Power Automate: Trigger approvals from Microsoft Lists
Microsoft Lists provides a simple, customisable way to structure data, and is useful for managing tasks, tracking assess, planning events and more. One of its powerful features is how easily it integrates with Power Automate, allowing you to build workflows depending on values in your list. We’ll walk through how to trigger an approval process from a Microsoft List using Power Automate, and if approved, we’ll update a choice column to reflect the outcome.
Begin with your Microsoft List. In this example, there is a Yes/No type column called Send for approval? which will determine whether or not the list item will be sent for approval. If approved the flow will update a choice-type column called Approval Status.
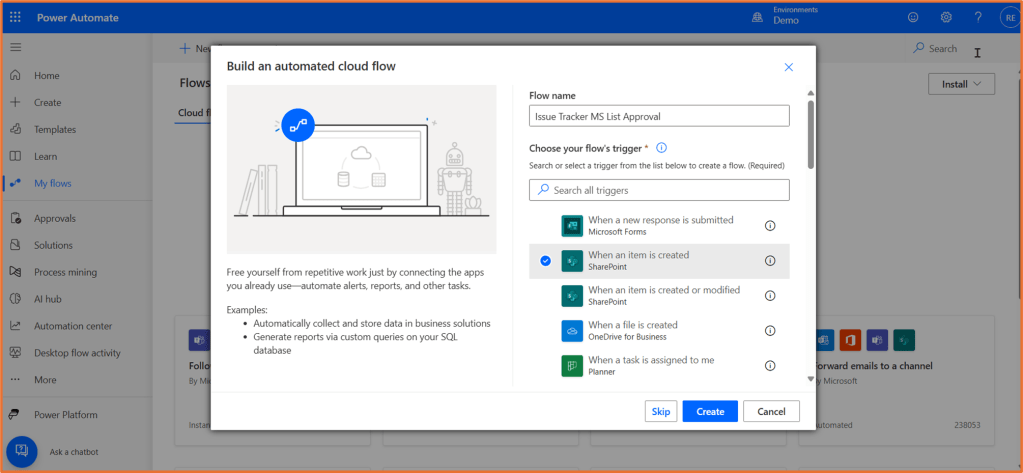
Open Power Automate. Begin with a new automated cloud flow that use the SharePoint trigger, When an item is created.
You need to provide the Site Address and List Name in the trigger.
If you don’t see your site appear in the dropdown, select Enter custom value.
Go to the homepage of Microsoft Lists (where your list is located), and copy the URL. Paste this URL in the Site Address field of the trigger in Power Automate.
Add a Condition step underneath the trigger. We will only send the list item for approval if the Send for approval?Yes/No field is marked as Yes. Since this is a binary field, use the word true to represent the Yes value, and false to represent No.
In the condition Choose a value field, click on the dynamic content button (lightning bold). Select your Send for approval? field from the SharePoint action.
Keep the operator as is equal to, and type true as the value.
Add the Start and wait for an approval action within the True branch of the condition. Choose your suitable approval type. Enter in the Title, Assigned to and Details. The Title is a brief title the approval recipient will see. Assigned to must be an email address of someone within your organisation responsible for the approval. Details field is where you can write any other information shown to the approver. You can use dynamic content from the list item within these fields.
Suppose you now want to update a a list column for Approval Status, once the item has been approved. Within the True branch, add a condition underneath the approval step. Within the condition, Choose a value should be set to the dynamic content Outcome, from the approval step. Keep the operator as is equal to, and type Approve as the value.
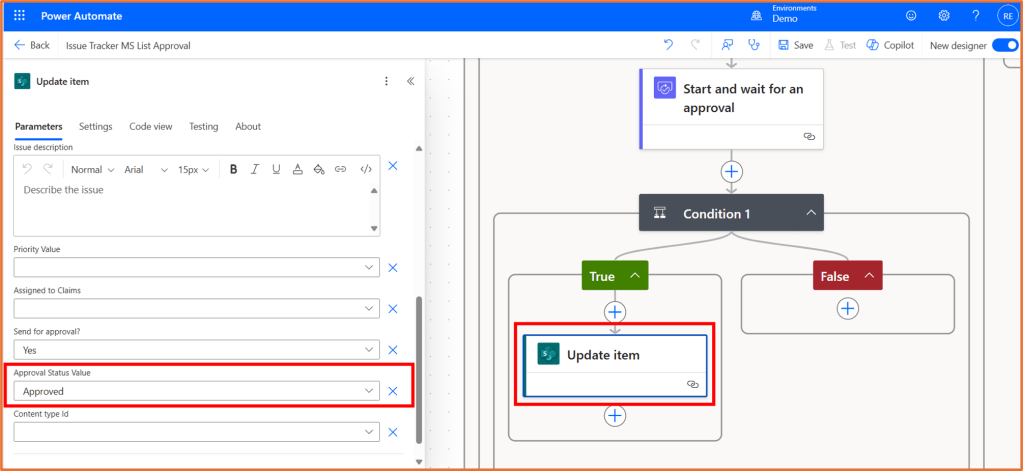
Within the True branch of the new condition, add the SharePoint action Update item. Select your Site Address and List Name from the dropdown. In the Id field, select the dynamic content value ID from the SharePoint action. Then, next to Advanced parameters, click Show all.
Here, make any changes that the list item requires. In this case, the Approval Status column will be set to Approved.
I'm a Microsoft MVP (Business Applications), Microsoft Certified Trainer (MCT), and I work as a Technology Evangelist at Barhead Solutions in Sydney, Australia. I run training sessions and events to showcase to people what they can achieve with Microsoft Copilot and Power Platform.
View all posts by Rishona Elijah