Microsoft Copilot Studio makes it easy integrate AI-powered document and image processing into your agents. By combining file upload capabilities with AI Builder’s AI Prompts, you can extract information in your desired format from documents like receipts. AI Prompts are natural language instructions that guide an AI model to perform a specific task—like extracting data from a document, summarising text, or generating a response—based on the context provided.
We will create a topic in Copilot Studio what allows users to upload a receipt. Then, an AI prompt will be created, which will extract information from the receipt and return it to the conversation.

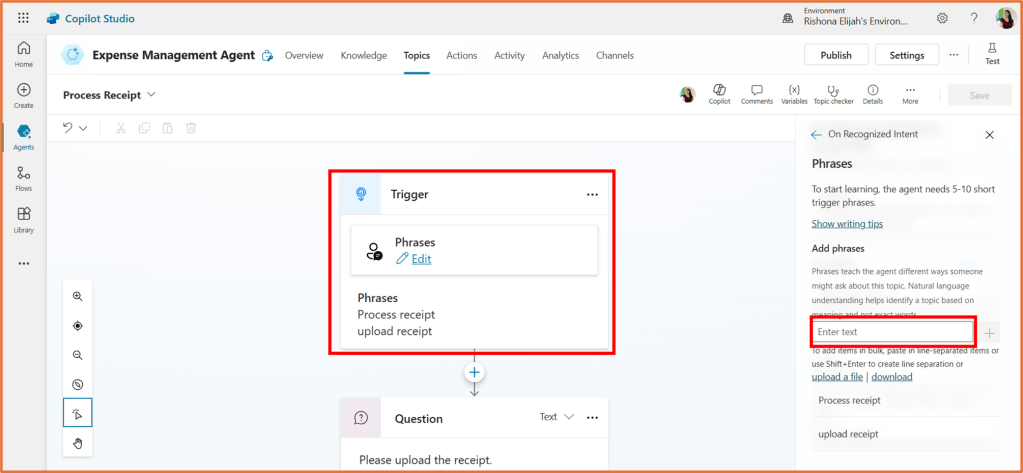
Begin a new topic for your agent in Copilot Studio. You can add trigger phrases, such as “process receipt” or “upload receipt”.
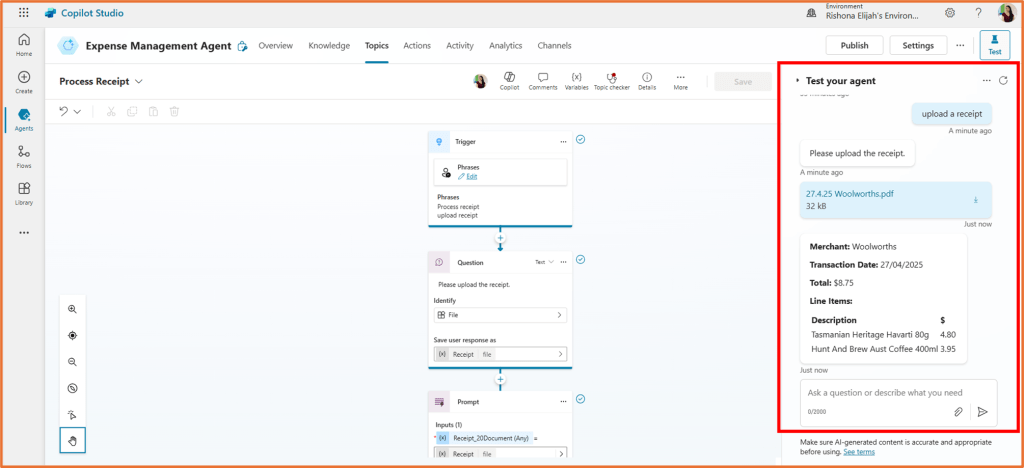
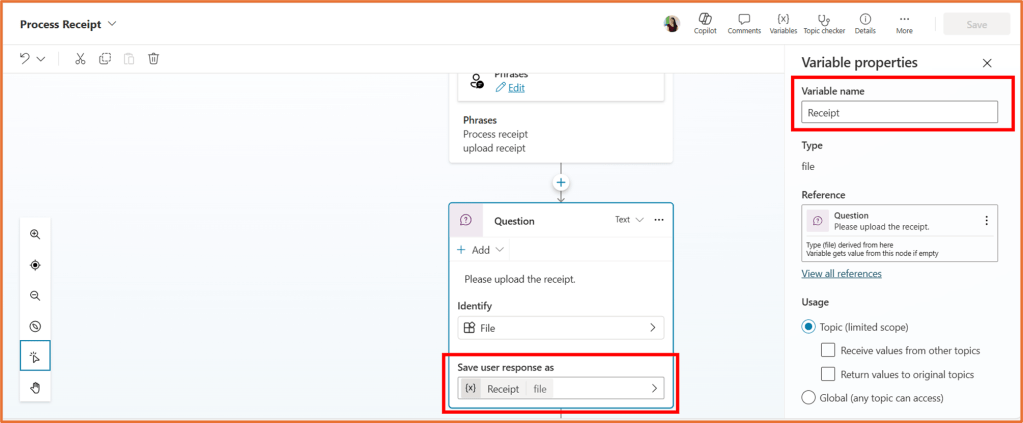
Add a question node underneath the trigger. You would like the user to upload their receipt. Enter a message for the question (e.g. “Please upload the receipt”). Select File in the Identify field.

Click on Save user response as and rename the variable to Receipt.
Below the question, select Add node > Add an action > New prompt.

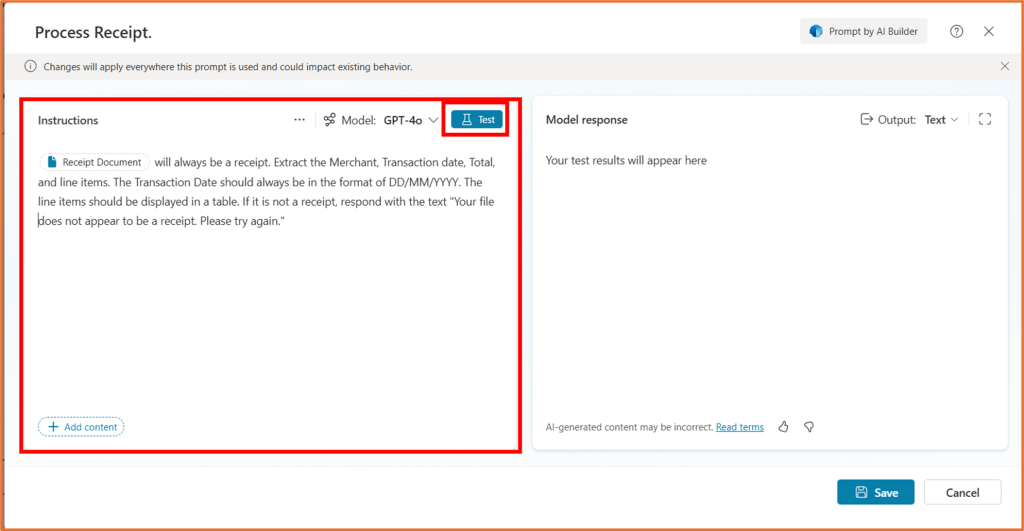
Give the prompt a name, such as Process Receipt. In the Instructions area, select Add content > Image or document.

Rename the content to Receipt Document. Upload a sample file of a receipt.

Next to Receipt Document in the Instructions area, enter the following text:
will always be a receipt. Extract the Merchant, Transaction date, Total, and line items. The Transaction Date should always be in the format of DD/MM/YYYY. The line items should be displayed in a table. If it is not a receipt, respond with the text “Your file does not appear to be a receipt. Please try again.“
Then, click Test.
You can modify the prompt to achieve your desired output. You can click on Receipt Document and upload a file to test the prompt on a different receipt. Then, click Save.

In the prompt node, select the Receipt file as the input. In the Outputs area, select > Create a new variable.

Set the Variable name to ReceiptDetails.

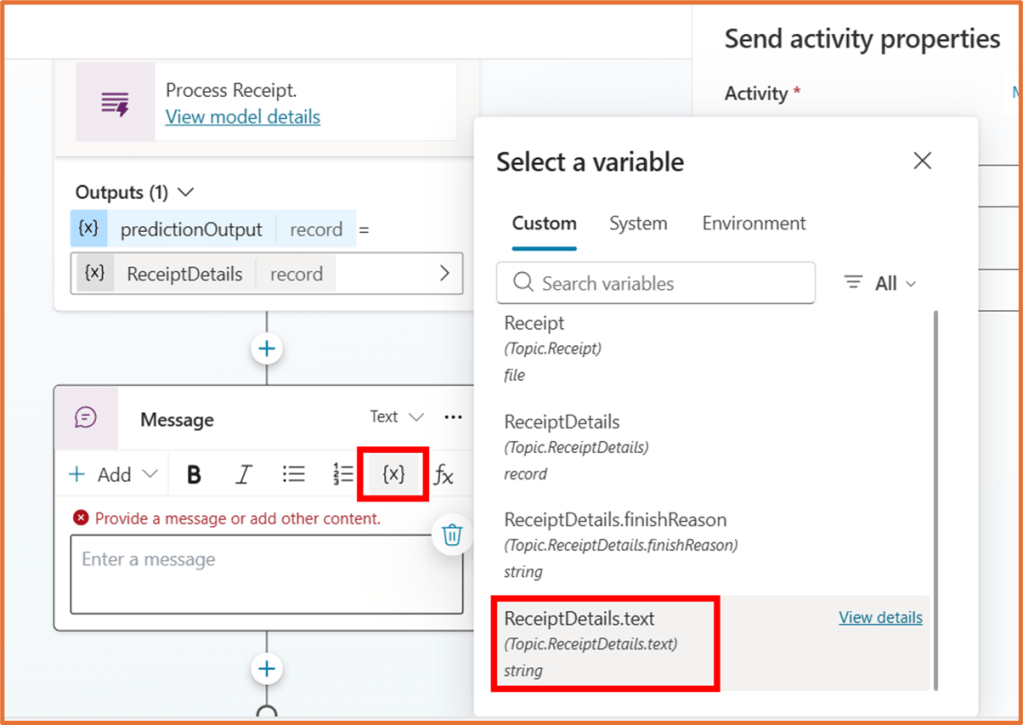
Finally, add a message node under the prompt step. Click on the {x} variable button in the message, and select the ReceiptDetails.text variable.

Save and test the topic.