
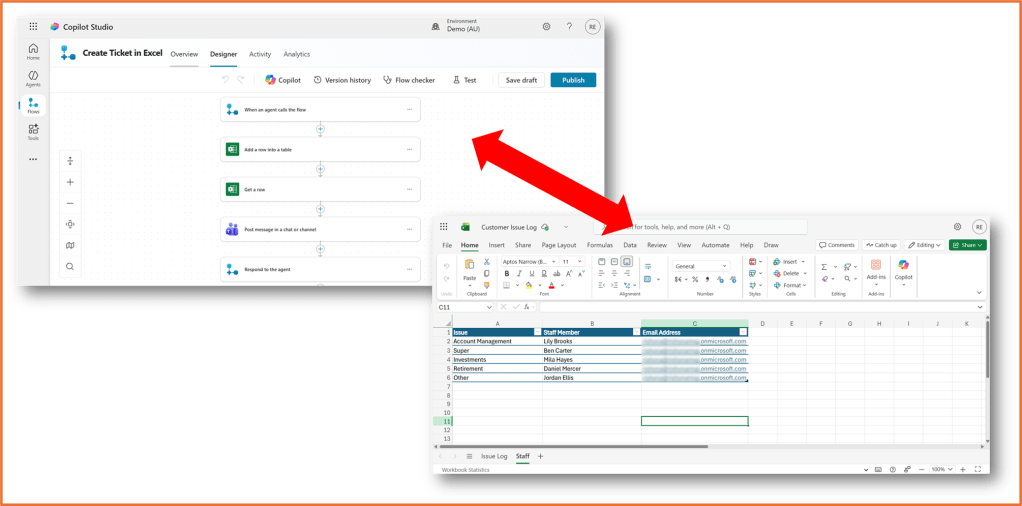
If you are building an agent in Copilot Studio and need a simple way to capture conversation details and act on them, Excel is a great place to start. I will show you how to build an agent flow that writes a new row to an Excel table, looks up a related record in another table, posts a Teams notification to the right person, and returns a value back to the agent to continue the chat. The steps work with any scenario, whether you are logging issues, requests, orders or more.
What you will need
- Copilot Studio
- An Excel workbook stored in OneDrive for Business or SharePoint
- Your Excel tables. This example will use the following 2 Excel tables
- Table to write a value (e.g. log table, IssueLog)
- Table to lookup a value (E.g table with staff details and the issue category they each handle)
- Microsoft Teams (optional, if you would like to send a message notification to Teams during the flow)
Steps to build your agent flow
Step 1: Prepare your Excel workbook
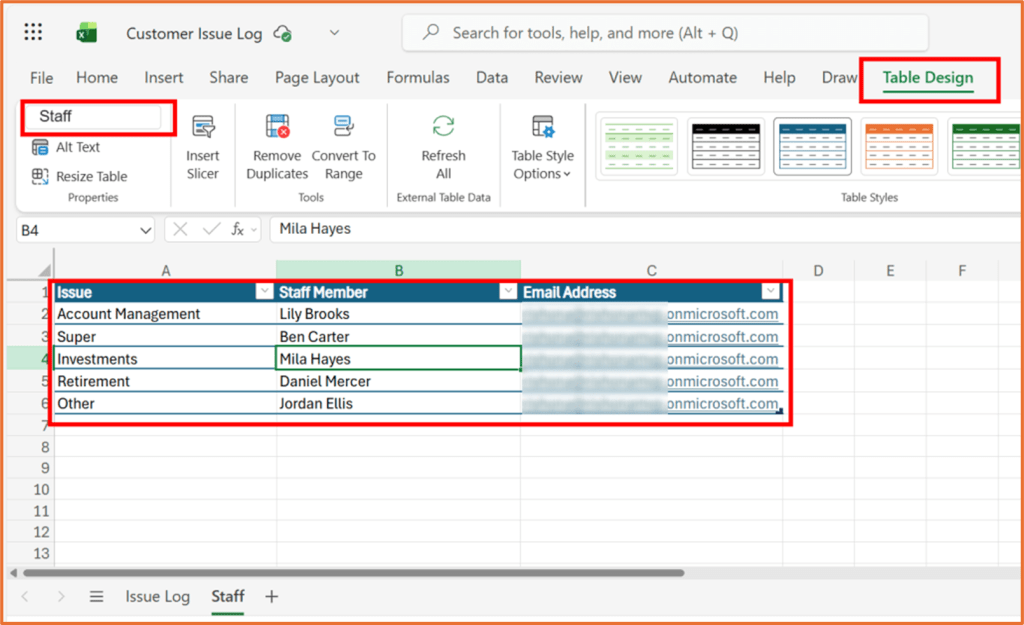
Create your Excel workbook and save it in OneDrive for Business or SharePoint. Excel flow actions work with tables only. Format your ranges as tables and give each table a clear name.
This example uses a spreadsheet with 2 tables.

If you want your flow to lookup a value in a table, ensure you have a unique (key) column to identify the correct row. Here, in the Staff table, Issue is the key column.
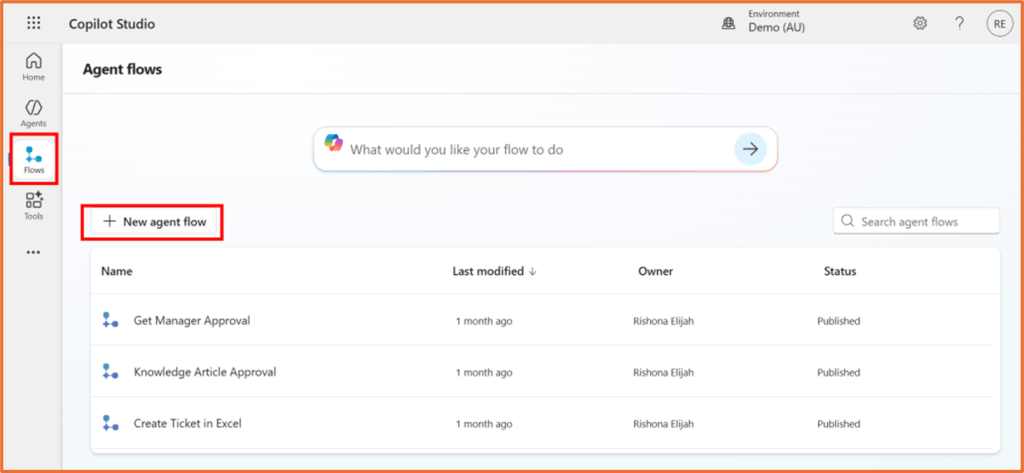
Step 2: Create a new agent flow
Open Copilot Studio in the same environment as your agent. Go to Flows and +New agent flow.
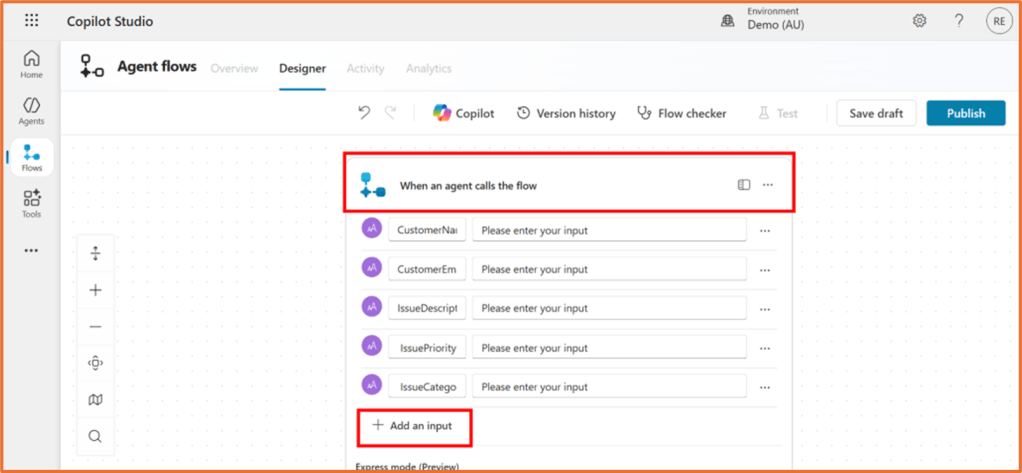
Step 3: Set the flow trigger
Select the trigger When an agent calls the flow. Add an input for each of the values you want to pass from your agent into the flow. These inputs should match the details your agent collects.
This example will use 5 text inputs, and these will be written into Excel.
- CustomerName
- CustomerEmail
- IssueDescription
- IssuePriority
- IssueCategory
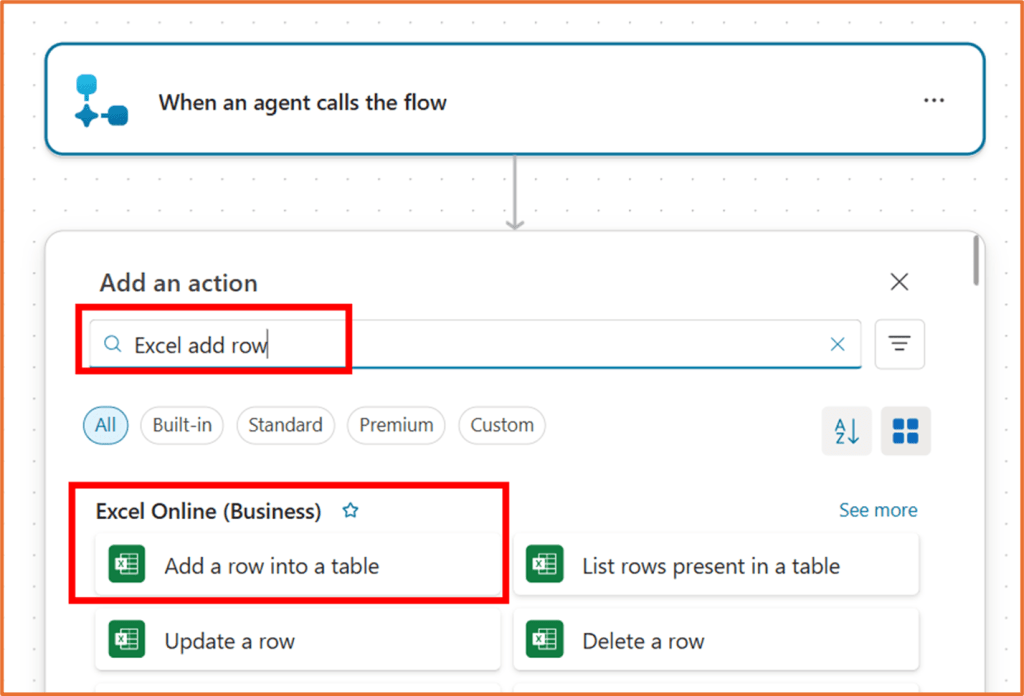
Step 4: Add a row to the log table in Excel
Add the Excel Online for Business action Add a row into a table.
Set the following:
- Location: Select the SharePoint Site or pick OneDrive for Business if you stored the Excel file in your OneDrive
- Document Library: Usually Documents for SharePoint Site and OneDrive for OneDrive for Business
- File: Click on the folder icon to browse and select the Excel file
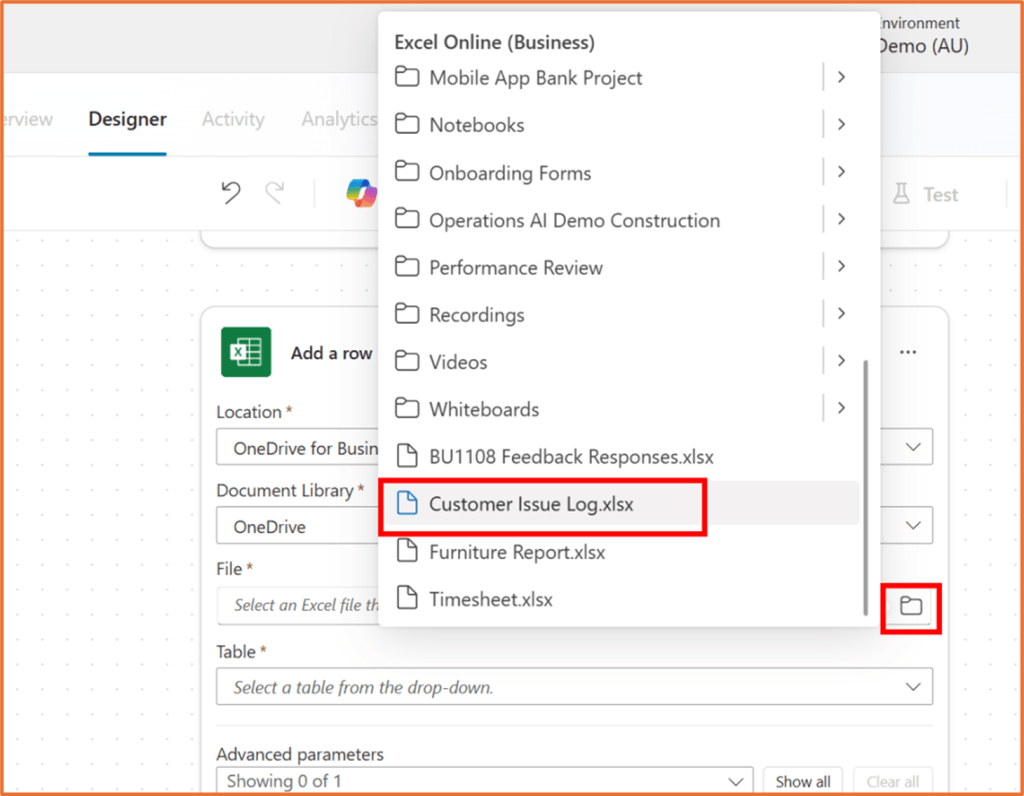
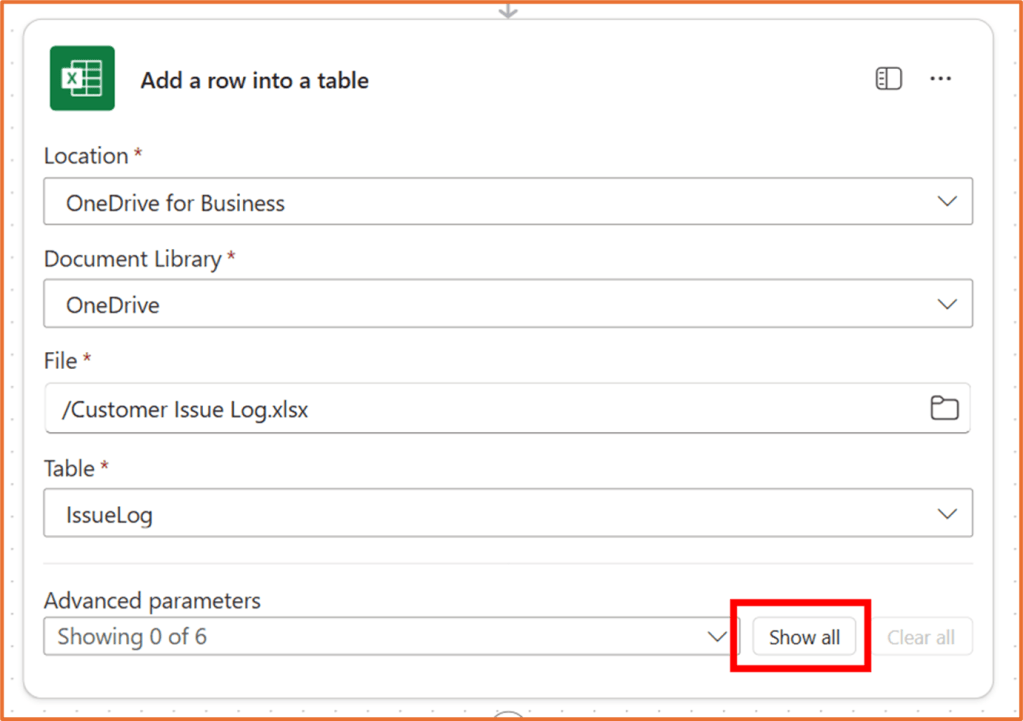
- Table: After selecting your Excel file, the table names used in your spreadsheet will appear. Select the table you want to write values to.
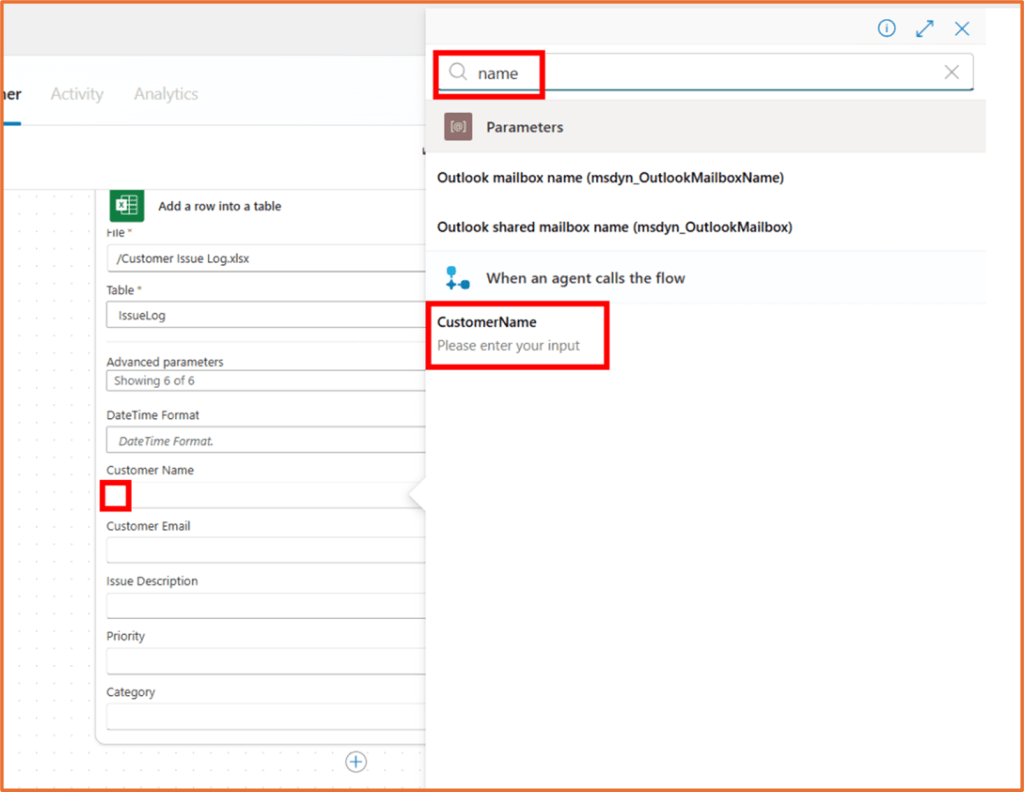
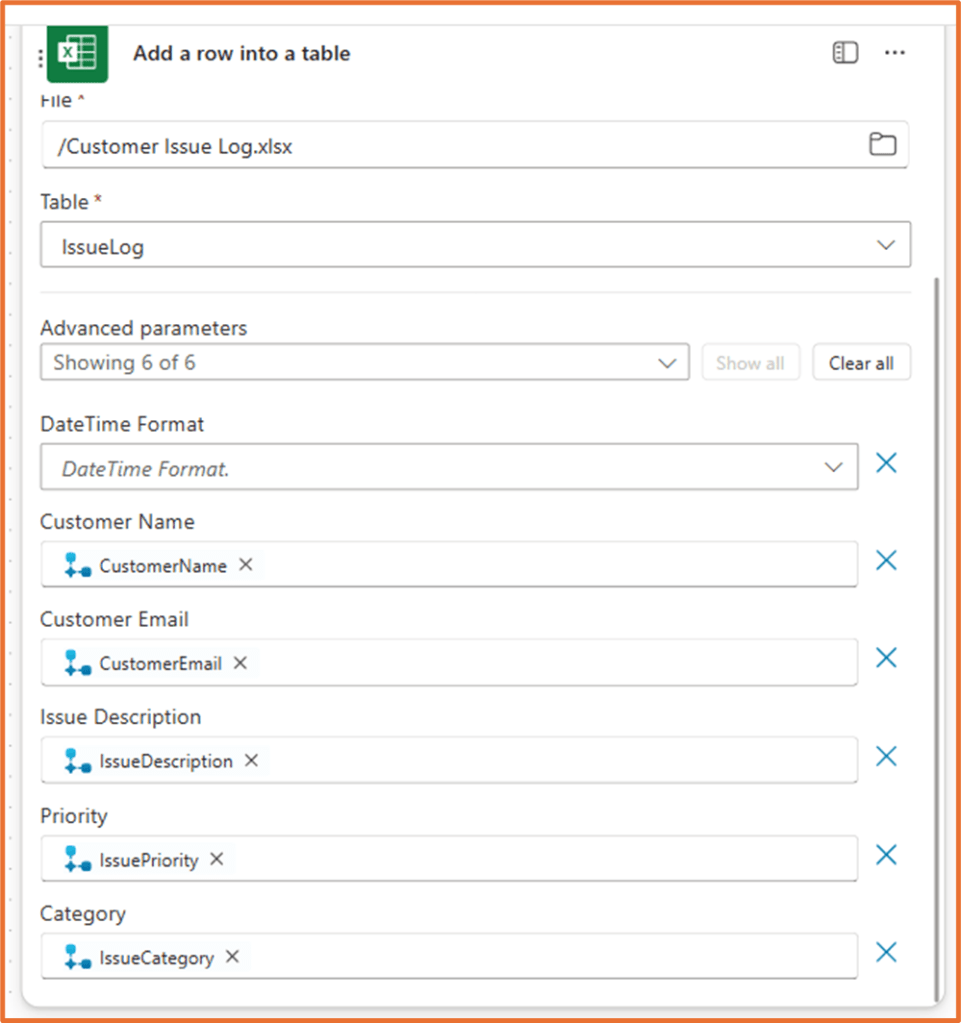
Click Show all next to Advanced parameters.
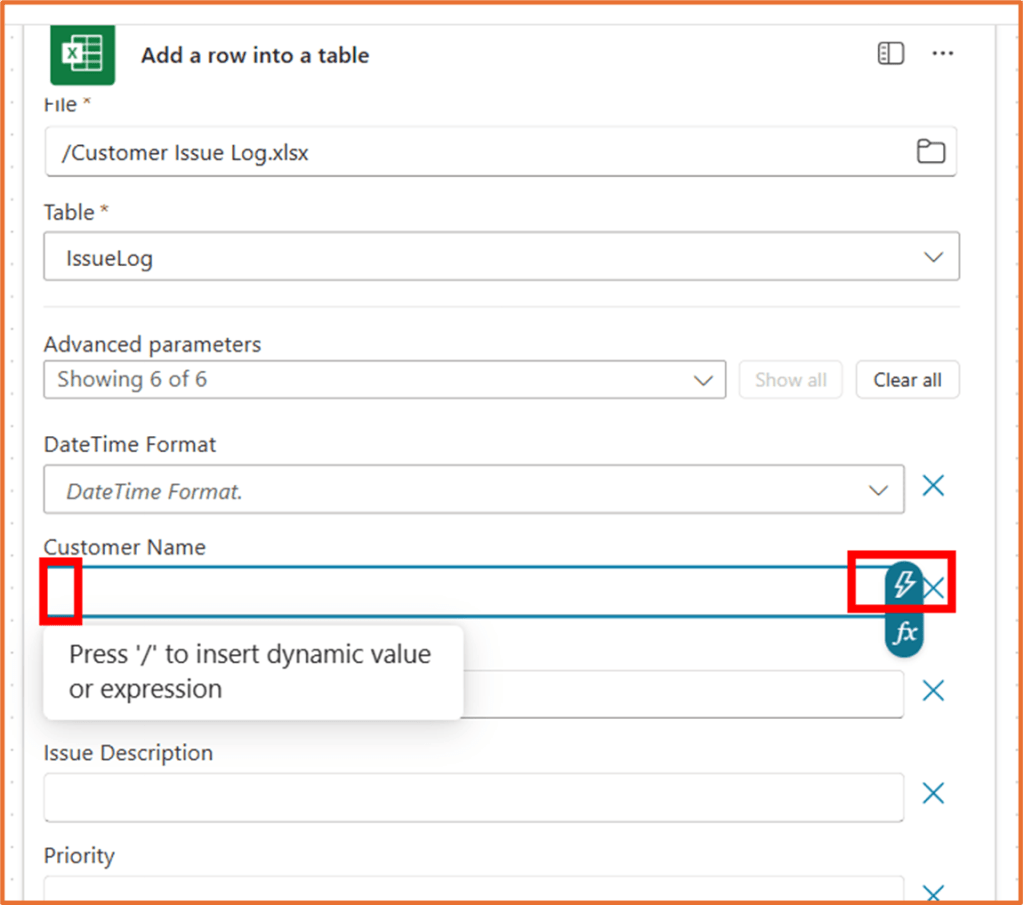
Next, map the trigger inputs to the table columns. For example:
- Customer Name to CustomerName
- Customer Email to CustomerEmail
- Issue Description to IssueDescription
- Priority to IssuePriority
- Category to IssueCategory
When a field is selected, click on the dynamic content button (lightning bolt) to show your flow inputs and any other dynamic values. You may need to use the search to find the right value.
If a column should be kept empty, leave it blank.
Step 5: Get a related row from the lookup table in Excel
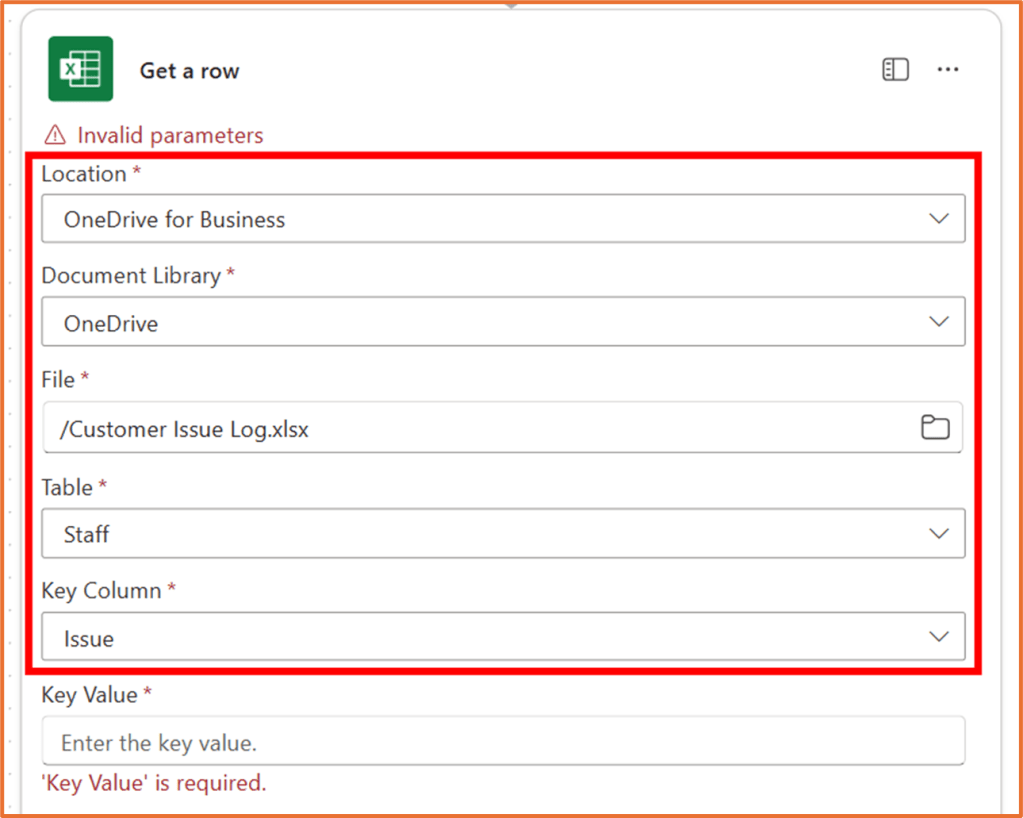
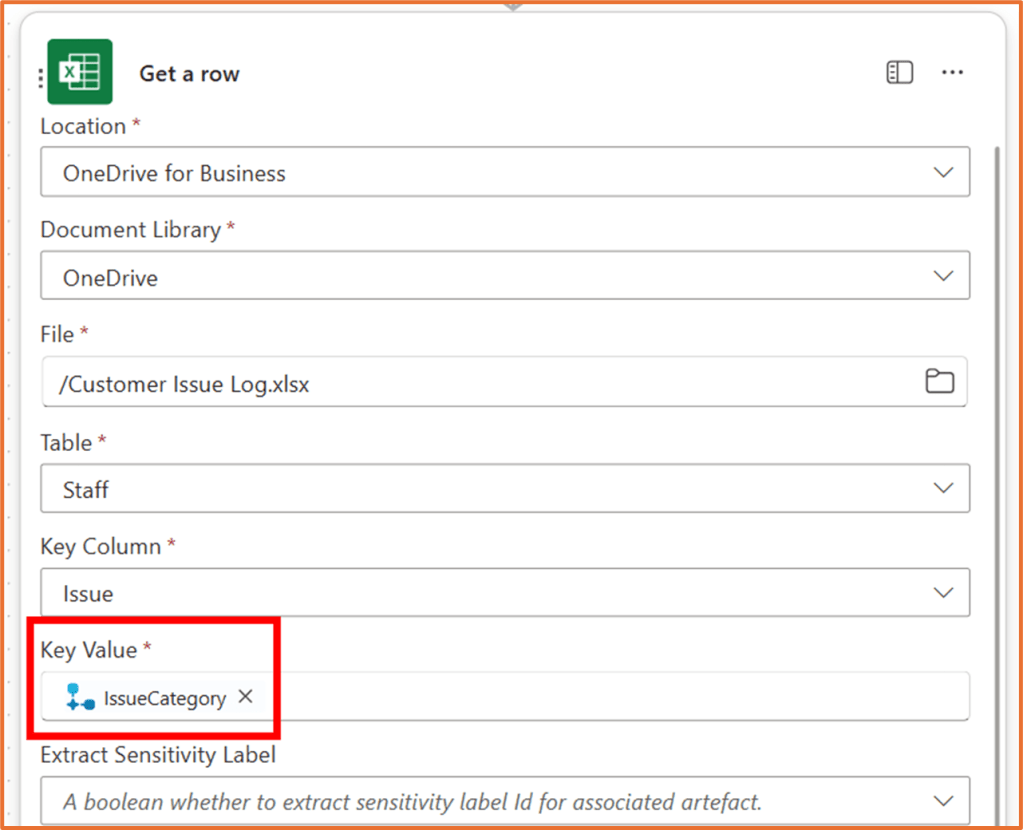
Add the Excel Online for Business action Get a row.

As done in step 4 above, select the Location, Document Library and File based on where your Excel file is stored. For Table, pick the table you want to use to lookup a value.
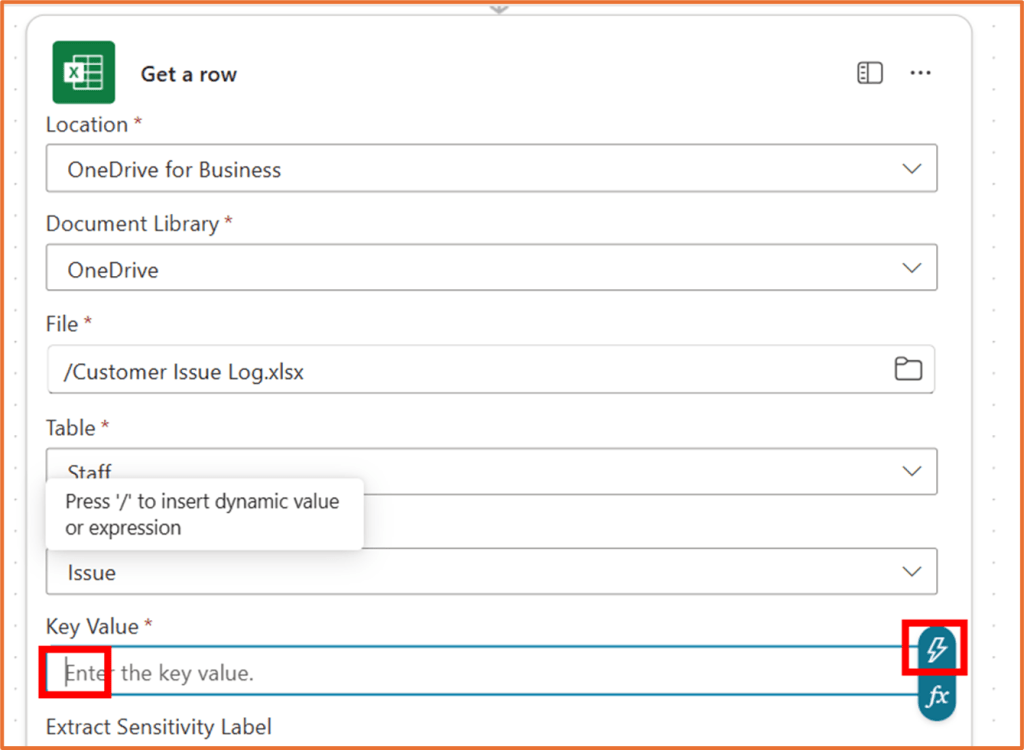
For Key Column, select the column that contains a unique value to identify a row.
Key Value refers to the term that will be used to search the Key Column. Here, you will likely need to select a dynamic value based on one of your flow inputs. In this example, the row is going to be searched based on an IssueCategory collected during the agent conversation. So, the Key Value selected is the dynamic content IssueCategory coming from the trigger action When an agent calls the flow.
If your key value is not unique, use the Excel Online for Business action List rows present in a table with a filter query, then select the first match or branch the flow if multiple rows are returned.
Step 6 (Optional): Send a Teams notification
The lookup table used in this example contains the name of a staff member and their email address. Perhaps we wish to notify this staff member.
Add the Microsoft Teams action Post message in a chat or channel. The message below is set up to send a private message to the email address field found in the table of the previous step.
- Post as: Flow bot
- Post in: Chat with Flow bot
- Recipient: Email dynamic content from Get a row step
- Message: Enter your message. You can reuse information collected from previous steps.

Step 7: Pass a value back to the agent
To finish off, add the final step Respond to the agent. This will send information back to the user via the agent, letting them know which staff member will handle their request.
Add a Text output to the action. Give it a name, StaffAssigned. Use a dynamic value in the field Enter a value to respond with. Here, the value Staff Member from the Excel Get a row step is used.

Step 8: Save and publish your flow
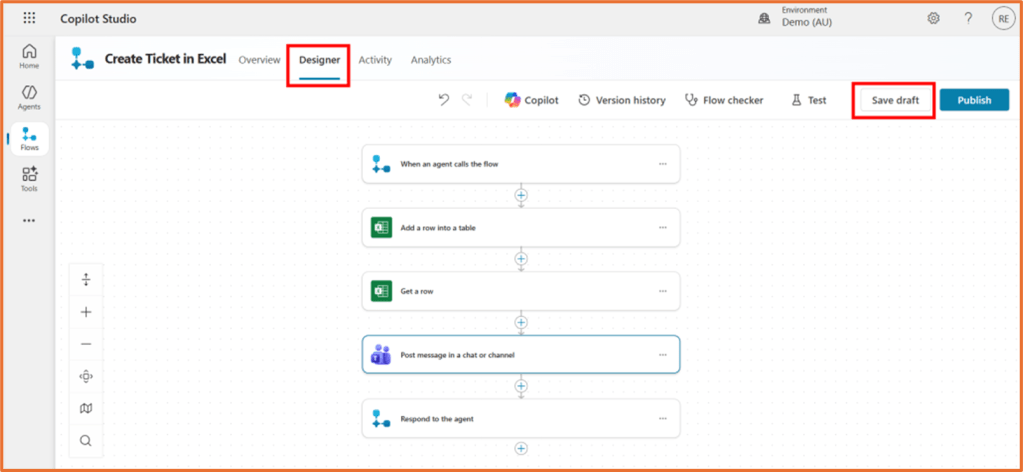
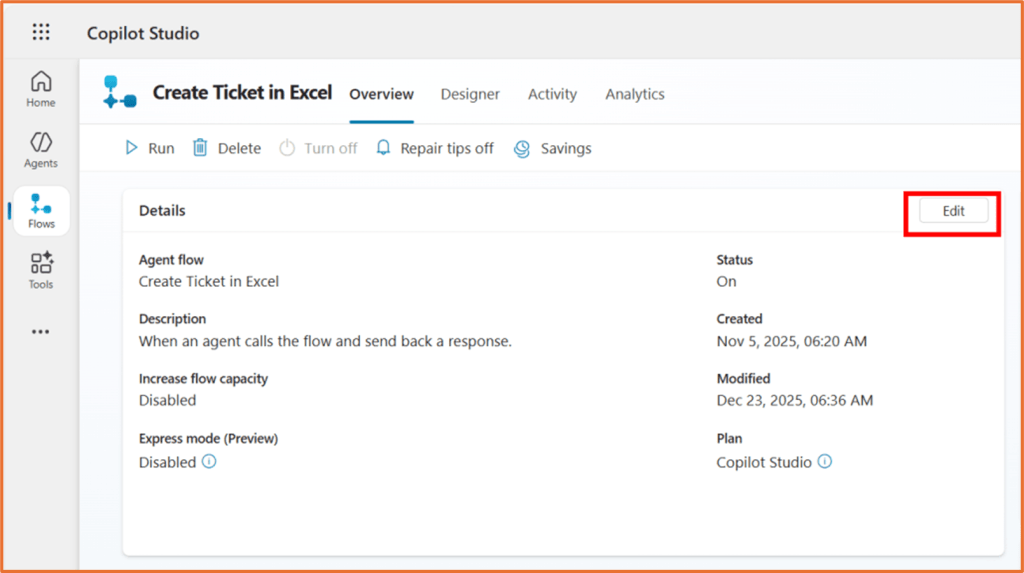
On your flow, Click Save draft. Go to the Overview tab.
To rename your flow, click Edit in the Details area. Enter and save the new name.
Go back to the Designer tab and click Publish.

Step 9: Add flow to your agent
Your flow is now ready to add to your agent. See here for how to do this:
- Add flow to your agent via instructions (coming soon)
- Add flow to an agent topic
