
Approval requests are a common part of business processes. They allow you to make sure actions or decisions are reviewed and authorised before they proceed. For example, you might need a manager to approve a leave request, an expense claim, or access to a resource.
This post will show you how to build an agent flow in Copilot Studio that sends an approval request to the user’s manager. This means when a user asks the agent to submit something for approval, the agent can automatically find their manager and start the approval process. This uses the Power Automate Start and wait for an approval action which sends the manager a Microsoft Teams and email notification to review the request.
The approver and user need to be within your organisation/tenant. They cannot be external users. The Office 365 connector will be used to retrieve the manager details.
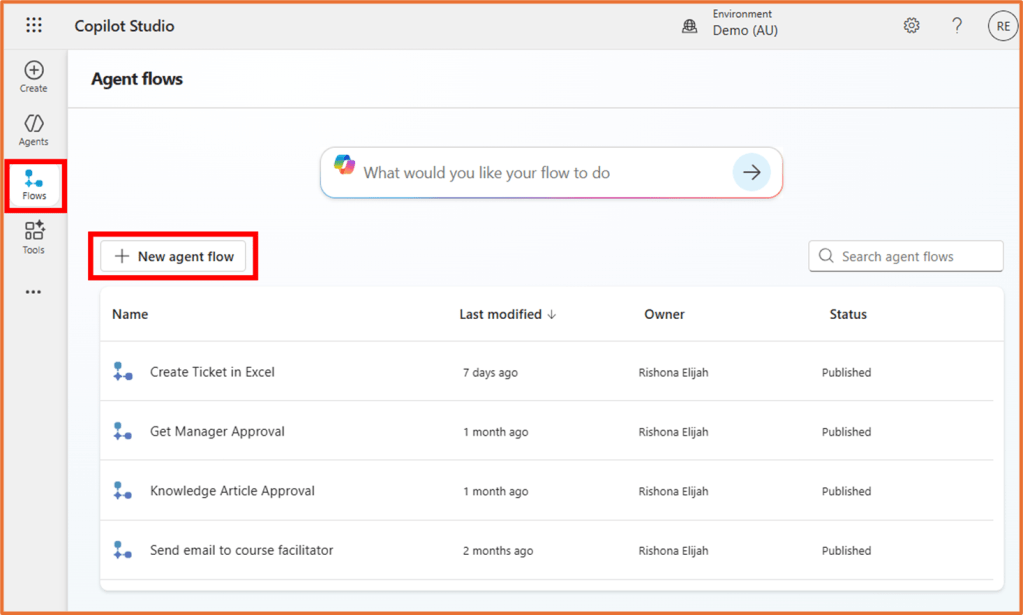
Step 1: Create a new agent flow
Start by creating a new agent flow in Copilot Studio. Build your flow in the same environment as your agent.
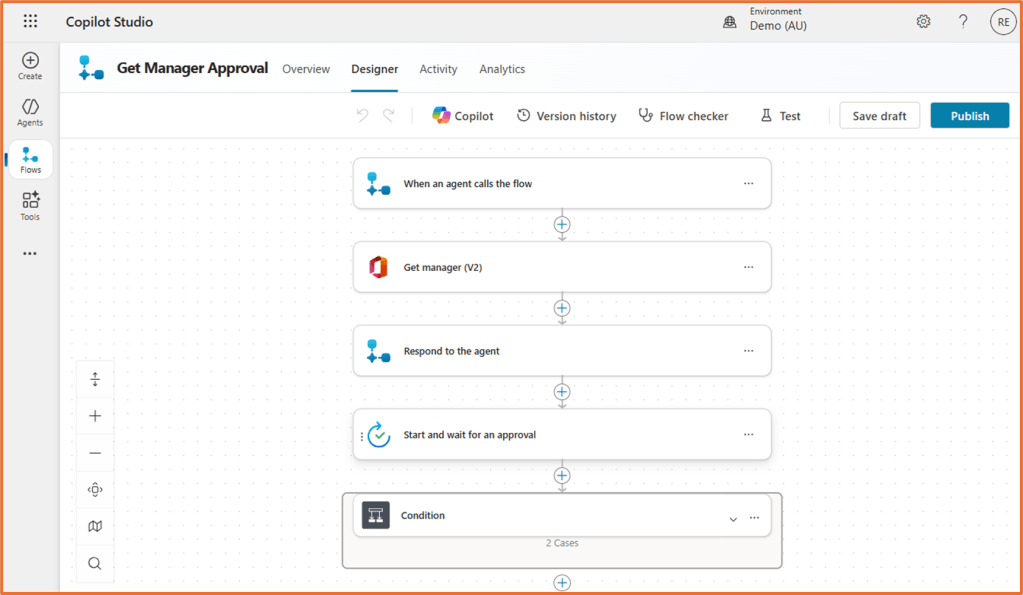
This flow will be triggered when the agent calls it. Add the When an agent calls the flow trigger.
If you have trouble finding the trigger, search for the word Agent and it will display underneath the Skills connector.
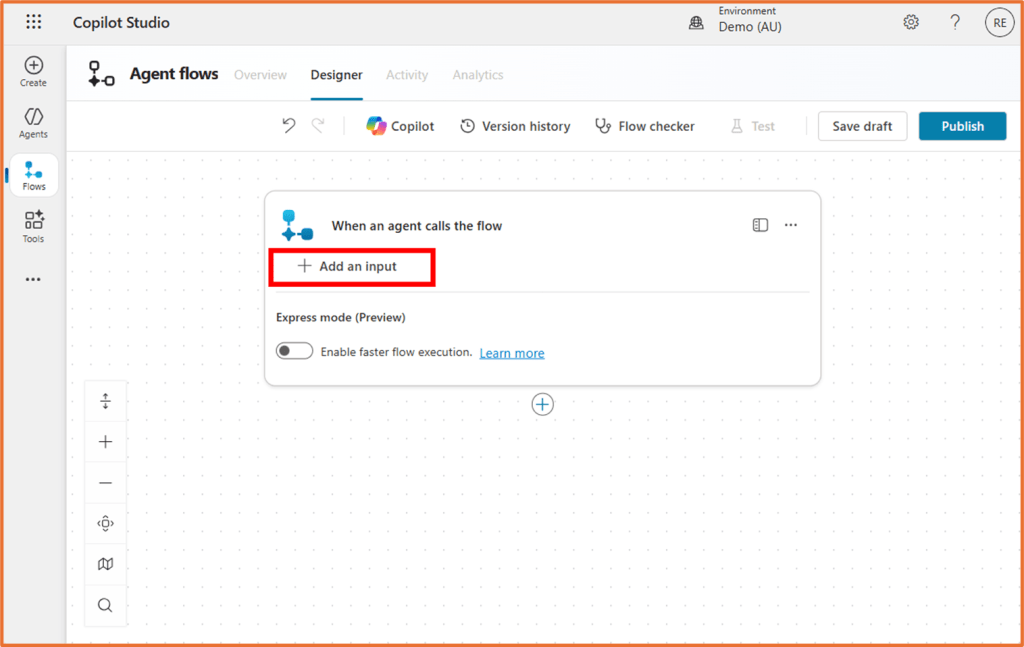
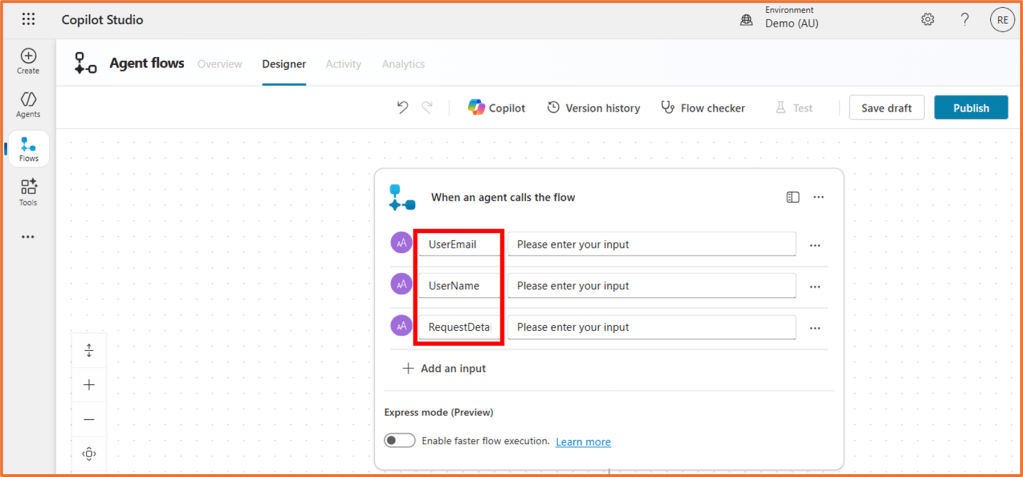
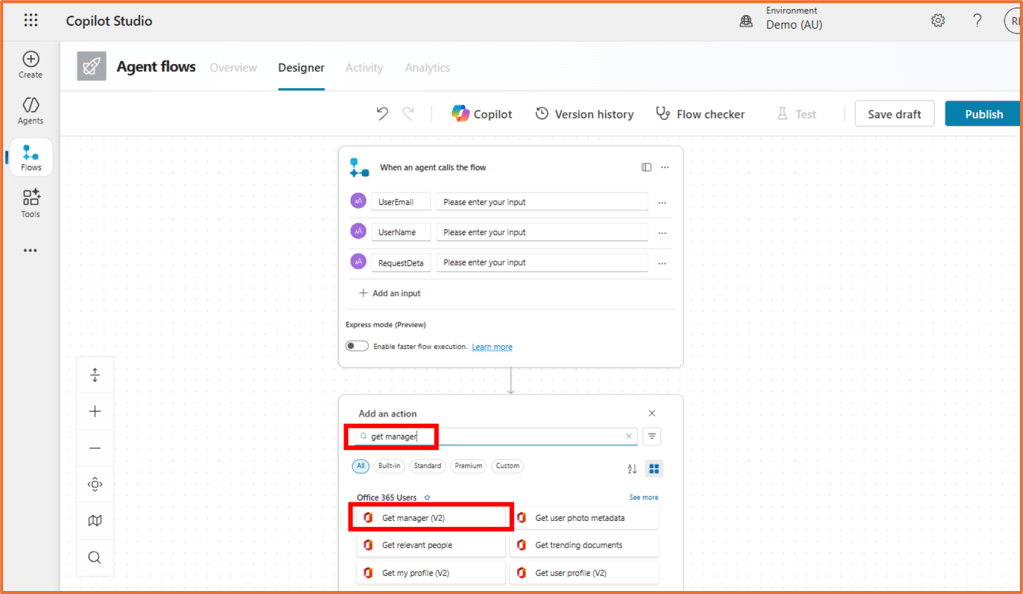
Define the inputs you need from the user. Click + Add and input.
Select Text and name the input UserEmail.
Add 2 more Text inputs with the following names:
- UserName
- RequestDetails.
Your trigger should look like this:
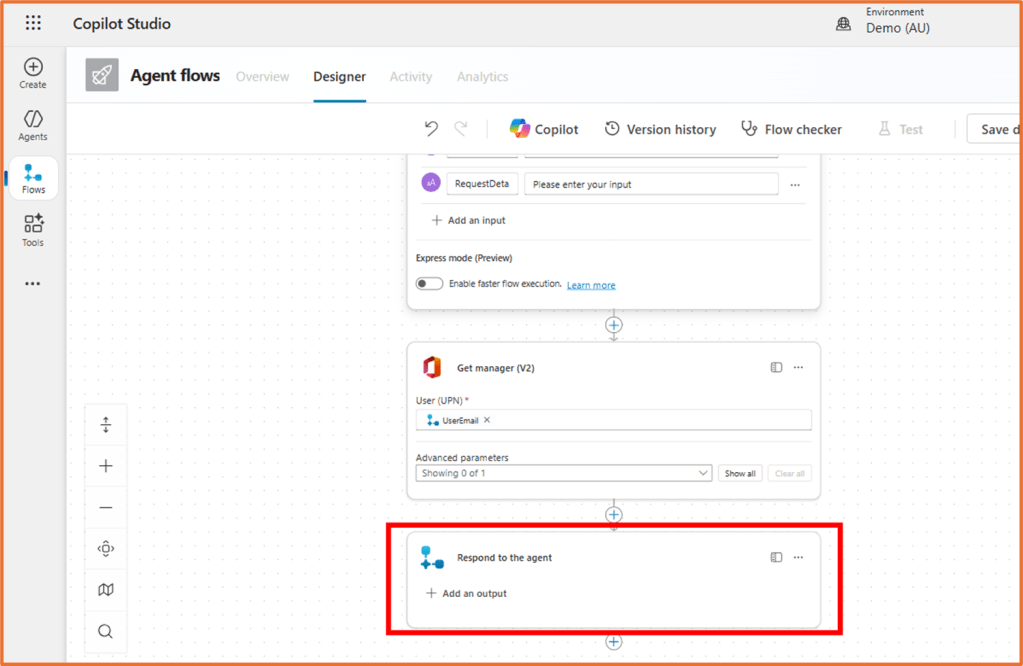
Step 2: Get the user’s manager
Next, add the Get manager (V2) action from the Office 365 Users connector.
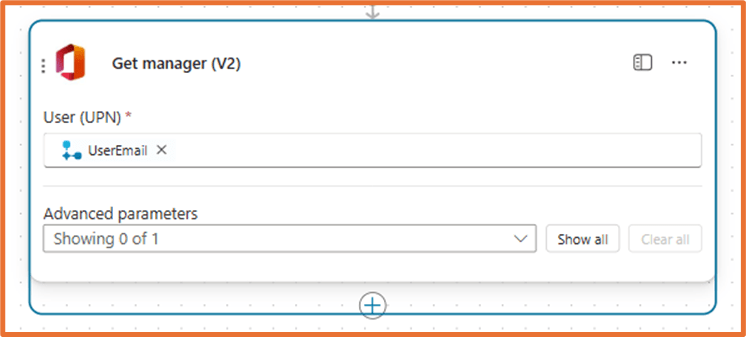
Set the User (UPN) field to the UserEmail input from the previous step. To do this, place your cursor in the User (UPN) field on the action, and click on the dynamic content (lightning bolt) button.
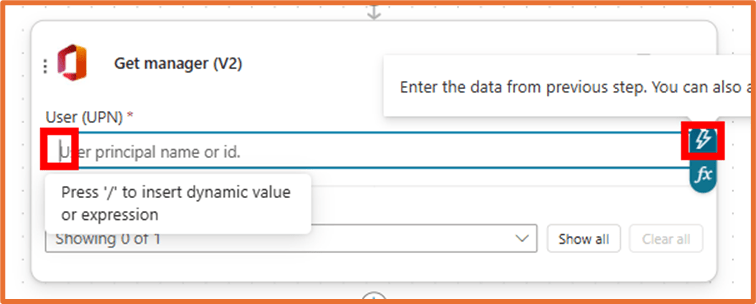
If UserEmail does not appear immediately, search for it.
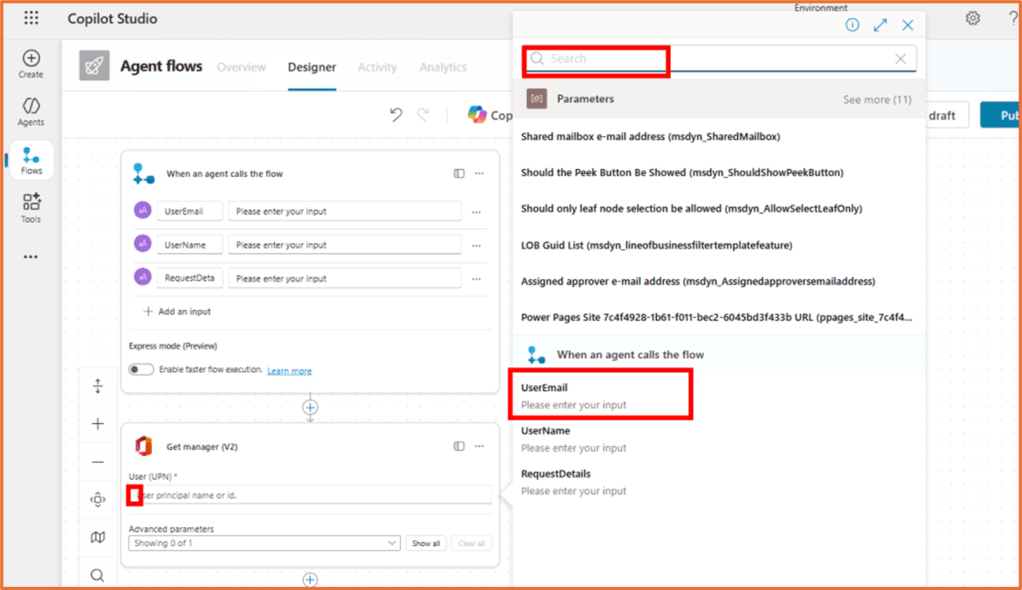
This will retrieve the manager’s details based on the user’s email address.
Step 3: Respond to the agent
Add a Respond to the agent action from the Skills connector so the user can continue talking to the agent before the approval process kicks off.
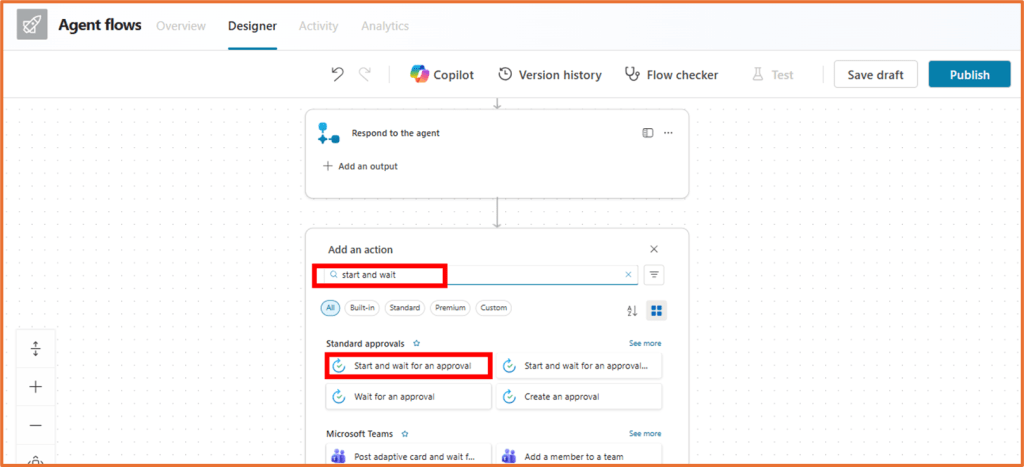
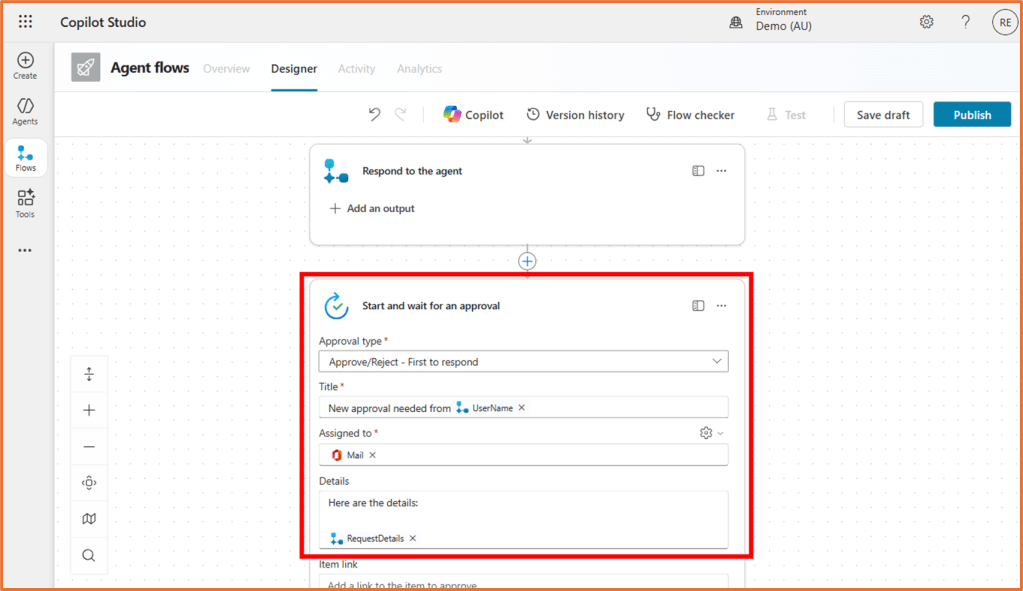
Step 4: Initiate the approval process
Next, add the Start and wait for an approval action. This will send an approval request to the manager.
Configure the fields as follows:
- Approval type: Approve/Reject – First to respond
- Title: Something like New approval needed from <UserName>. To dynamically add in the user’s name, select it from the dynamic content menu. It will be the input from the When an agent calls the flow step.
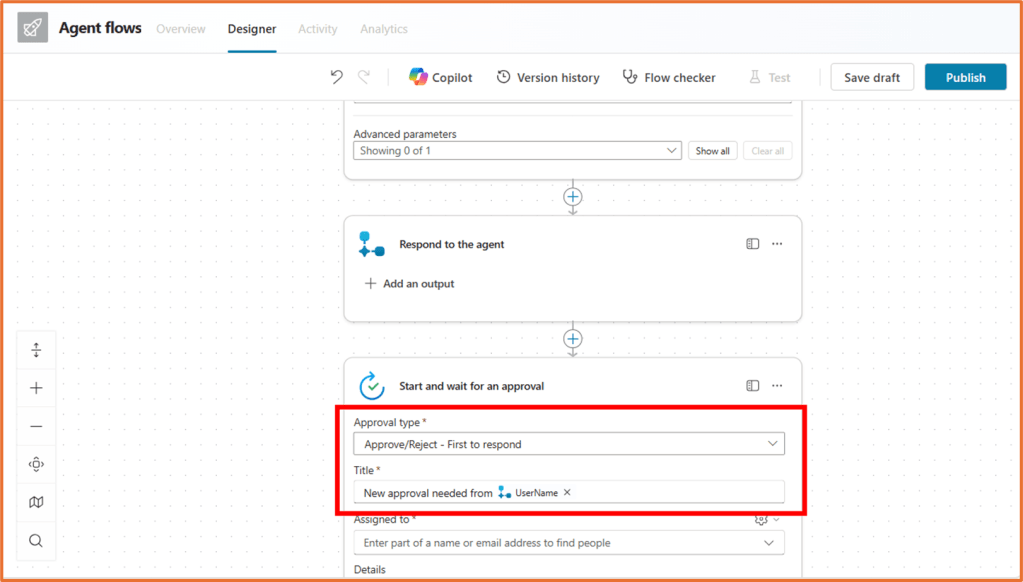
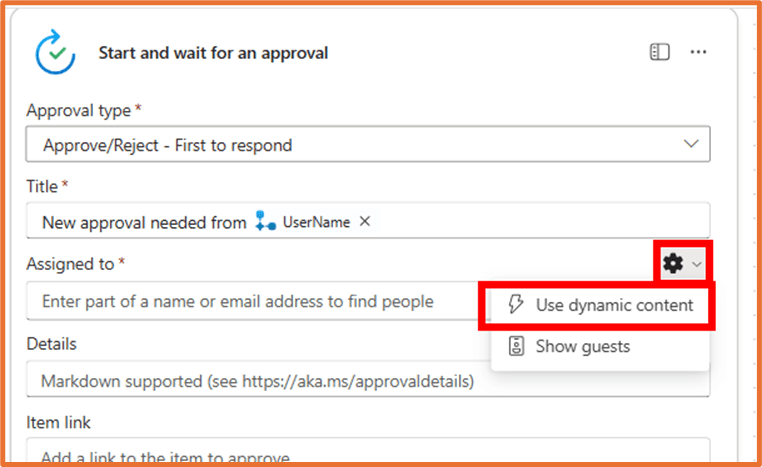
- Assigned to: Use the manager’s email from the previous step. Use the dynamic content named Mail. You will need to click on the Settings cog > Use dynamic content.
- Details: Include the RequestDetails input so the manager knows what they’re approving.
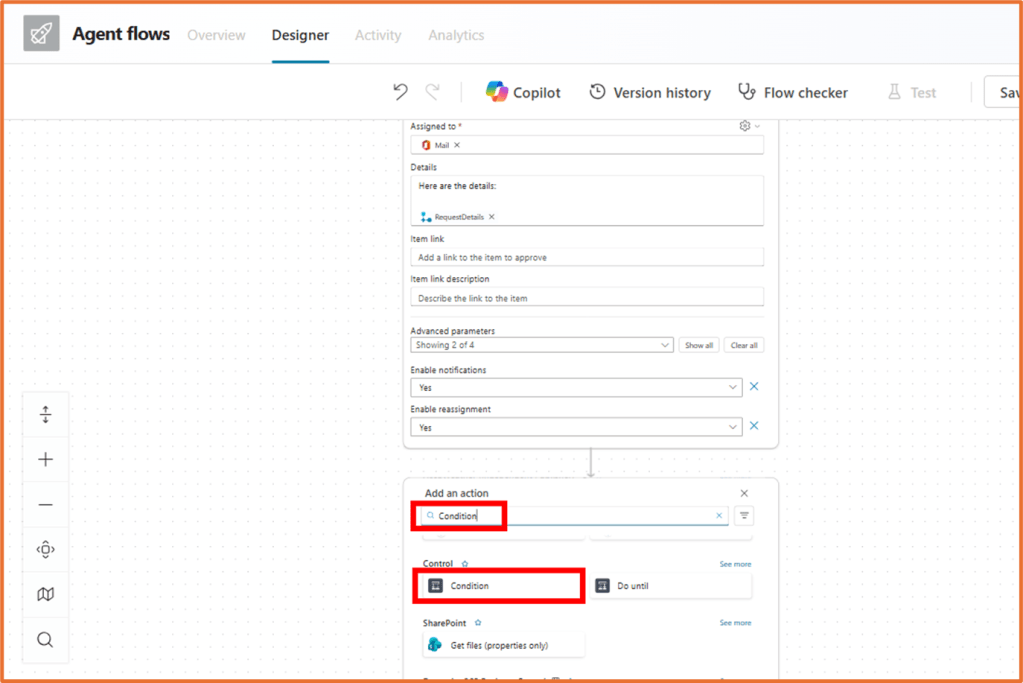
Step 5: Condition
Once the approval is complete, you’ll want to handle the outcome. Add a Condition action to check if the approval was approved or rejected.
In the first Choose a value field, select the dynamic content Outcome. In the field next to is equal to type in the value Approve. The condition should look like the image below.
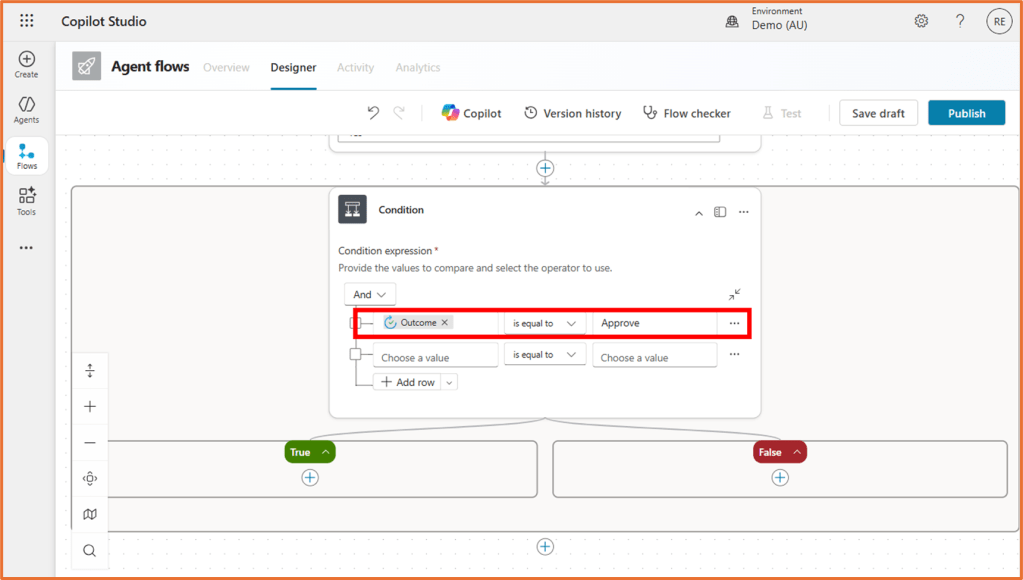
The condition action has 2 branches. You can configure the actions that need to occur if the request is approved (True branch) or rejected (False branch). Make sure to add the actions within the condition branch.
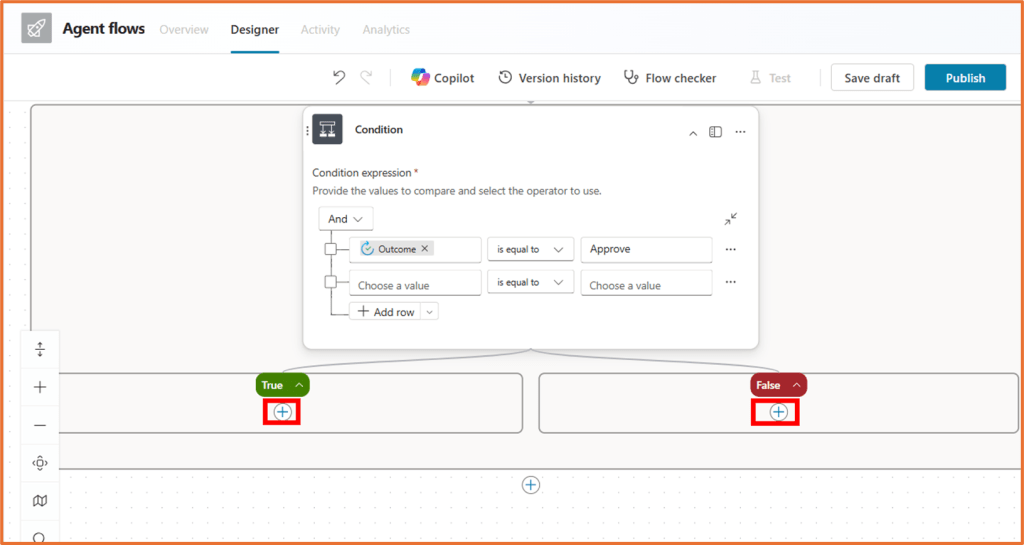
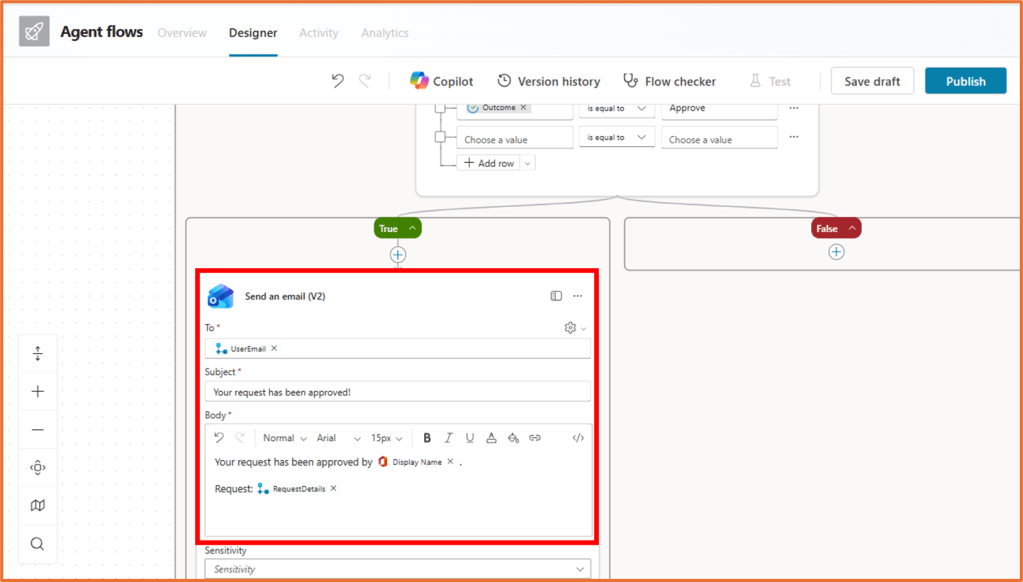
If True, let’s send an email confirming the approval. Click on + within the True branch and select the action Send an email (V2) from the Office 365 Outlook connector.
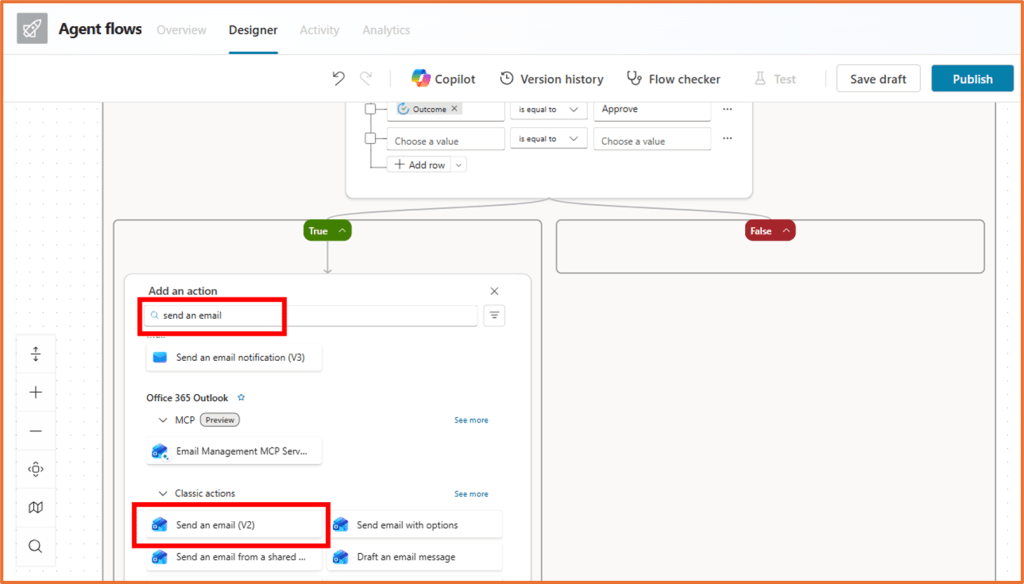
Configure the fields as follows:
- To: Click on the Settings cog > Use dynamic content. Select UserEmail from the inputs (“When an agent calls the flow”) created earlier.
- Subject: Something like Your request has been approved!
- Body: Something like Your request has been approved by <Display Name>. Request: <RequestDetails>
You can use the dynamic content Display Name from the Get manager (V2) action to display the manager’s name. The RequestDetails dynamic content comes from the inputs in When an agent calls the flow trigger.
If False, you may want to send an email notifying that the request was rejected. You can copy and paste the action created in the True branch. Right click in the Send an email (V2) action and select Copy action.

Within the False branch, right click on the + icon. Select Paste an action.

Make your changes to the Subject and Body of the email to let the recipient know that their request was rejected.
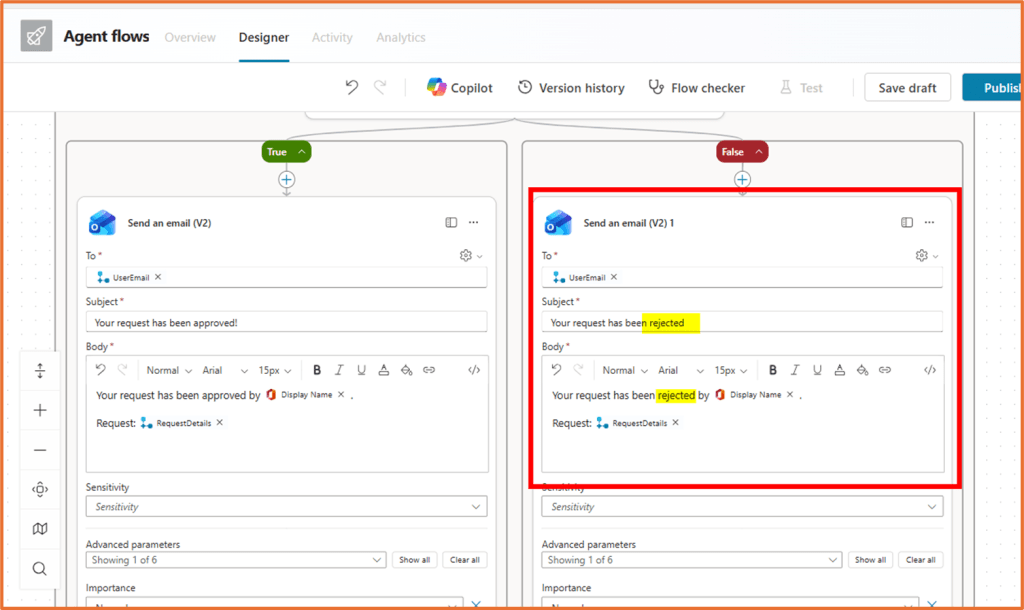
If you get errors in the copied step, try remove then re-add any dynamic content within the step.
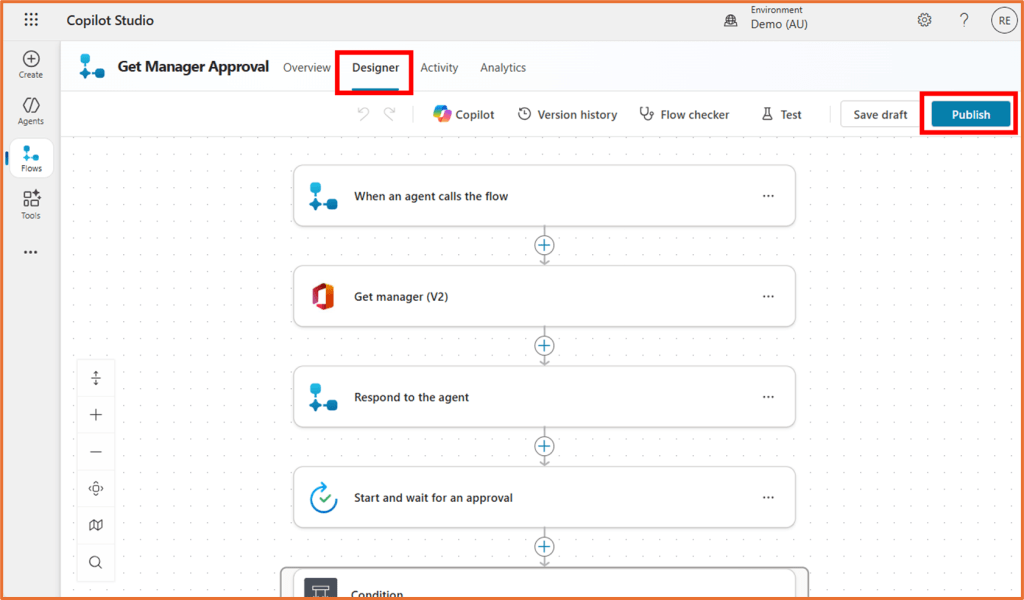
Step 6: Save and publish your flow
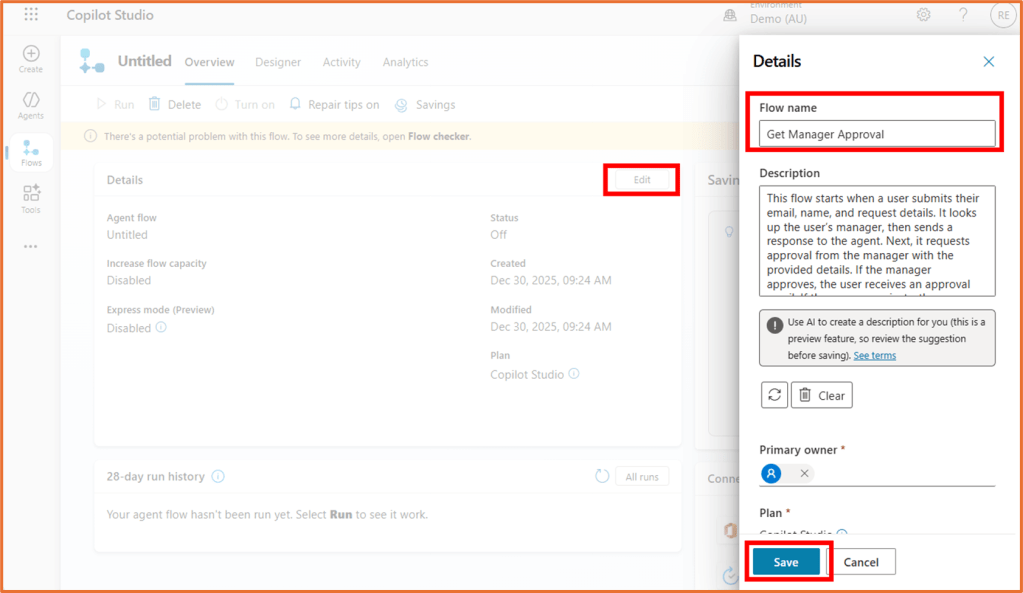
On your flow, Click Save draft. Go to the Overview tab.

To rename your flow, click Edit in the Details area. Enter and save the new name.
Go back to the Designer tab and click Publish.
Step 7: Add flow to your agent
Your flow is now ready to add to your agent. See here for how to do this:
- Add flow to an agent topic
- Add flow to your agent via instructions (coming soon)
