
In Copilot Studio, the flow designer is where you create and manage the automated processes that your agents will use. The agent flow designer has a similar building experience to Power Automate. For beginners, it can feel overwhelming at first, but once you know a few tricks, you will work faster and avoid common mistakes. Below are practical tips to help you get started with the agent flow designer.

- Where to create a new agent flow
- Save as you go
- Moving around the designer
- Toolbar
- Rename a flow
- Expand or collapse steps
- Insert dynamic content to use information from previous steps
- Copy and paste an action
- Reorder steps with drag and drop
- Rename a step
- Test a flow
- Restore a previous flow version
- Add a flow description
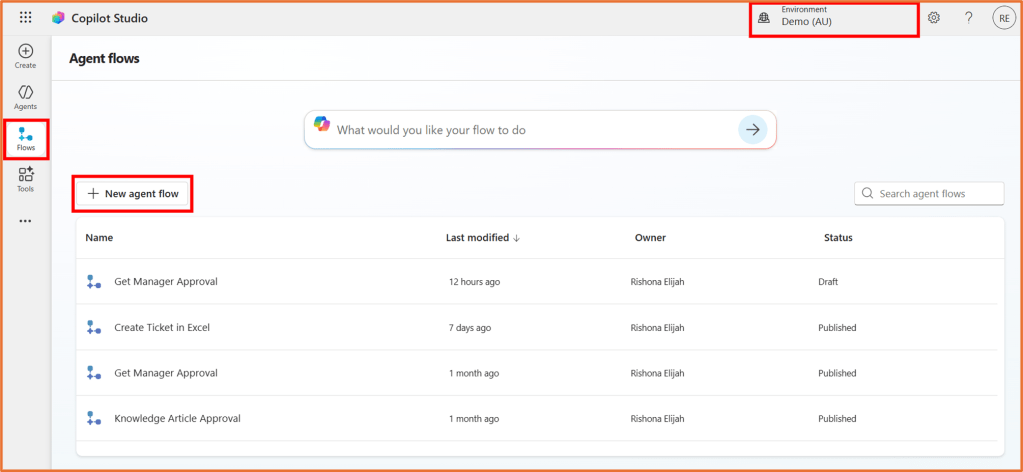
Where to create a new agent flow
Go to Copilot Studio https://copilotstudio.microsoft.com/ and select Flows from the left hand side. Click +New agent flow.
Before building the flow, check that you have the correct environment selected in the top right hand side of the screen. Typically, you would build your flow in the same environment as your agent.
Building an agent flow does not automatically connect it to an agent. Once the flow is built you can add it to your agent as a tool or via topics.
Save as you go
Flows do not auto-save. Make it a habit to click Save draft regularly while editing. If you navigate away without saving, your changes will be lost.

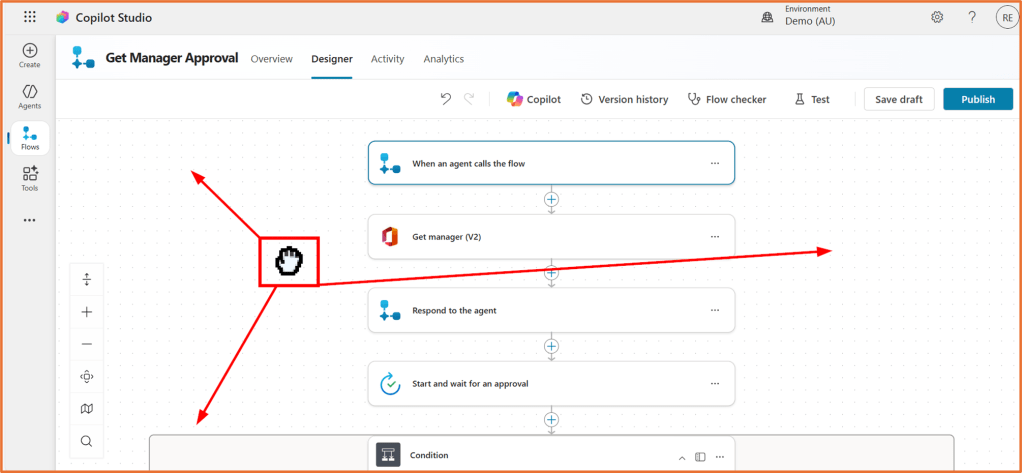
Moving around the designer
Click and drag around the whitespace of the screen to move around in your flow.
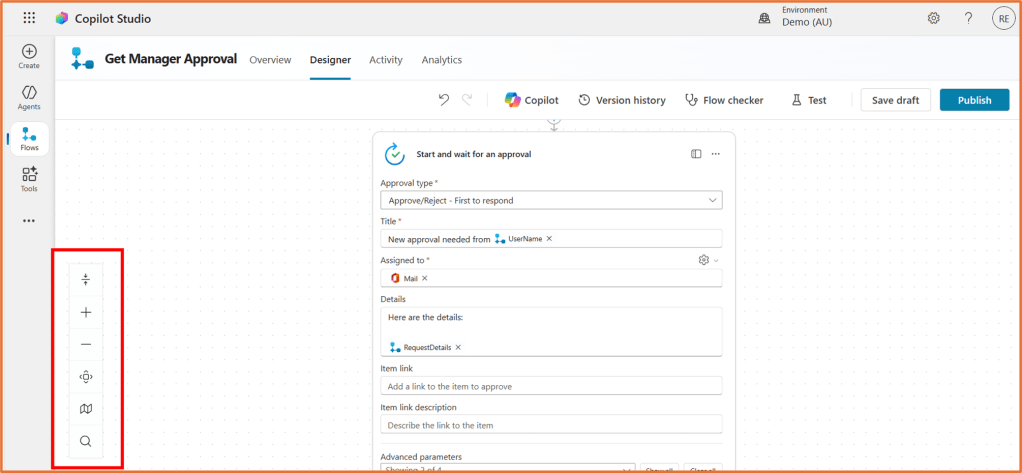
Toolbar
The toolbar provides quick-access controls for managing the flow design. The icons include:
- Expand/collapse all actions: Hide or display the details of all steps
- Zoom in
- Zoom out
- Fit to screen: Adjust the view to fit the entire flow
- Minimap: Move around the minimap to navigate around the flow
- Search: Find and open flow steps quickly
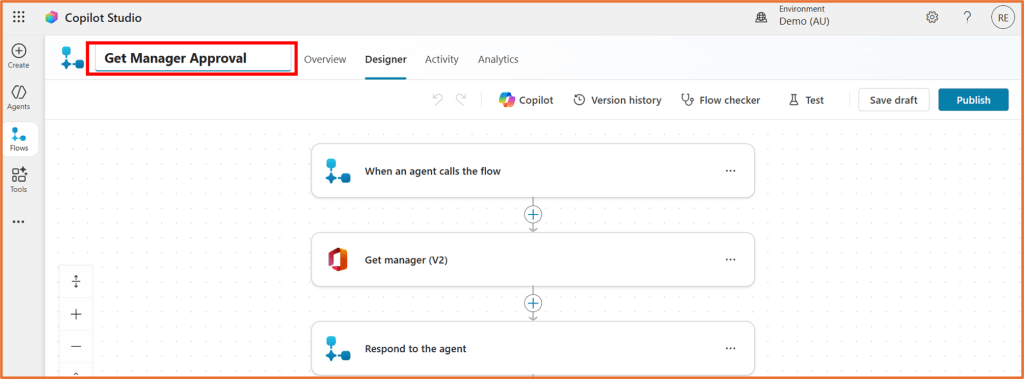
Rename a flow
Give your flows clear names so you can easily identify them later. Click the flow name at the top of the designer and type a name that reflects its purpose.
You will only be able to rename the flow after it has been saved.
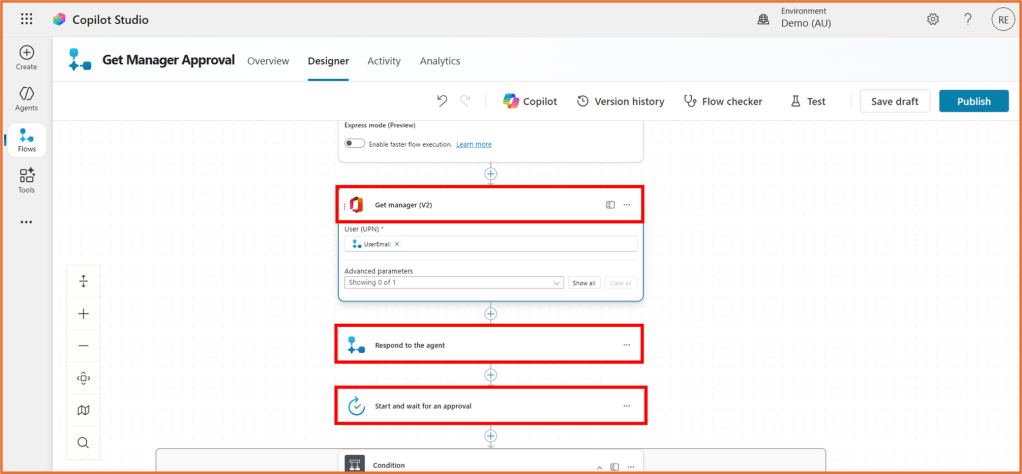
Expand or collapse steps
You can click on an action to minimise or expand it on the screen. Click on the action name area at the top of the step to expand or minimise it.
Insert dynamic content to use information from previous steps
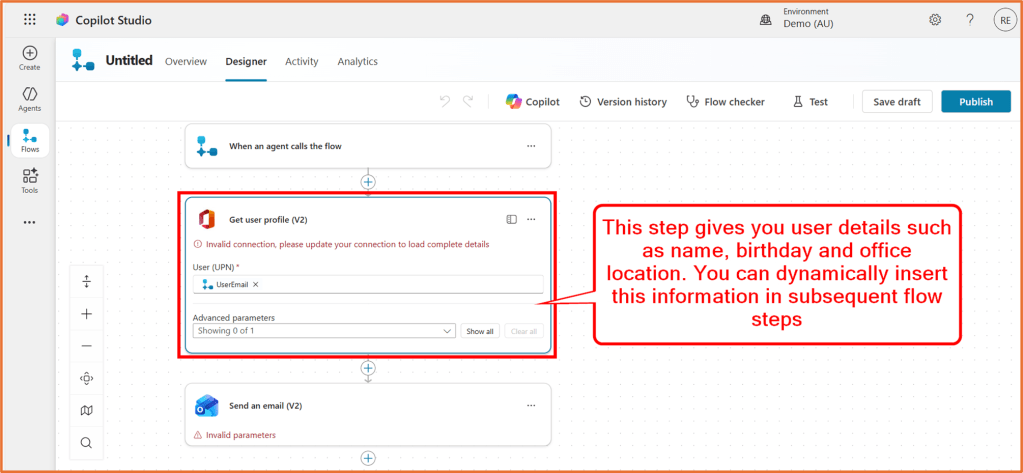
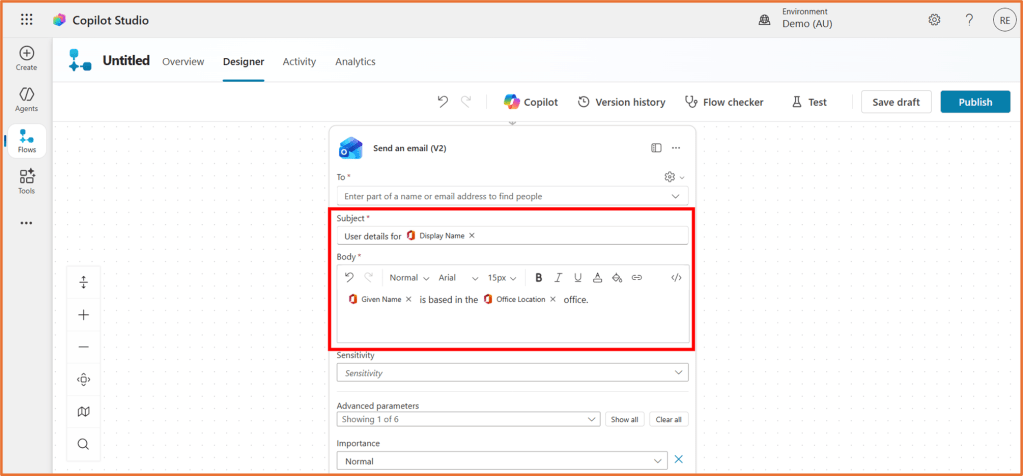
Dynamic content lets you use information and outputs from previous steps in your flow. This is essential for passing data through your flow. For example, say you have inserted an action that retrieves a user’s details (Office 365 Connector). This action generates outputs such as the user’s name, phone number, birthday, address, office location and more.
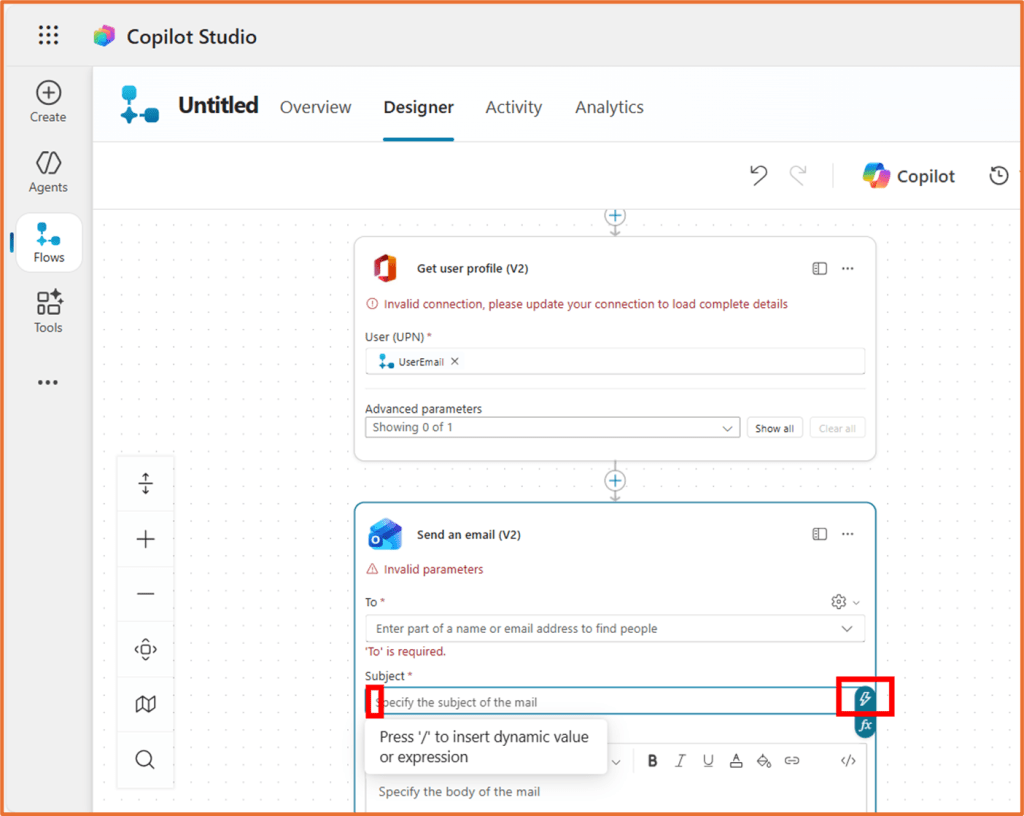
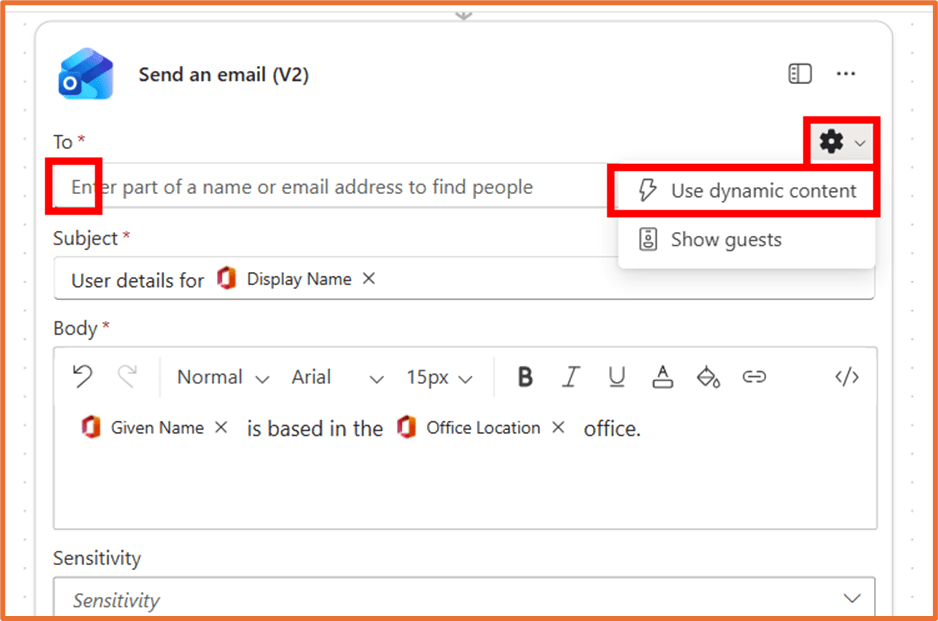
In an action, look for the lightning bolt button to bring up dynamic content options.
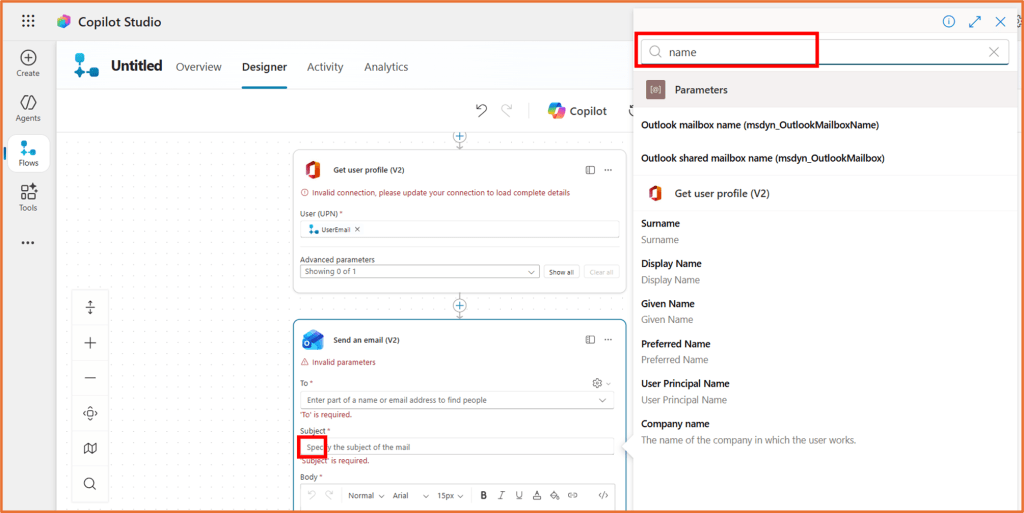
You will see a list of available dynamic content, sorted by the action it was generated from.

Sometimes, not all dynamic content will be displayed in the list. Use the Search bar to find it.
Your actions can use a mix of static values and dynamic content. Insert the dynamic content in the correct position. For example, this email message below follows a standard template but will dynamically insert a user’s name and office location.
The dynamic content (lightning bolt) button will may not appear immediately. You will need to click on the settings cog icon first.
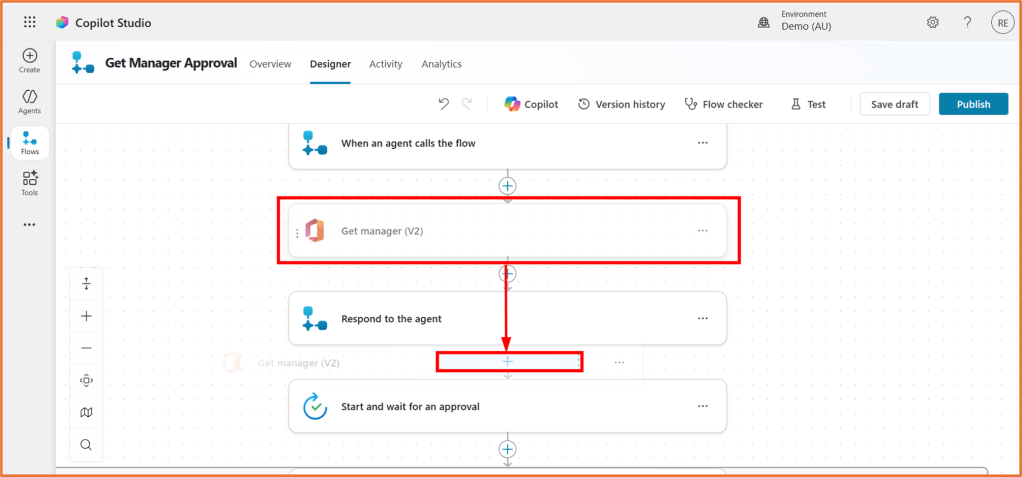
Copy and paste an action
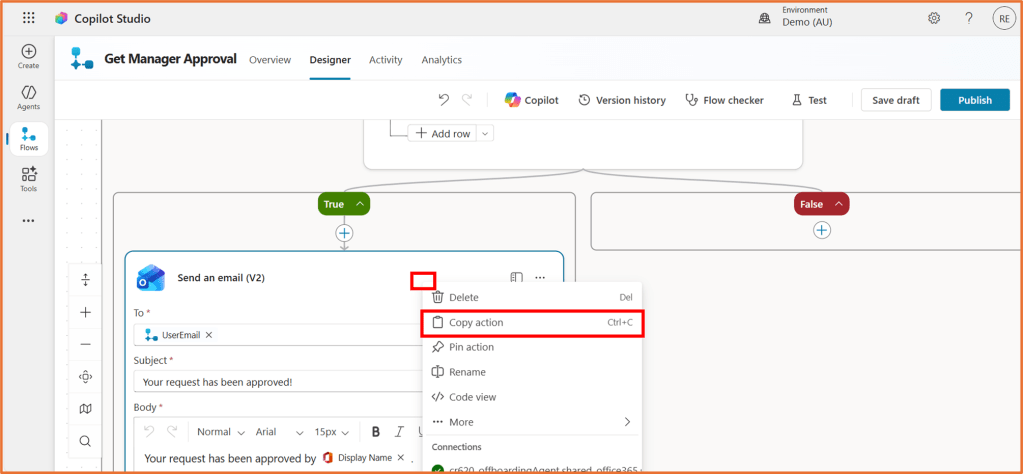
Need to reuse an action? Right click on the action you want to copy, and select Copy.
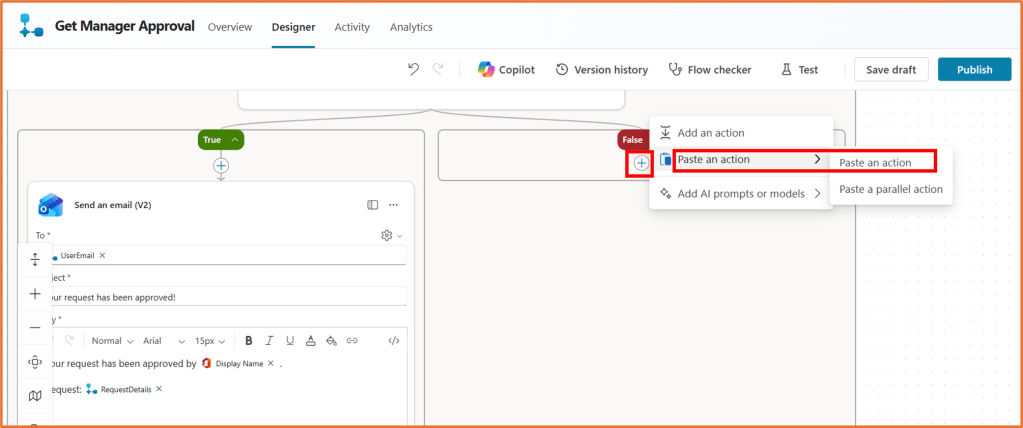
You can then paste it into another part of the flow. To paste the action, right click on the + new step icon. Select Paste an action.
This saves time when you have similar steps.
If you see errors appear in the copied action, remove then re-add any dynamic content in the action.
Reorder steps with drag and drop
You can change the order of steps by dragging and dropping them in the designer. “Drop” the step on the + icon of the new position. This is useful when you need to adjust the sequence without deleting and recreating actions.
If moving a step earlier in the flow, check that it does not use dynamic content from subsequent steps. Dynamic content can only be used in a flow if it comes from a previous step in the sequence. You will not be able to reorder the step if that is the case.
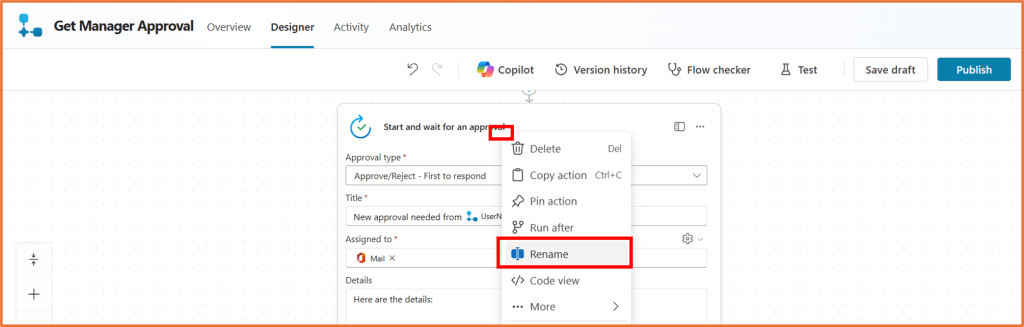
Rename a step
Just like flows, steps should have clear names. This does not functionally change anything in your flow, but can be helpful while building your flow, especially if it has many similar actions. Right click on the step name and select Rename. Edit it to describe what the step does. This makes your flow easier to read and maintain.
Test a flow
You can test a flow to ensure it is working as expecting.
Testing a flow will run the flow. This means that if your flow contains the sending of emails or notifications, these will actually be sent. Make sure you use test data in your flow (not actual customer details!)

When you click Test, you can run the test manually or automatically. Manually means that you will need to go and perform your flow’s trigger step before the flow runs.
If a flow has already been run, you can use the automatic test. This uses a triggering action from a previous flow run, which means that you do not need to go and perform the trigger again.
Restore a previous flow version
If something goes wrong, you can restore an earlier version of your flow. Go to the Versions tab to view and revert to previous saves.

Add a flow description
Use the Description field to explain what the flow does and any important details. This is helpful for anyone reviewing or maintaining the agent later. You can find the description in the Overview tab. Click on Edit in the Details area.
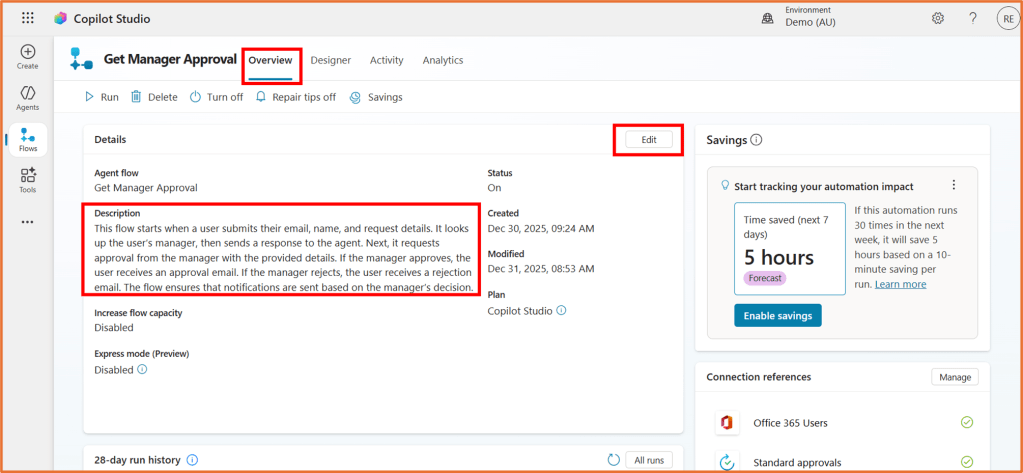
You can automatically generate a description too.

