Does your agent need to find a user’s country, access their phone number, job title, or route requests based on their department? You can add the Office 365 Users connector as a tool in Copilot Studio to handle this. The connector lets your agent call Microsoft Entra ID-backed profile data such as display name, email, department, job title, hire date, city, country, interests, skills, birthday and more.
This post will explore the Office 365 Users action called Get my profile (V2). See here for the full list of available outputs from the action.
This post will detail how to obtain the details of the user speaking to the agent. It uses the Get my profile (V2) action. However, this could be replaced by looking up any other email address in your tenant too (e.g. if you wish to build a “Staff Finder/FAQ” type of agent, that can look up details of any user across your organisation). If so, this would use the action Get user profile (V2) instead.
If you only want to obtain details such as the user’s name, language and email address, you do not need to enable the Office 365 Users connector. These variables should already be available to your agent if the user is authenticated.
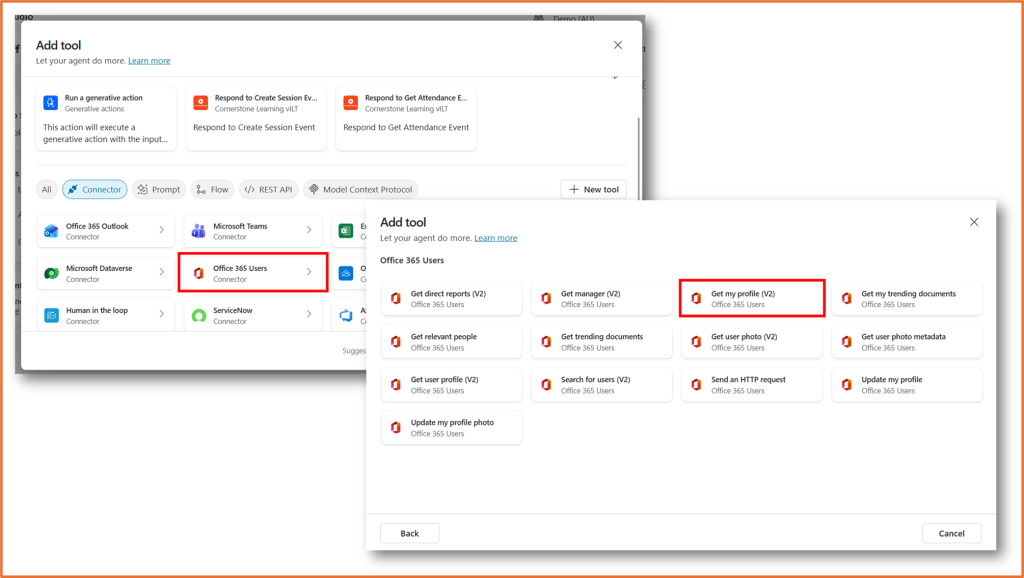
Add Get my profile (V2) tool
Go to either the Overview or Tools tab of your agent in Copilot Studio, and select +Add tool.

Look for Office 365 Users connector and select the action called Get my profile (V2).
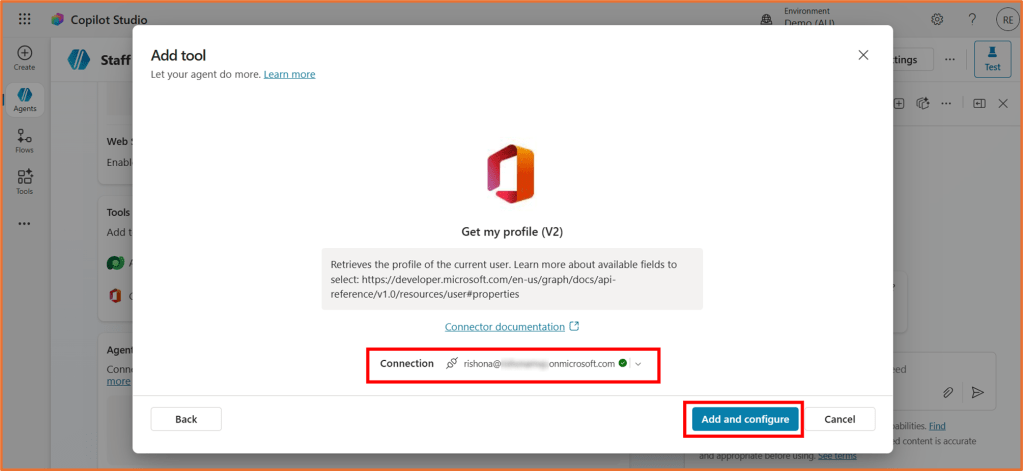
Click Add and configure. You may need to sign in to enable the connection first if not already enabled.
Configure the tool
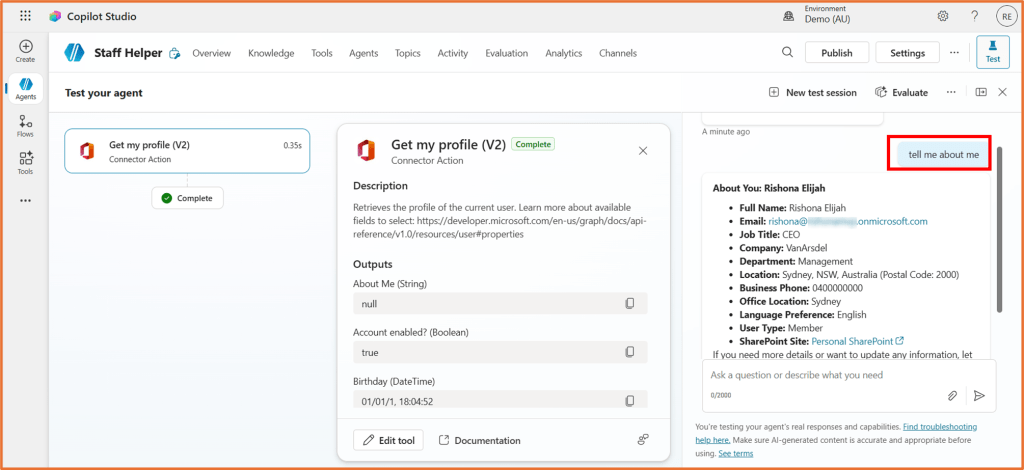
You can give the tool a test without configuring anything. Type in the Test pane a phrase such as “Tell me about me” and it should return a list of some of the outputs from the Office 365 Users tool you just enabled. Try another phrase like “What department am I in”. You will see that the agent can already answer these basic questions by leveraging the tool.
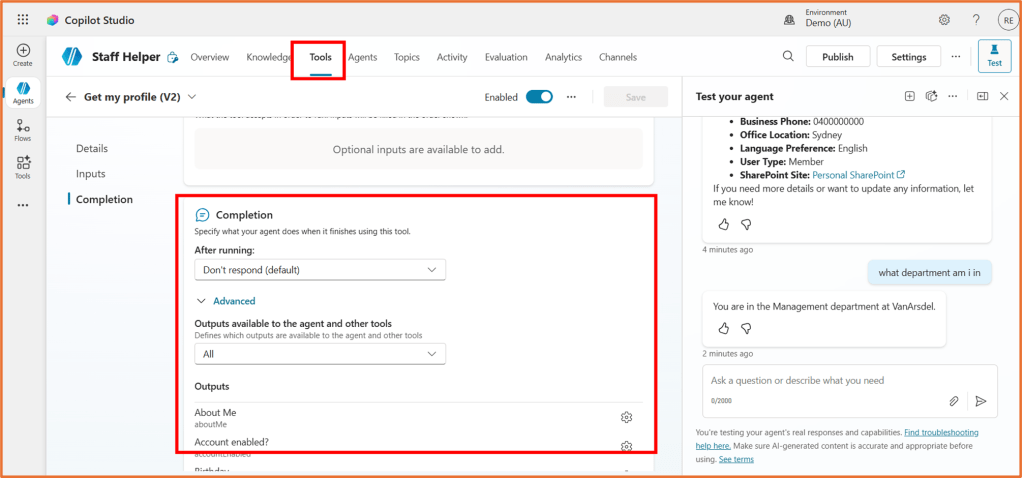
You can control which outputs are available to the end user. Open Get my profile (V2) from the Tools tab of your agent. In the Completion area, expand Outputs.
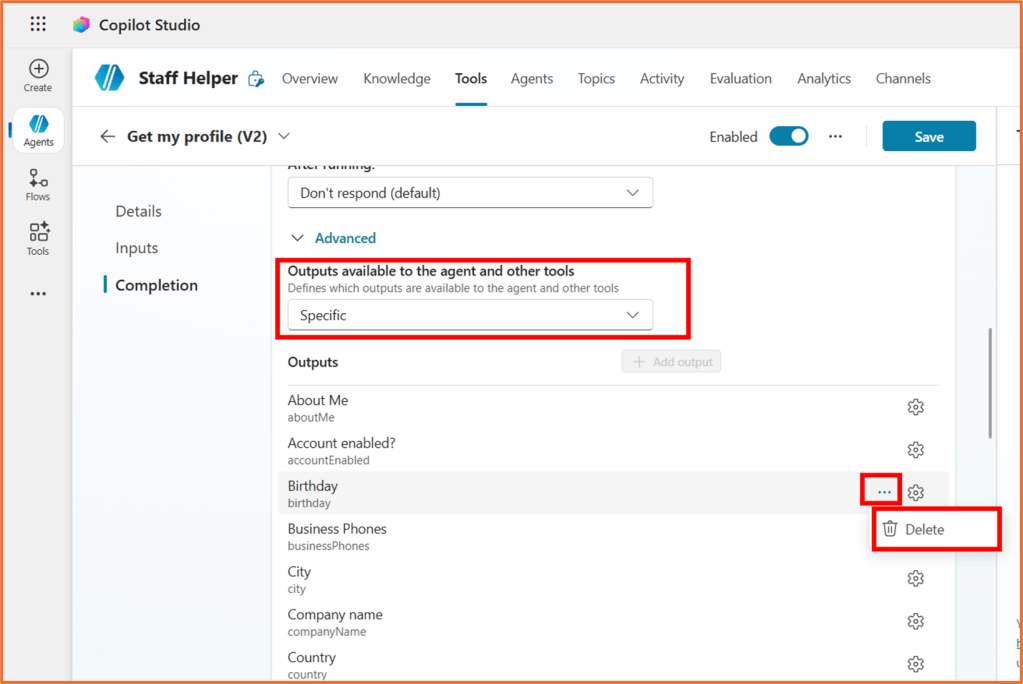
To remove any outputs from your agent, change Outputs available to the agent and other tools to Specific. Then click on … next to the output you want to delete.
The settings cog next to each output allows you to provide a description of when the agent should use the output. It may not be necessary to change this. E.g. a if the user enters a phrase such as “Where is my office?“, it should automatically understand to return the user’s Office Location value.
Use the outputs in a topic
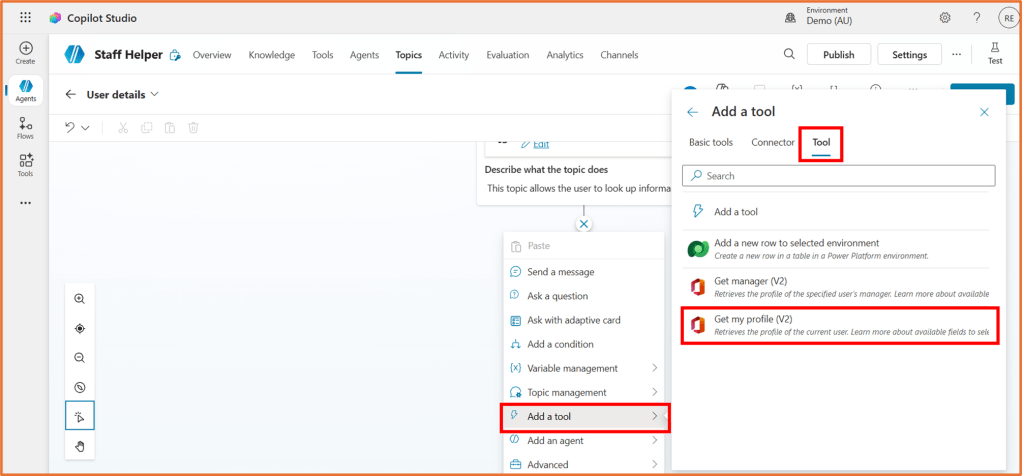
To use any of the outputs from the Get my profile (V2) tool within a topic, begin by opening your topic. Add a node to the topic and select Add a tool > Tool > Get my profile (V2).
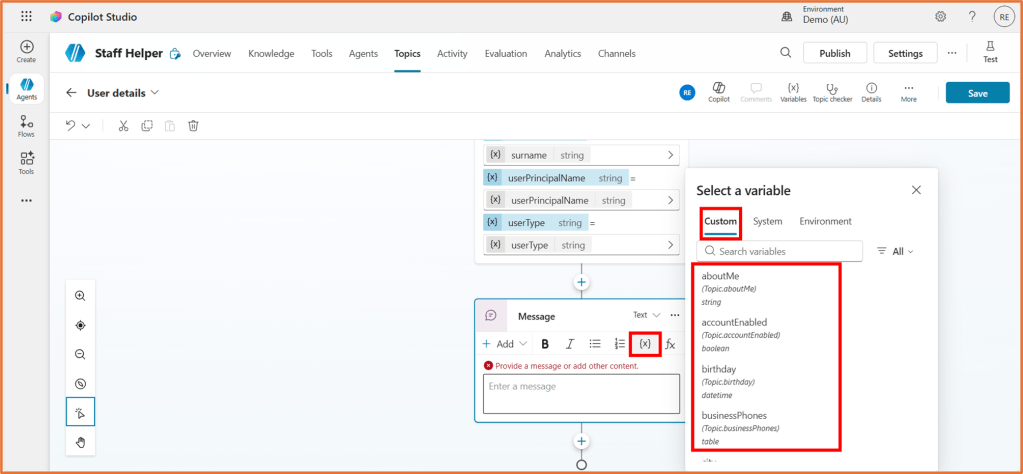
You can now tailor your conversation using the outputs as variables. Nodes after the tool step in the topic will have the outputs available as variables under Custom.

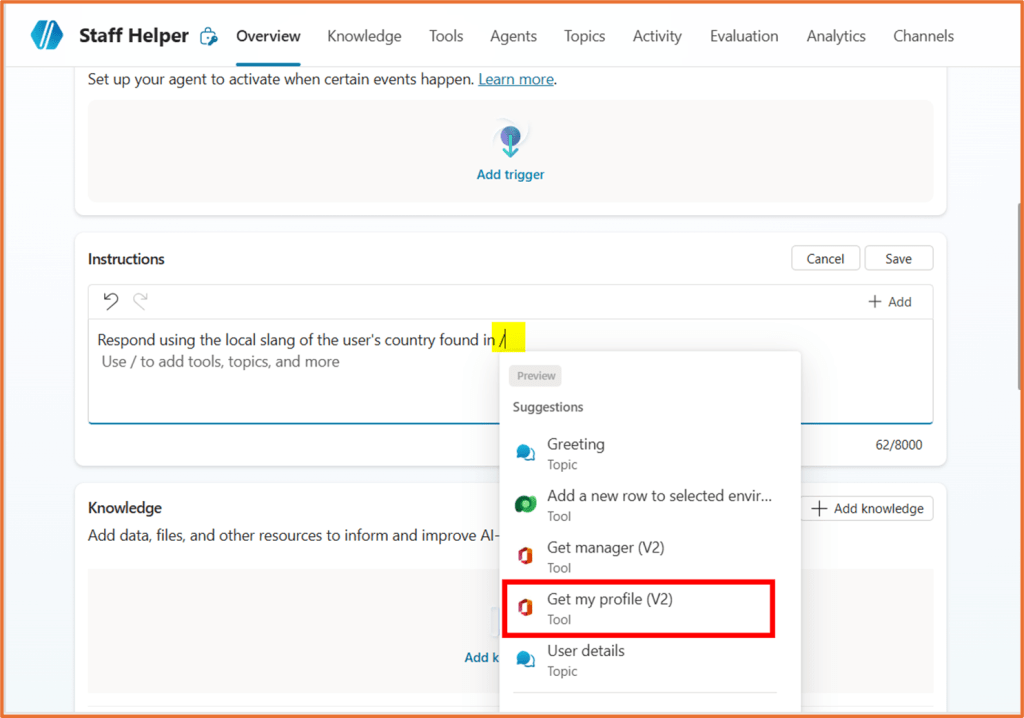
Reference the tool in agent instructions / personalise agent behaviour
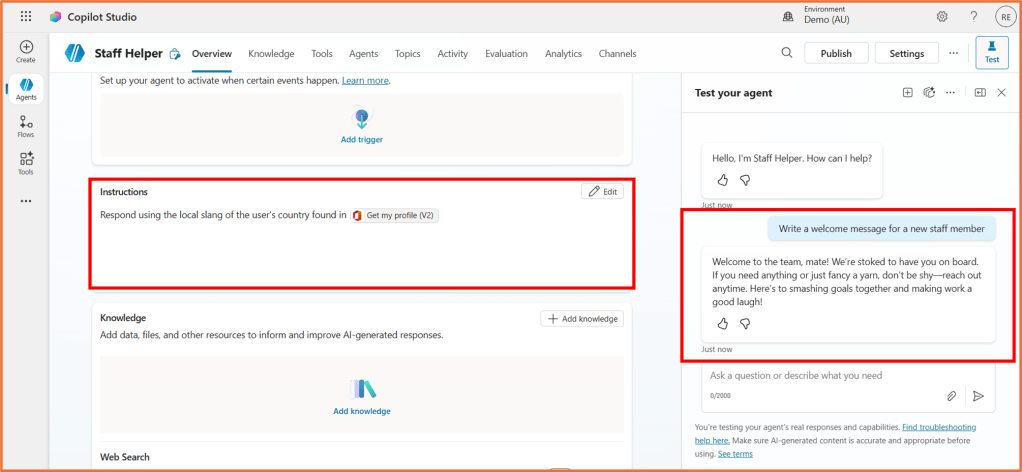
The tool can be added to the agent instructions to personalise the experience for each user. For example, the screenshot below shows the results of an instruction that responds with the local slang of the user’s country.
In the Instructions area of your agent, you can type the / key to find and tag the Get my profile (V2) tool.