If you want your Copilot Studio agent to do more than answer questions, one of the most valuable steps is letting it write back to your business data. Creating records in Dataverse or Dynamics 365 is something staff do constantly. Instead of switching apps or filling in a form manually, you can let your agent collect the information and create the record for them. Let’s walk through how to add the Dataverse tool to your agent and how to configure it. The example will demonstrate how your agent can create a new Contact record.
Dataverse connector is used for interacting with your D365 tables, such as Contacts, Accounts, Leads, Opportunities, Cases, any custom tables and more.

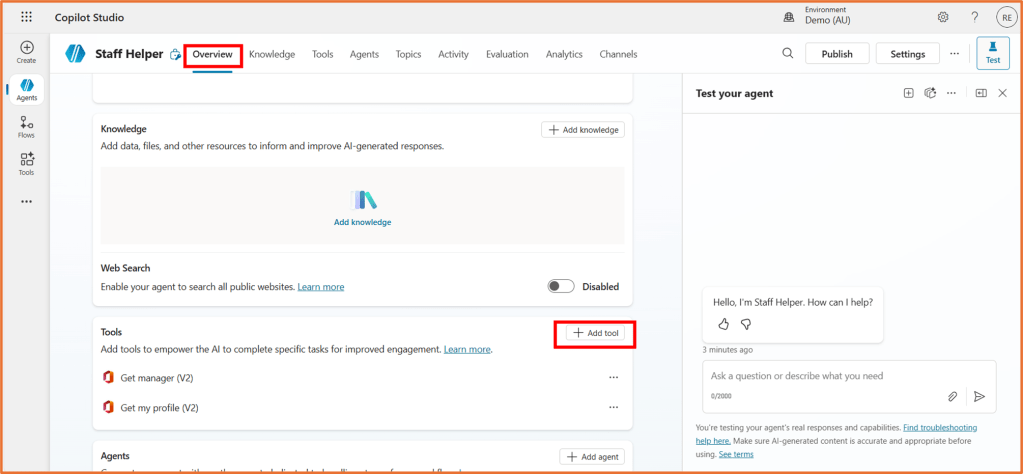
Step 1: Add Dataverse tool to your agent
Open your agent in Copilot Studio and select +Add tool on the Overview or Tools area.
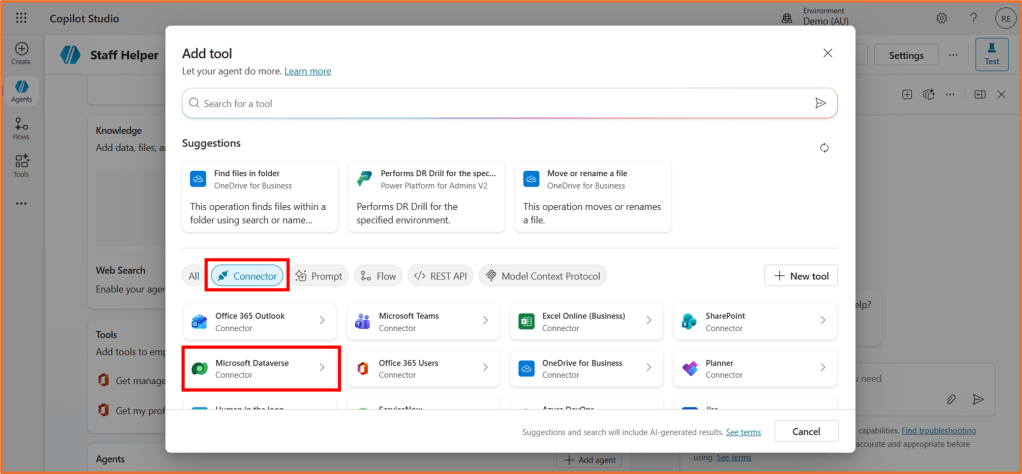
Select Dataverse from the Connector category.
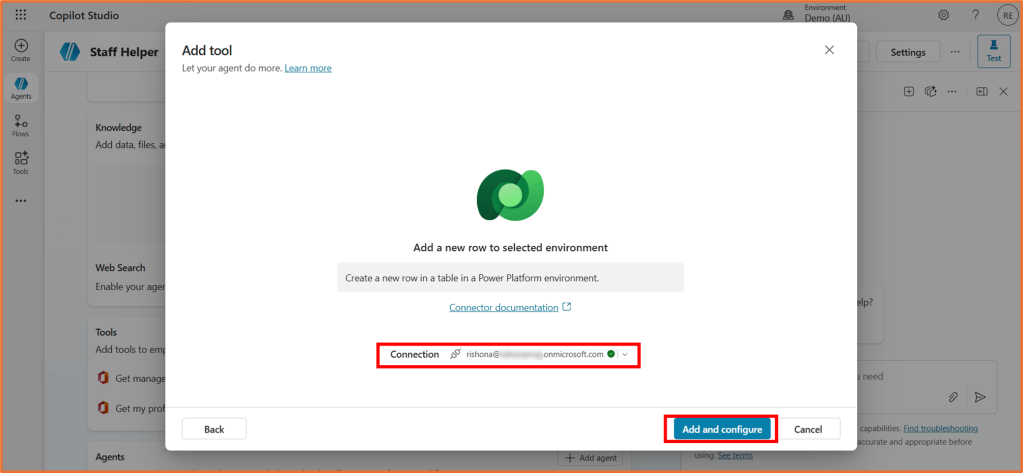
Pick the action Add a new row to selected environment.
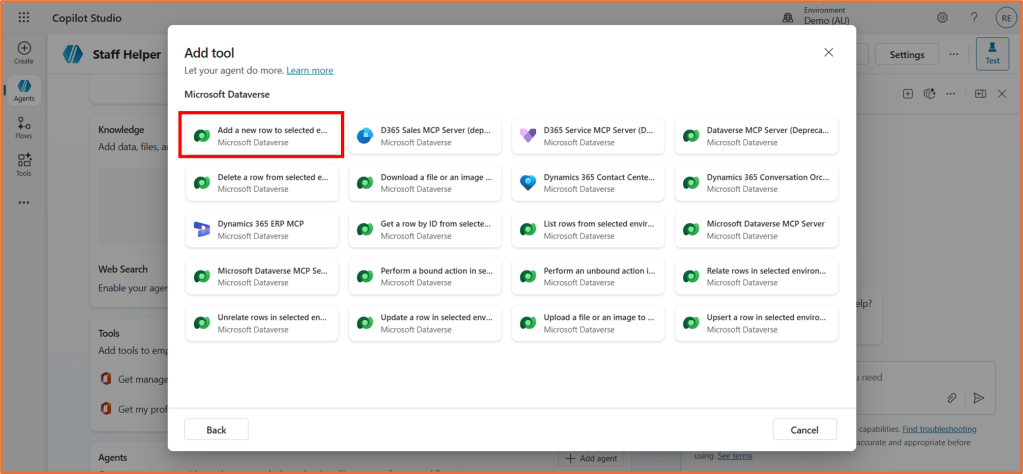
This is the out of the box Dataverse tool. It lets your agent create records without building a Power Automate flow or writing any integration logic. When you add it, it can become available for your agent to call whenever a user asks to create a record.
Create a connection by signing in if required. Then click Add and configure.
We’ll next go through the steps of configuring the tool details, inputs, and what happens upon completion.
Step 2: Configure Dataverse tool- Details
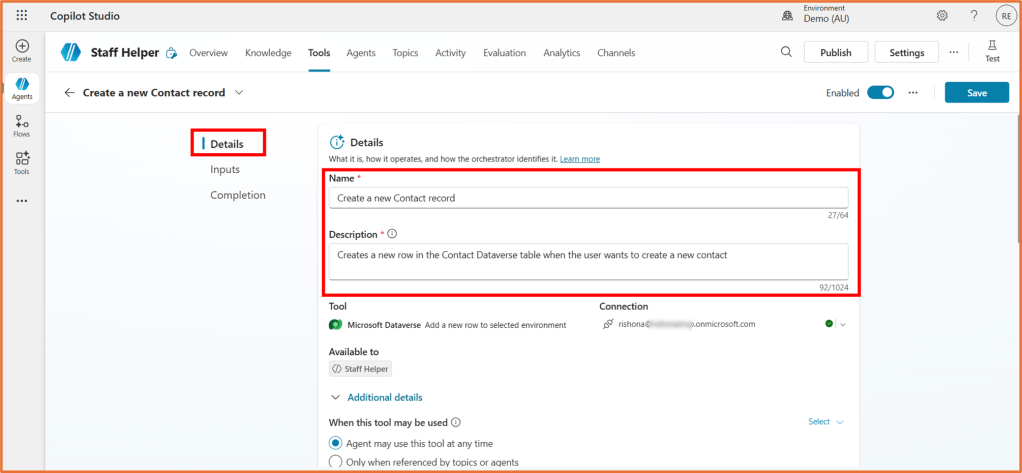
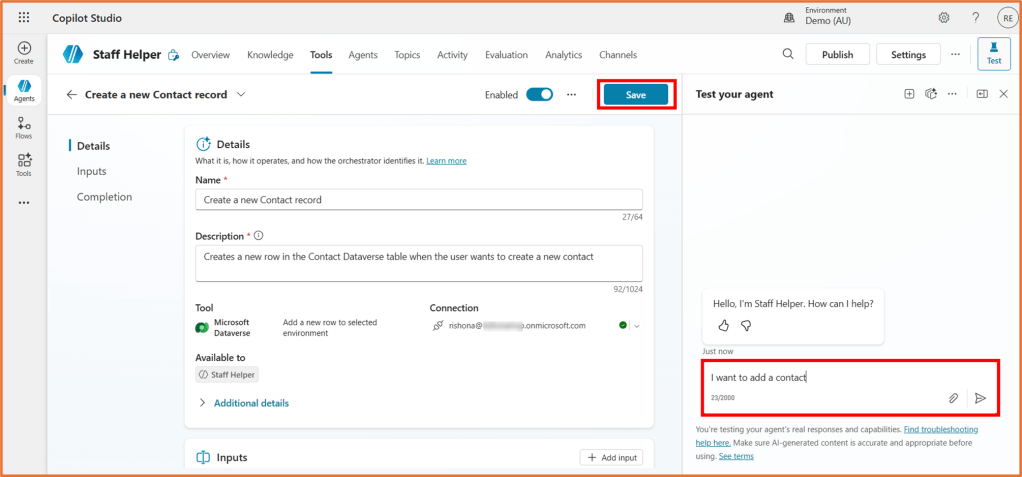
In the Details area of the tool, you can update the Name and Description. It is a good idea to rename the tool so you can easily determine it’s purpose, e.g. “Create a new Contact record”.
Updating the Description will help the agent to determine when to use the tool. You should update this too. For example, “Creates a new row in the Contact Dataverse table when the user wants to create a new contact”.
Under Additional Details, select if the agent can call on the tool at any time, or only when specifically called in a topic. For more flexibility, select the first option. With this, the user could simply state a phrase such as “Create a new contact” and the agent can call the tool. This means you do not need to create a separate Create a new contact topic or reference the tool in your agent instructions.
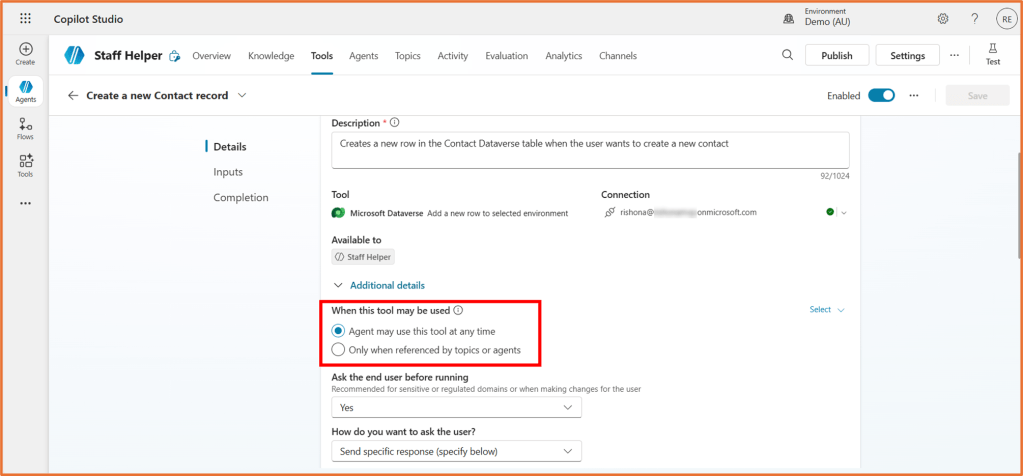
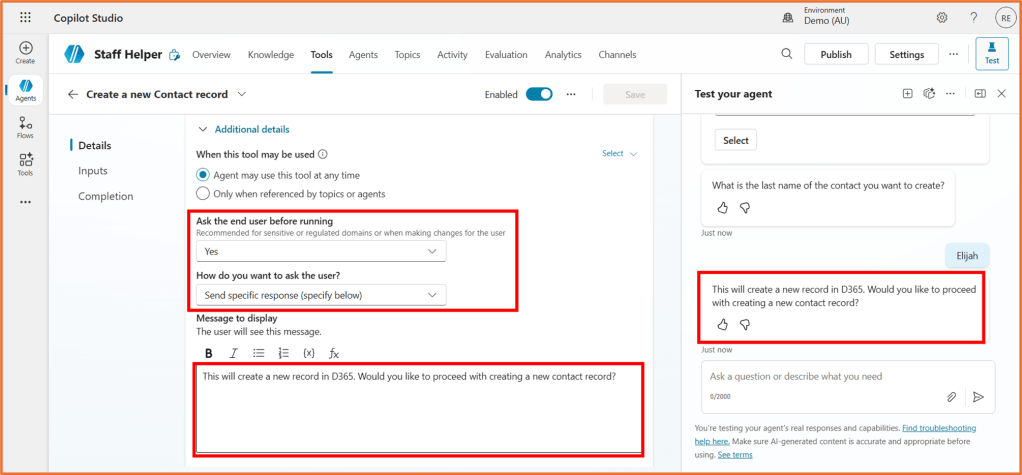
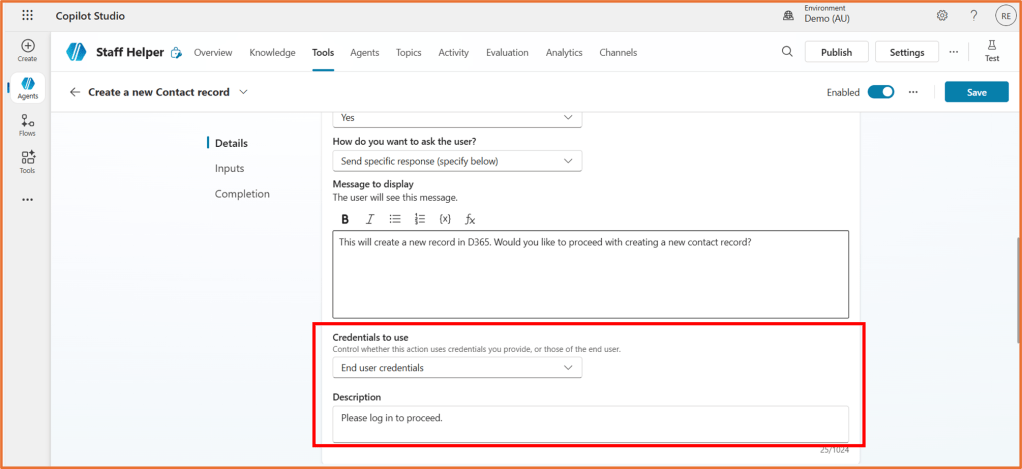
Ask the end user before running will first get the user to confirm via the agent if they wish to proceed with creating the record. This is recommended for an action such as creating Dataverse records. You probably want to avoid creating accidental new records! This can mitigate that. If you select Yes here, enter a message the user will see before proceeding. For example, “This will create a new record in D365. Would you like to proceed with creating a new contact record?”.
When you configure the tool, you will see a setting called Credentials to use. This controls which identity the agent will use when it performs the action.
If you choose Maker provided credentials, it means the tool will run using the credentials of the person who built the agent. In other words, the maker authenticates the connection once, and every time the agent creates a record, it is done under that maker’s Dataverse permissions.
This option is useful when:
- You want every user to be able to create a record, even if they do not have Dataverse permissions.
- You need the agent to run with elevated access that end users do not have.
- You want predictable behaviour because the same identity is used each time.
The alternative option is User provided credentials, where each user must authenticate with their own identity. In that model, the agent can only create records if the signed in user has permission to do so.
Step 3: Configure Dataverse tool- Inputs
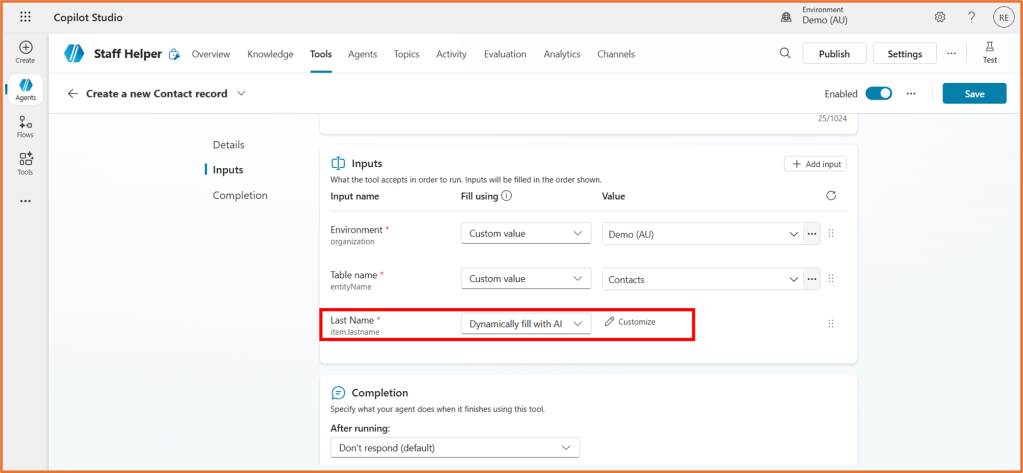
By default, the Inputs area will allow the user to create a record in any Dataverse environment and table (depending on the user permissions). You can configure this so that the intended Environment and table (Contact) is pre-selected. Without setting these values, the agent will take a guess itself or ask the user to select. For this scenario, it is recommended to pre-set the Environment and Table name. For both, change the option to Custom value. Select your intended Dataverse environment from the dropdown. Then, select the table name, such as Contacts.

After selecting the table, required fields/columns in the table will be listed. For this Contact table, Last Name is the only required field. It is recommended to keep this setting as Dynamically fill with AI, so the user can enter the Last Name of the contact themselves.
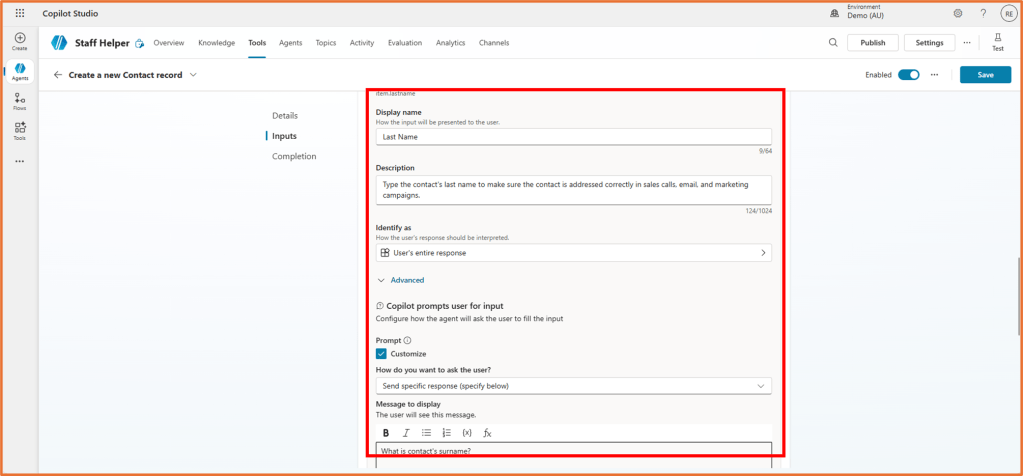
You can optionally click Customize (for the Value) for more options on how the value will be captured. You could change the Display name of the field as well as write your own custom prompt/message the agent will send to the user. Changing the entity selected in Identify as can help with clean data capture. For example, if you’re expecting to capture an email address, change Identify as to Email.
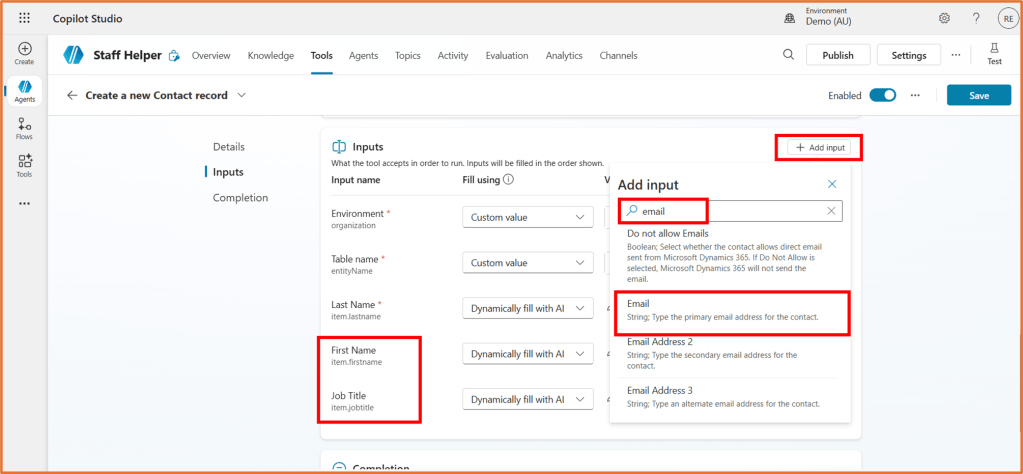
What if you want more than just the required fields to be captured? Click +Add input and select more columns from the table.
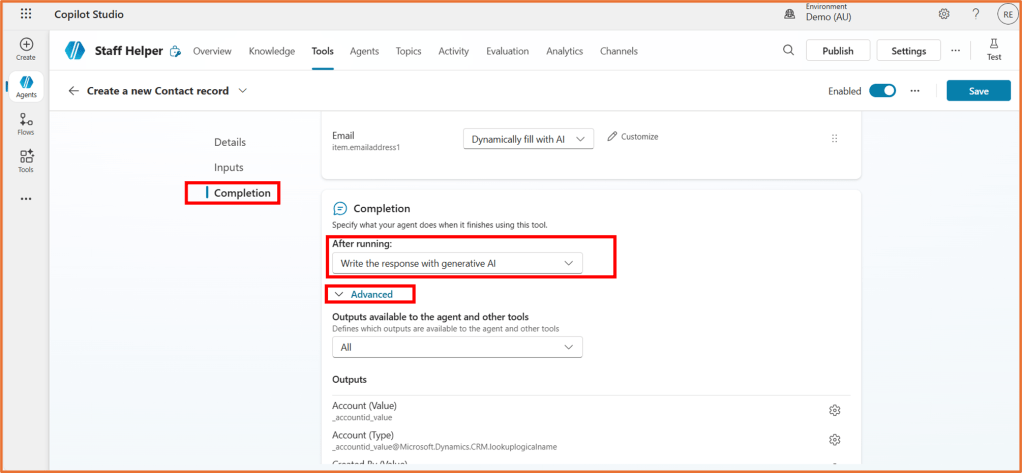
Step 4: Configure Dataverse tool- Completion
In the Completion stage, you can optionally specify a message the agent will display once the record is created. Otherwise, Write the response with generative AI will automatically generate a completion message for the user.
Underneath the Advanced tab, you will see a list of all the columns/fields from the record. These are available to use as variables.
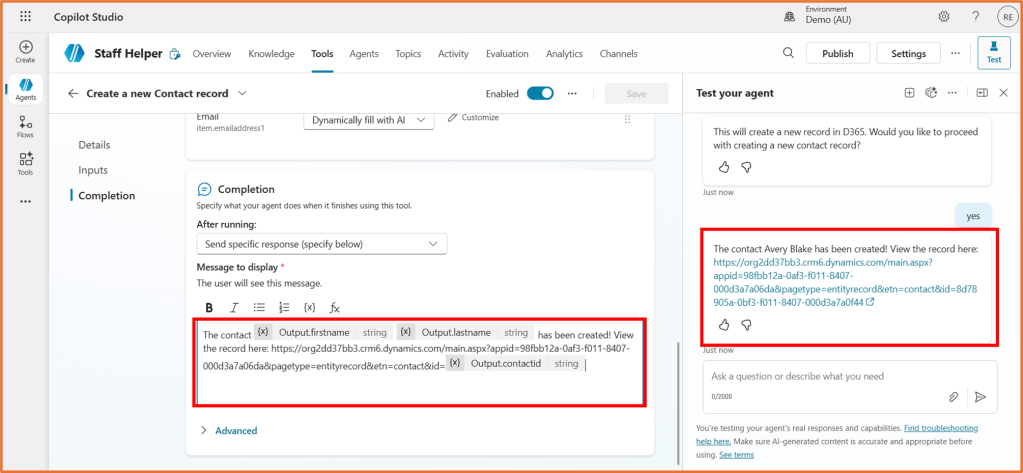
Perhaps after creating the record you want to display a link to the Dataverse record and some basic details. To do so, set After running to Send specific response (specify below).
Enter a message such as:
The contact has been created {First Name} {Last Name}! View the record here: <app URL>{Contact ID}
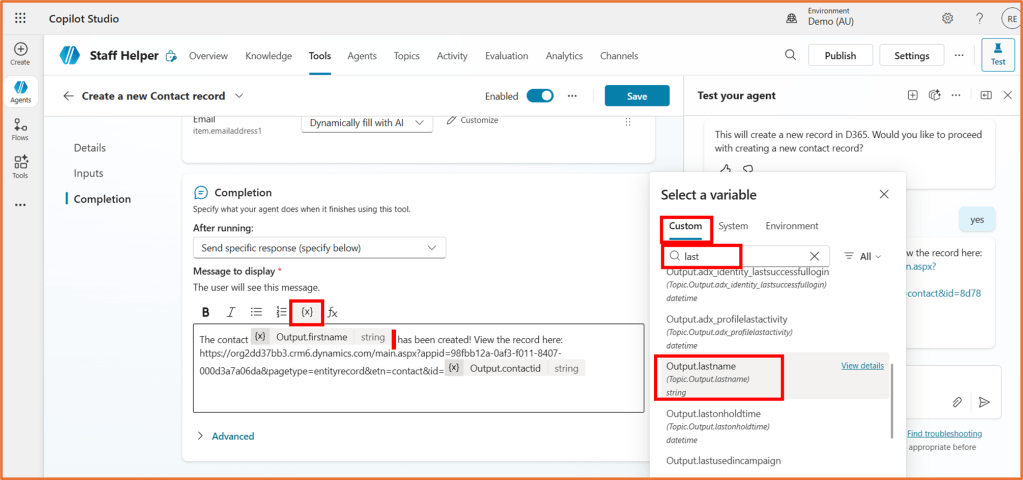
The values between { } can be added via the {x} variable button. It will appear under Custom. Look for the output name and select the option containing the word Output:
- Output.firstname
- Output.lastname
- Output.contactid
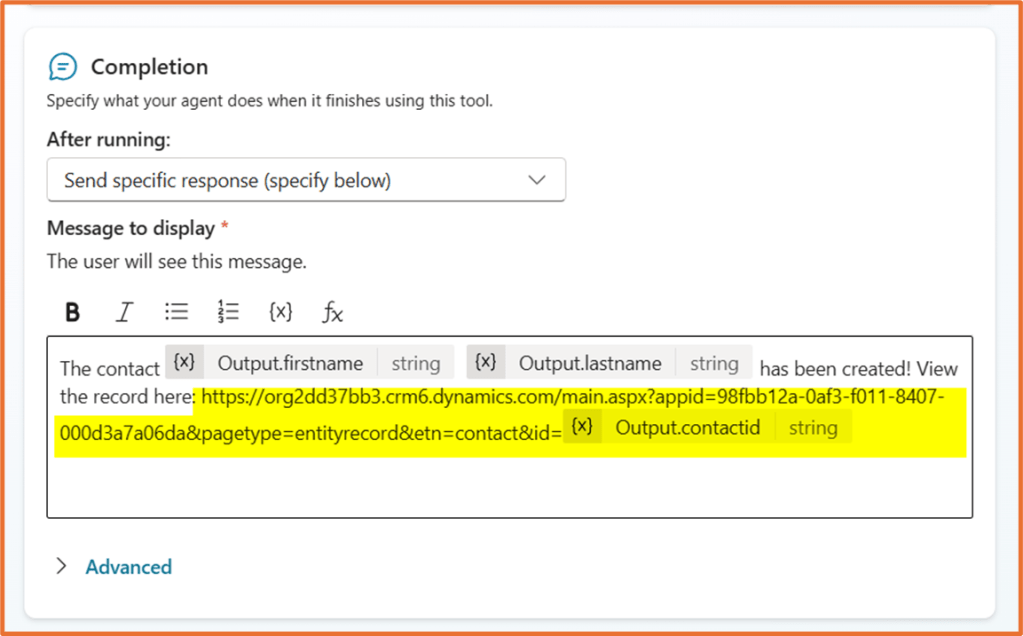
To get your app URL, open a Contact record in your Power App/D365. Copy the URL. The full URL of the record could look something like this:
https://org2dd37bb3.crm6.dynamics.com/main.aspx?appid=98fbb12a-0af3-f011-8407-000d3a7a06da&pagetype=entityrecord&etn=contact&id=005bb18e-09f3-f011-8407-000d3a7a06da
Note the part of the URL that is bolded above and highlighted in the screenshot below. This is the part you want to copy for the app URL. Everything after contact&id= is the unique contact id that will be dynamically filled in via the Output.contactid variable.

Make sure there is no space in between the app URL and the Contact ID variable in your message.
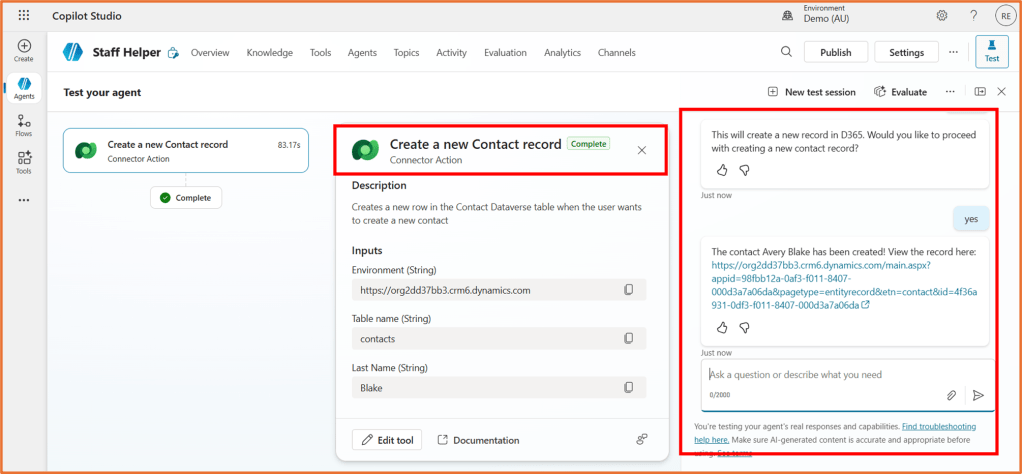
Step 5: Save and test
Click Save on the tool and open the Test pane. Test your tool by entering a phrase such as “I want to add a contact”.
Continue testing the tool by answering the agent’s questions. Finally, upon reaching the end, your Dataverse record will be created!