
Have you ever wanted to trigger your agents to run from an existing Power Automate or Agent flow? Maybe you want your agent to run as part of a scheduled process, or you want to pass structured data into the agent and let it decide what to do next. You can call on your agents during a flow by using the Copilot Studio connector- Execute Agent action.
Example scenario
Imagine you have a flow that runs whenever a new employee is created in your HR system. The flow already does the predictable, structured things. It picks up the employee details, and logs them in the right system. These steps follow the same pattern every time, so Power Automate handles them reliably.
But onboarding always includes steps that need judgement. For example, who actually needs to be notified about this new starter? Different roles require different teams to be informed. Some roles need extra equipment or training. Some departments prefer a personalised welcome message. You may have built an autonomous agent that handles this part of the process.
When the employee is created, the flow can call the agent using the Execute Agent action. The agent reads the context, interprets the role and works out what should happen next.

How to use Execute Agent action
Begin by building your flow in Power Automate or as an Agent Flow in Copilot Studio. Set up the standard trigger and actions your flow needs. When you reach the stage of your flow where the agent should begin running, look for the Execute Agent action. It belongs to the Microsoft Copilot Studio connector.

Alternatively, you can use the action called Execute Agent and wait. This waits until the agent finishes running it’s process before the next step in the flow kicks off.
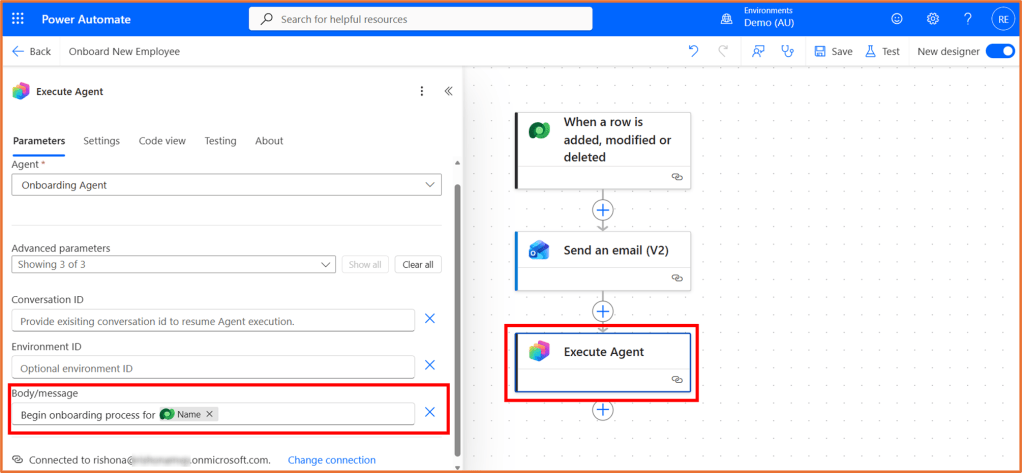
Choosing the agent
The Agent field lets you select which agent you want to run. The dropdown will show the agents available in your environment.
When the flow runs, the selected agent receives the message you send and generates a response. This gives you the same behaviour as if a user were interacting with it, but triggered by automation instead.
Understanding the advanced parameters
Conversation ID
If you want the agent to continue an existing conversation, you can pass the Conversation ID. This is useful if you have a long running process or want to maintain context across multiple steps in a flow.
If you leave this blank, the agent starts a new conversation.
Environment ID
If you have multiple Copilot Studio environments, you can use the Environment ID field to make sure the flow selects the right one. If your agent is in the same environment as your flow, you can leave this blank.
Body or message
This is the content that gets sent to your agent. It can be a natural language message such as “Please summarise this text” or “Begin onboarding process for <employee name>”. The agent receives this content as the input for its next turn. You can use dynamic content from the previous flow steps, such as the employee’s name.
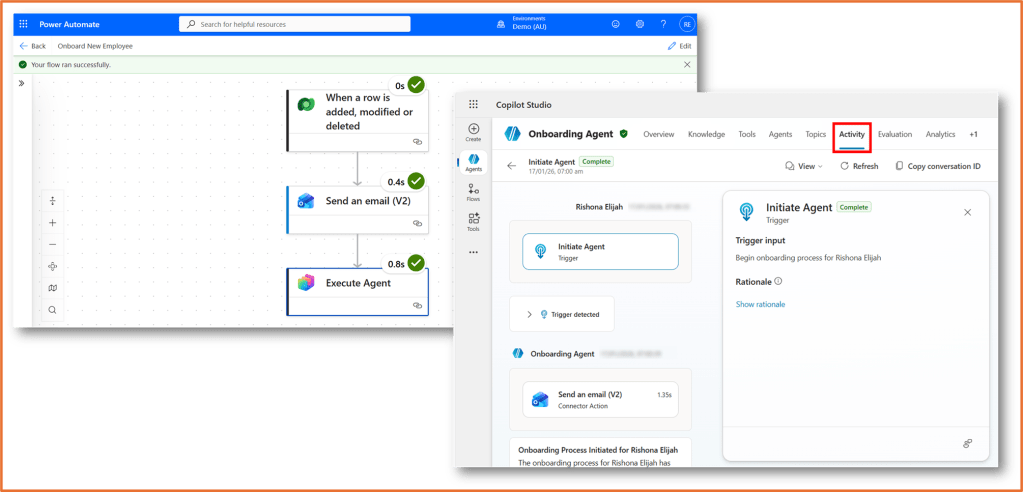
Ensure your agent is equipped with the right knowledge and tools it needs to run it’s process based on your trigger message.
You can review the Activity tab of your agent in Copilot Studio to inspect details of the run.

This is an excellent tutorial, Rishona. Thank you for sharing.