
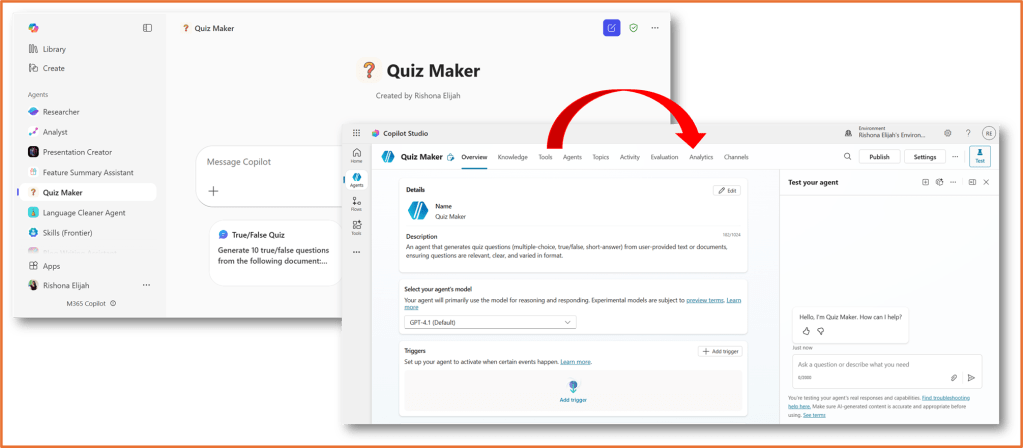
When you build an agent in Agent Builder inside Microsoft 365 Copilot, it is a great way to get a working helper up and running with minimal effort. It suits those early stages where you are exploring an idea, testing a use case, or giving a small group something practical to try. Once the agent starts getting broader use, or you need more control over how it behaves and how changes are managed, “Copy to Copilot Studio” lets you take that same agent into Copilot Studio so you can extend it, apply proper controls, and manage it in a more structured way.
Read more about Agent Builder here: Build a no-code agent in Copilot Chat – Rishona Elijah
Agent Builder has gone through a few name changes. It has previously been named Copilot Studio Lite.
Agent Builder inside Microsoft 365 Copilot is set up to help people create agents directly where they already work, with a smaller set of options to keep the build process straightforward. It is a good fit for personal or team agents that answer questions, guide users through common tasks, or support a focused scenario. Copilot Studio is where you go when the agent needs to operate as a managed solution: for example, when you want development and test environments, deeper integrations, stronger governance, and better visibility into how the agent is performing and being used across the organisation.
When should you move your agent to Copilot Studio?
- Your agent has outgrown a quick experiment and now needs proper governance
- You want to integrate with enterprise data or APIs
- You need to test updates in a development environment before releasing them
- Different teams will collaborate on maintaining the agent
- You want richer analytics to drive improvements
How to copy the agent
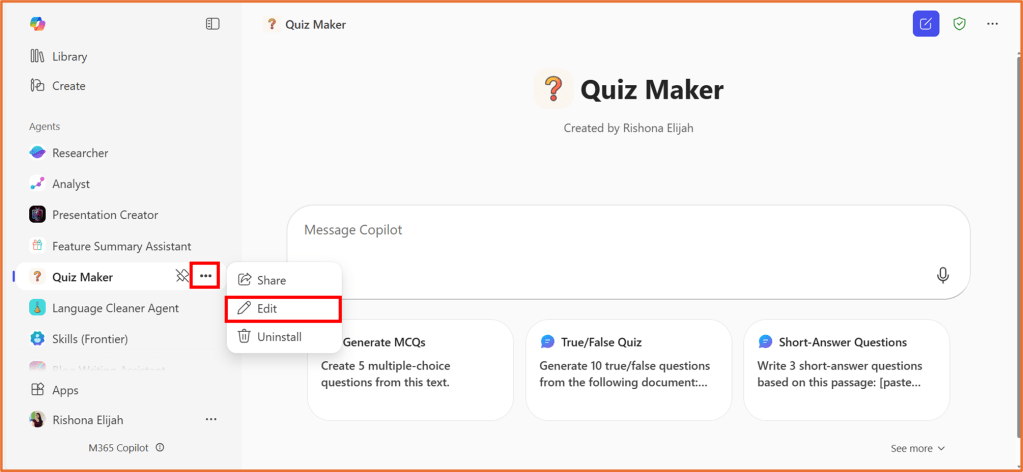
1. Navigate to https://m365.cloud.microsoft/chat/ and click on … > Edit next to your agent.
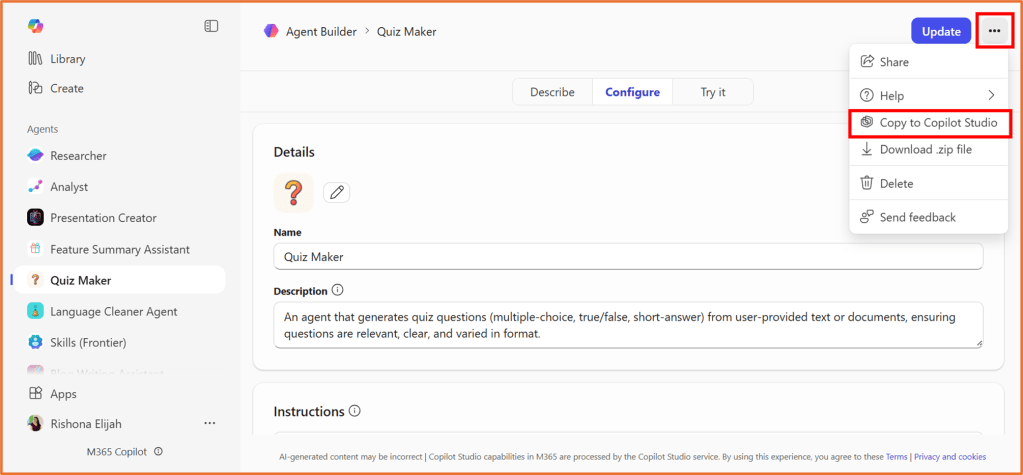
2. Click ... > Copy to Copilot Studio located in the top right of the screen.
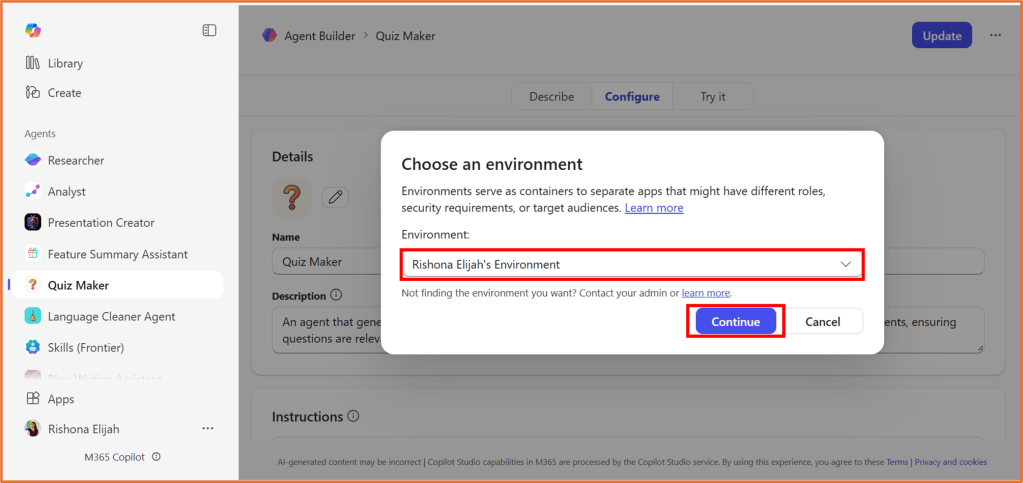
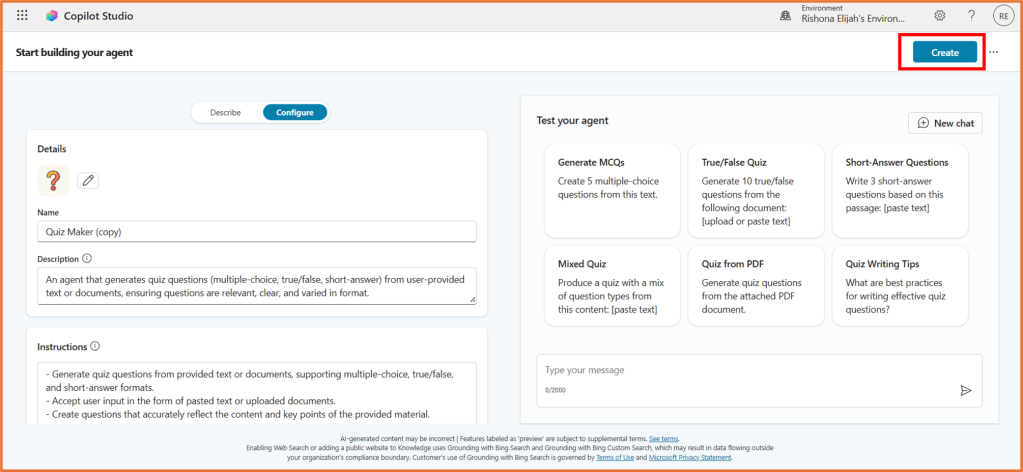
3. Click Get Started, select an environment and click Continue.
The agent name, description, instructions, and suggest prompts will be carried over to Copilot Studio.
Not all settings and knowledge sources will be copied over. Emails, uploaded files and Teams chats/meetings will need to be added again via Copilot Studio. See the list of limitations here: Copy an agent to Copilot Studio | Microsoft Learn
You can make changes here, then click Create to build the agent.
4. Your agent is now ready to continue to develop in Copilot Studio.
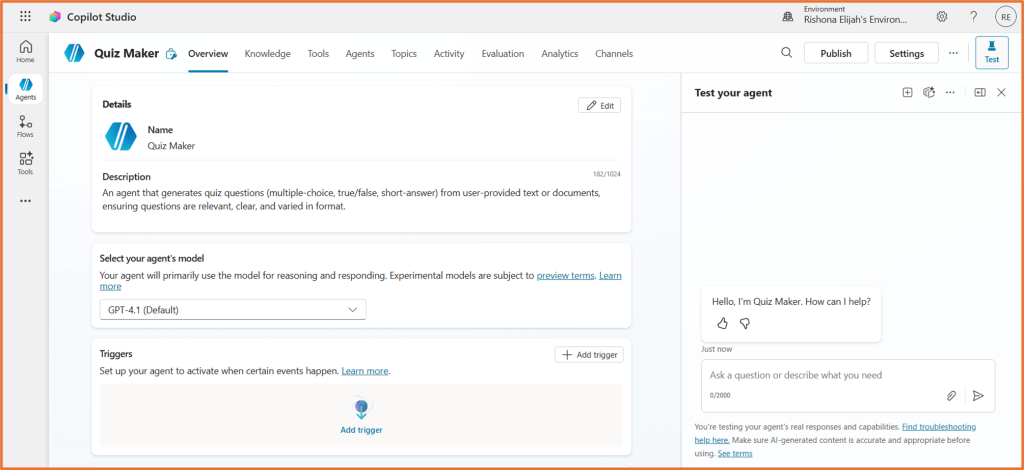
Your copied agent is treated as a new agent. You can still continue using the original agent and it will not be impacted by any changes made to the copy via Copilot Studio.
