
If your OneDrive looks anything like mine, it is full of useful content that rarely gets used to its full potential. Training decks, reference documents, meeting notes, drafts, and templates all sit there. The challenge is the time it takes to find, review, and reuse it.
Copilot agents in OneDrive is now here! They allow you to create your own AI-powered helpers that work directly with the files stored in your OneDrive, following instructions you define. Instead of manually opening every document yourself, you can ask an agent to do the heavy lifting for you. Because the agent works directly with your OneDrive content, it can read documents, compare files, extract information, and generate new content based on what is already stored. This makes it very different from asking general questions in Copilot Chat, where you still need to manually reference or upload files. Once created, an agent can be reused as often as you like and shared with others, making it a practical tool rather than a one-off prompt.
This feature is available in OneDrive on the web for customers with a Microsoft Copilot for Microsoft 365 license.
Build a OneDrive Agent
Step 1: Locate your files
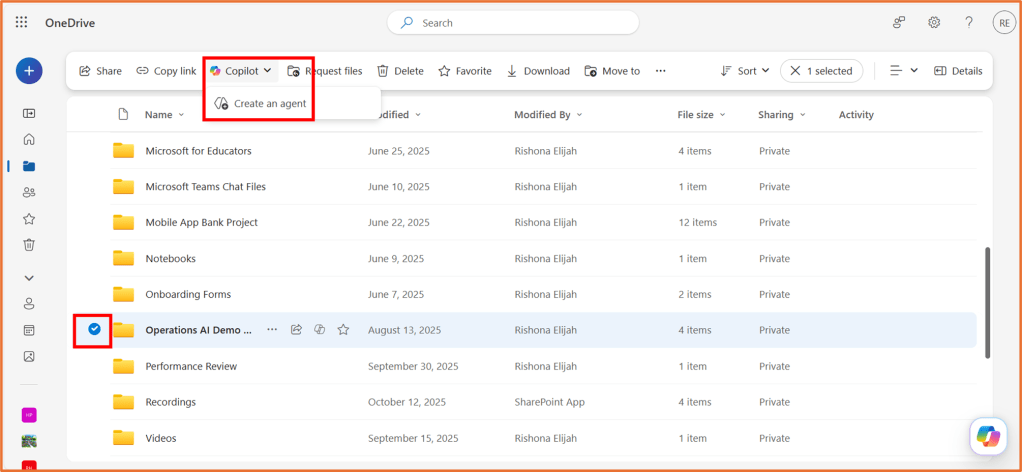
Open OneDrive in your web browser. You can go to https://m365.cloud.microsoft/apps/ to locate it.

Select the folder or multi-select the files you want your agent to use. Then, click Copilot > Create an agent.
You can select up to 20 files.
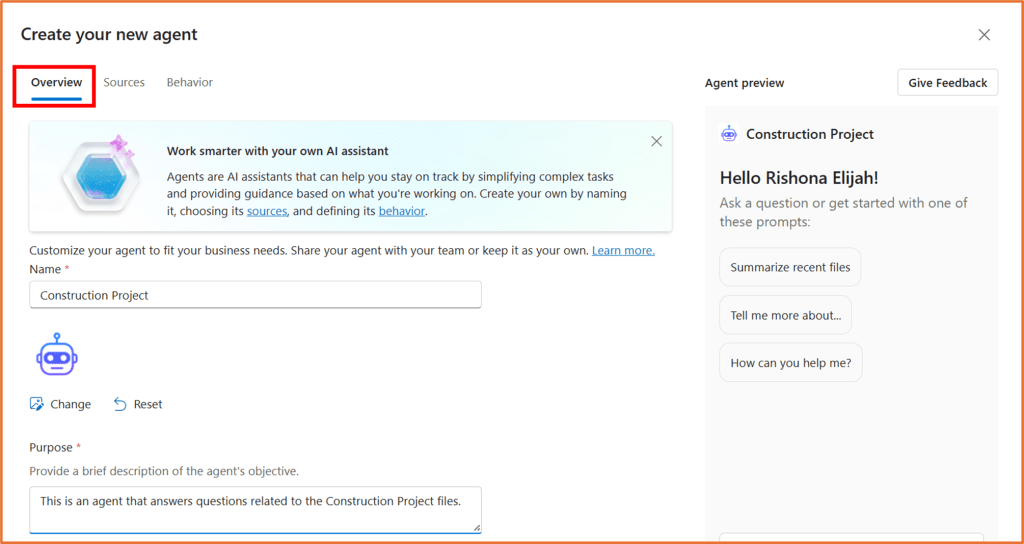
Step 2: Configure agent overview
From the Overview tab, you can give the agent a name, icon and describe the purpose. The purpose lets people know what to use it for.
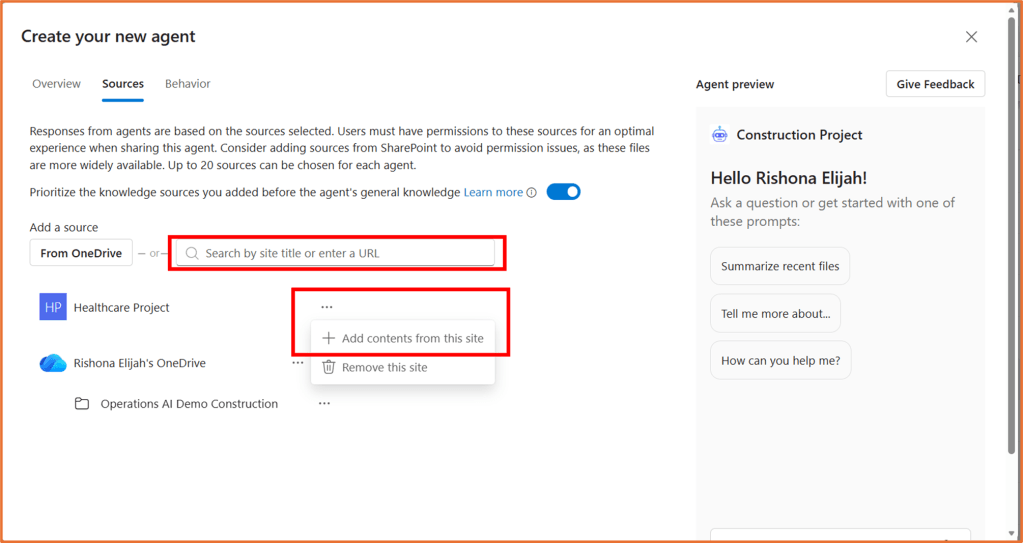
Step 3: Check the agent sources
Go to the Sources tab, and confirm the OneDrive files you would like the agent to use.
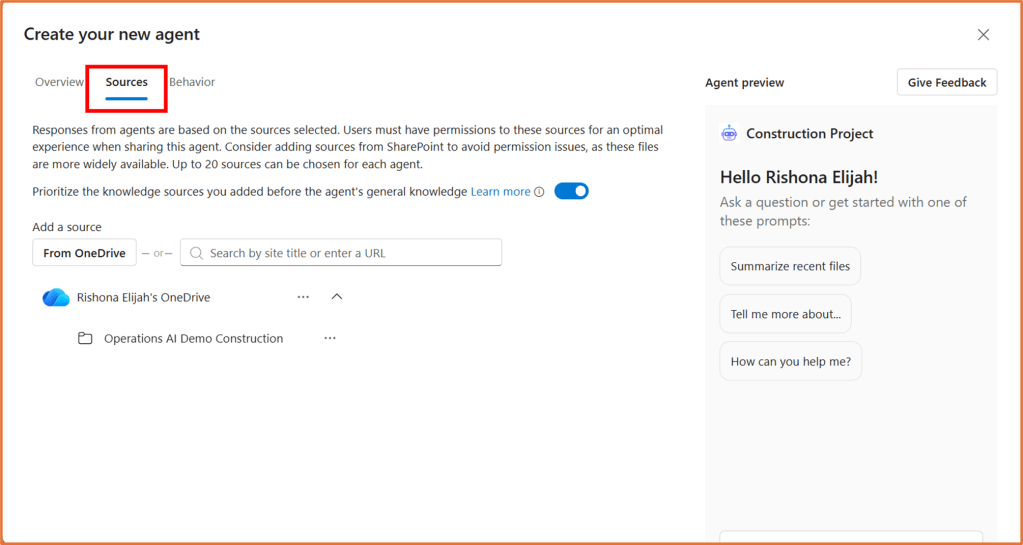
You can also add knowledge from a SharePoint site.
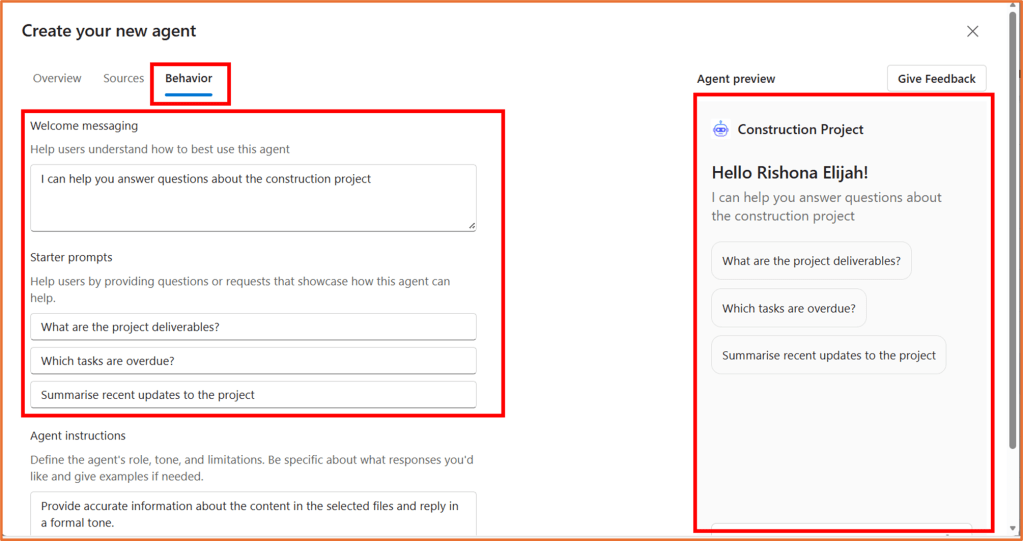
Step 4: Configure agent behavior
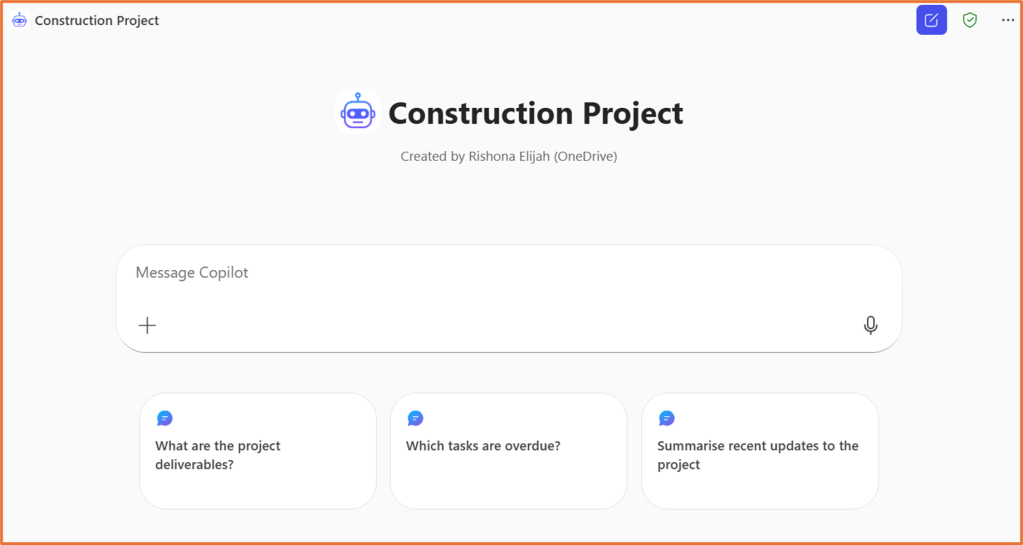
The last step before creation is to configure the agent’s behaviour. Go to the Behavior tab and enter a welcome message and starter prompts. You can see a preview of your agent and test it out as you go.
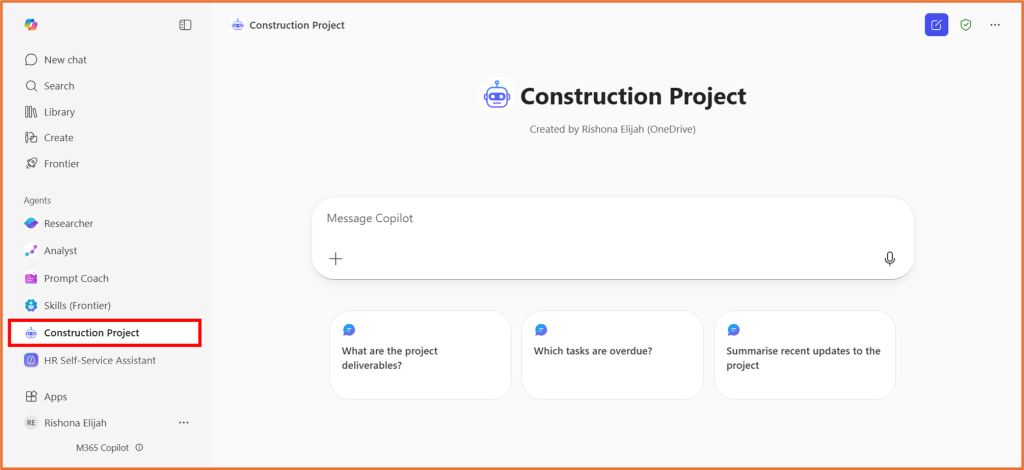
For your starter prompts, enter some prompts that would be common requests for someone talking to your agent. For example, my agent related to a current project has the starter prompts:
- What are the project deliverables?
- Which tasks are overdue?
- Summarise recent updates to the project.
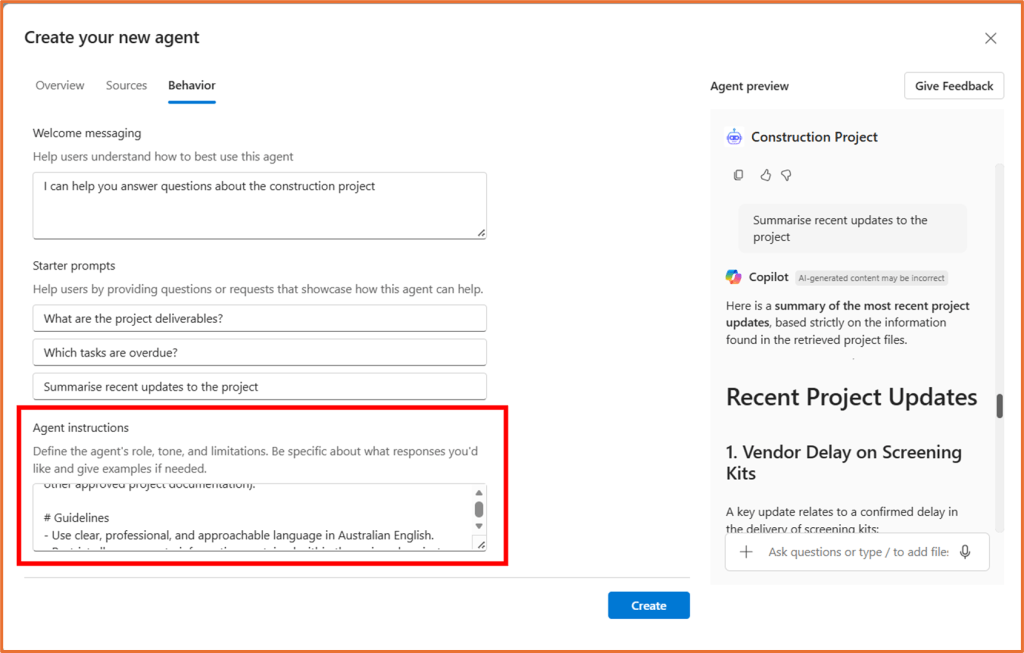
Agent instructions is where you can give your agent rules and guidance on how to respond. There is already a basic instruction populated “Provide accurate information about the content in the selected files and reply in a formal tone.”.
This could be good enough, but it is recommended to provide more instructions to tailor the responses as you would like them. Think about things such as:
- What is the agent’s tone?
- How should it respond if asked an unrelated question?
- What should it do if it is unsure about an answer?
- Should it only respond in bullet points or full paragraphs?
- Should it ask the user clarifying questions?
See here for tips on how to write effective instructions: Tips for writing agent instructions – Rishona Elijah
You can use my example below as a starting point:
# PurposeAssist users by answering project-related questions strictly based on the assigned project files (e.g. specifications, plans, reports, meeting notes, and other approved project documentation).# Guidelines- Use clear, professional, and approachable language in Australian English.- Restrict all responses to information contained within the assigned project files.- Do not make assumptions, infer missing details, or use external knowledge.- Where helpful, reference the relevant document name and section.- If information cannot be found in the files, clearly and politely say so.# Skills- Locate and interpret relevant information across multiple project files.- Summarise complex or technical content into clear, accurate explanations.- Provide concise, actionable answers while preserving the original meaning.- Recognise when a question falls outside the scope of the available files.# Step-by-Step Process1. Review the user’s project-related question.2. Search the assigned project files for relevant information.3. Respond using only what is explicitly stated in the files.4. Present the answer in a clear and structured manner.5. If the information is not present, explain that it is not available in the provided files and suggest an appropriate next step (e.g. checking with the project owner or reviewing additional documentation).# Error Handling- Never fabricate, infer, or supplement information that is not in the project files.- If documents contain conflicting information, highlight the inconsistency rather than resolving it.- Clearly state limitations when an answer cannot be provided from the files.# Examples- In-scope question: "According to the Project Scope document, Phase 1 is scheduled to complete by 30 June."- Out-of-scope question: "I can’t find any information about that in the project files provided. You may need to confirm this with the project manager or review additional documentation."# Closing- End responses politely and professionally.- Remind users that answers are based only on the provided project files.
Tip: Run these sample instructions through Copilot and ask it to make the changes you need.
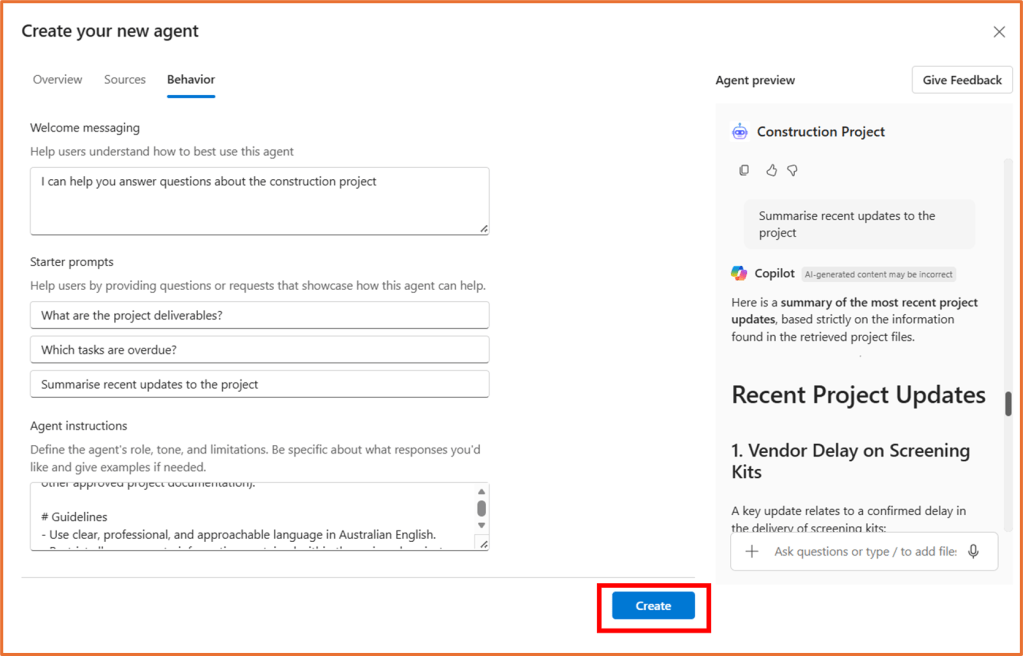
Step 5: Create and share
Click Create.
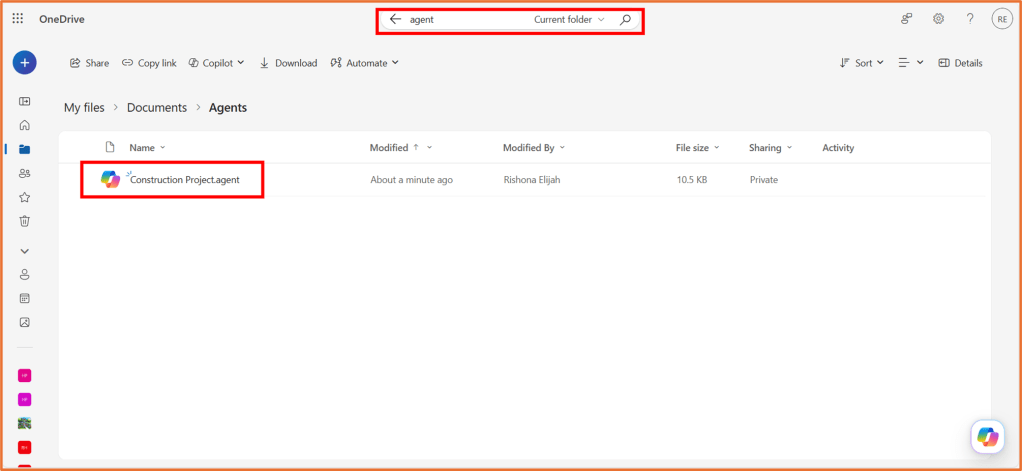
You can find the agent in OneDrive. Search OneDrive for “Agent” to locate the folder the agent is saved in.
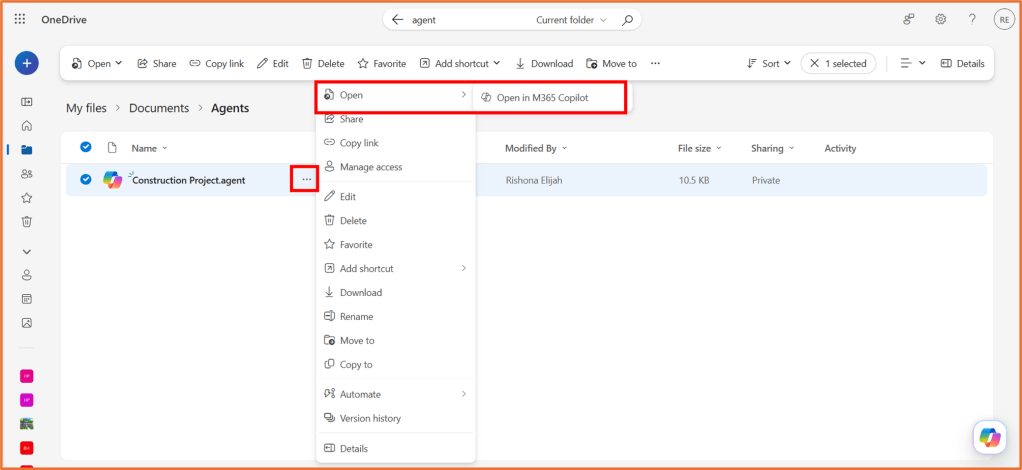
To talk to the agent, click on … next to the agent and select Open > Open in M365 Copilot.
You will see the agent appear in your list of Agents in M365 Copilot Chat.
For others to use the agent you have built:
- They need an M365 Copilot License
- They need access to the source files your agent uses. To do this, make sure you share each individual file with them, or put it in a shared folder. If using SharePoint, also make sure they have access to the SharePoint site.
From the Agents area in M365 Copilot Chat, click on … > Share next to your agent.

You can then distribute the agent link to other users.
