
With Power Apps visual in Power BI, you can give your users the ability to interact with a canvas app directly from a Power BI report page. In this post, we’ll look at how to add the Power Apps visual to a report, create a new app based on the report data, create app screens with additional information, then see how it works within the report.
Begin with your report in Power BI. You can use either Power BI Service or Desktop. Click on the Power Apps visual, then position it on your report page.

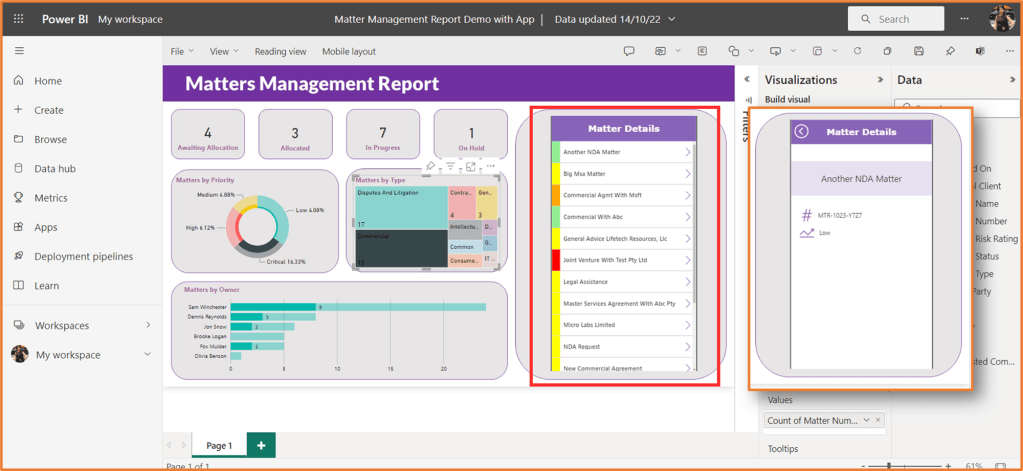
The purpose of the report in this example is to display information regarding contracts/matters, where interactive filters allow you to drill down to view information based on the contract/matter owner, type, priority and other information. The embedded app should provide a list of the matters by their name. When you click into a matter on the app, further details about it should be seen.
You’ll first need to select the fields to use in the app. With the Power App visual selected, tick the checkbox next to the fields you wish to bring through to the app. Make sure to also select your correct environment from within the visual. Then, click Create new.

This will launch Power Apps in a new tab. You should see that one screen already exists, using one of your selected fields.
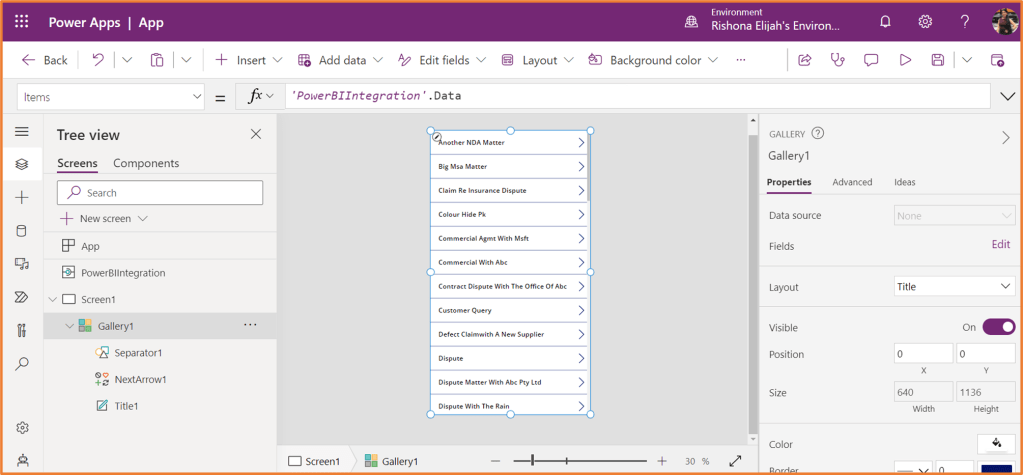
If you wish to change the field visible, click on Title1 from the gallery, and replace the field used. You should see your other chosen fields appear as suggestions when typing in the formula.

If you wish, you can customise the screen design.
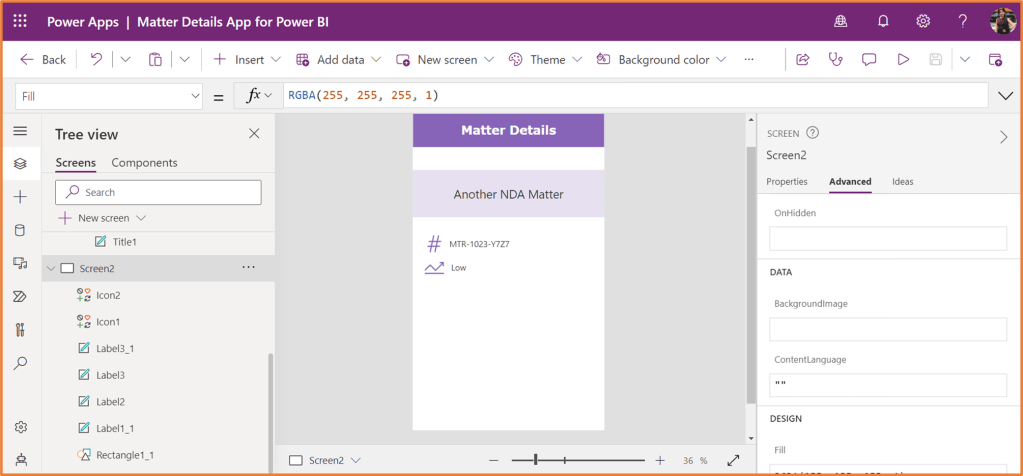
In the example below, I’ve added a rectangle in the gallery which displays a colour, representing the Matter Risk Rating value. The formula is below. You’ll have to replace the highlighted parts to match your data source and values.
Switch(Text(ThisItem.'Matter Risk Rating'),"Low",LightGreen,"Medium",Yellow,"High",Orange,"Critical",Red)Next, you can create the screen with additional detail. Add a new screen to the app, and insert Text Labels to display the relevant information. For example, to display the Matter Name in a text label, I have used the following formula on the Text property.
Gallery1.Selected.'Matter Name'
You should also add in a button for users to go back to the first screen. For your back arrow or button, set the OnSelect property to:
Navigate(Screen1)
Back on the first screen, select NextArrow1. You’ll need to add in a formula to navigate to the next page. The OnSelect property for the arrow should look like the following (replace Screen2 with the name used for your second screen):
Select(Parent);Navigate(Screen2)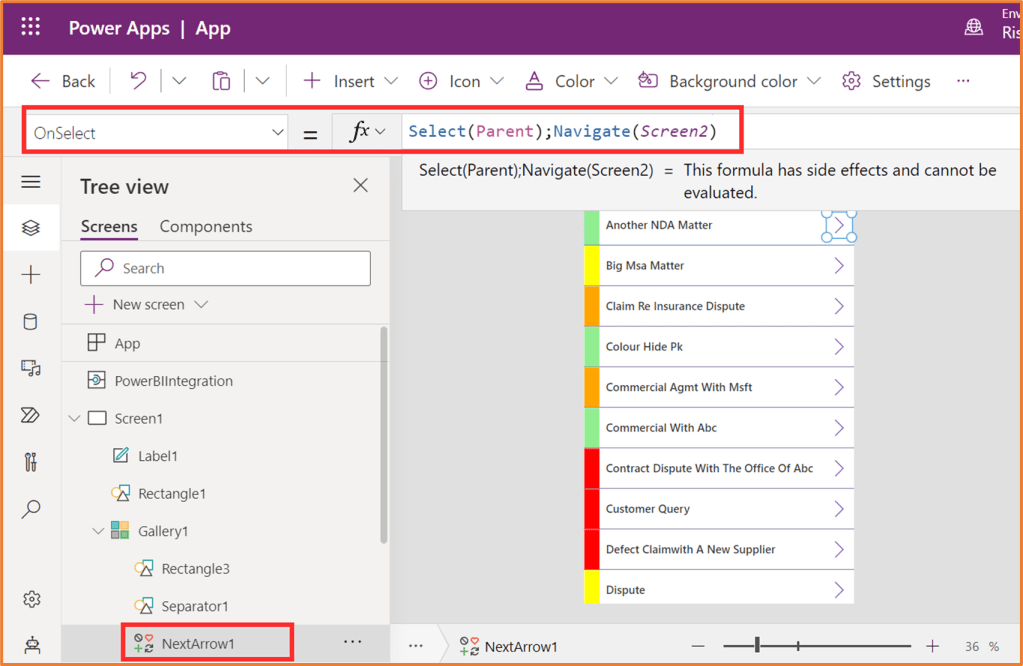
Once your app is ready to use in Power BI, Save the app. To use it yourself you should only need to save it. But make sure to Publish and Share the app for other users to interact with it.
Back on your Power BI report, you should see the app you created. Save your report, then give it a test by clicking on your report filters. This should change the records visible the the app’s list.
