If you are building a Power App you might want to automate some tasks or processes within your app- such as sending an email notification, creating a document or even updating a database record based on an input from the app. How can you do that without leaving your app and switching to another tool? The answer is Power Automate within the App Studio. You can build and manage your flows right from your canvas app, without navigating away.
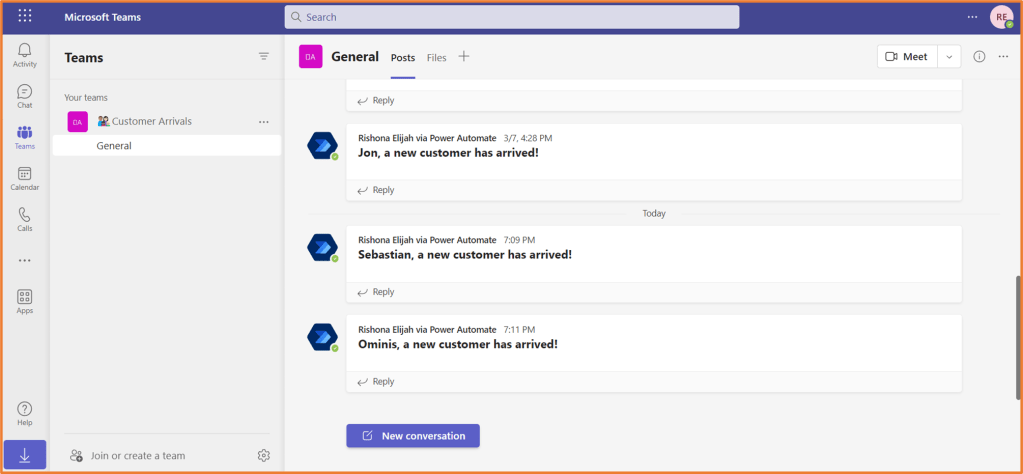
In this example, we’ll have an app that notifies staff via Microsoft Teams when someone presses the button to mark their arrival into a store.

Create the flow by clicking on the Power Automate icon from the left hand side of the screen.

There are templates you can select from if they address your use case, otherwise, click +Create from blank to customise your own.

The flow editor will open up within the same Power Apps window. You can rename the flow from the top left of the screen. Your flow will begin with the Power Apps trigger.

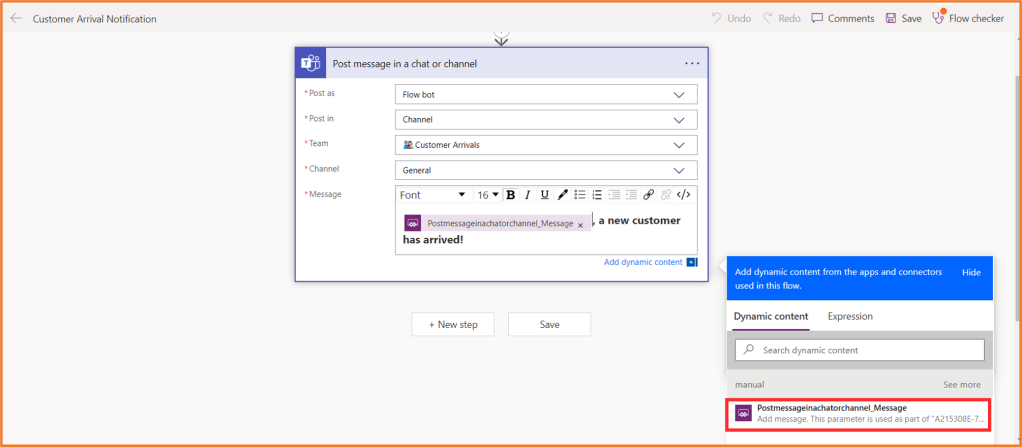
Build out your flow with the actions you want. This example has the Teams Post message in a chat or channel action underneath the trigger.
Likely, you also want to reuse user input gathered via the app within the flow. From the dynamic content pop-out, you will see content coming from the manual Power Apps trigger (it will be purple as shown below). The dynamic content may initially appear as Ask in Power Apps. Select this where you would like to place it in the flow. Back on your app is where you link the dynamic content with the right area of the app.
Save and close your flow.
Select the component you’d like to associate the flow with, such as a button or icon someone would press. Here, the Submit button (Button1) is selected. The OnSelect property for this button is where a formula will be used to run the flow. For the OnSelect property, start typing the flow name into the formula bar.
The formula in this example is:
CustomerArrivalNotification.Run(TextInput2.Text)

CustomerArrivalNotification= Replace this with your flow name.
.Run= type this after the flow name to get the flow to run.
(TextInput2.Text) = The component and it’s property I want the dynamic content for the flow to come from. Replace with your component names. If your flow uses more dynamic content from the app, list multiple by separating them with a comma. List them in the order that the flow uses the dynamic content. E.g. CustomerArrivalNotification.Run(TextInput1.Text, TextInput2.Text)
When typing in the formula, you will be shown the order you should list out the components (there is only 1 in this case as dynamic content from the Power Apps trigger was only used once).

If you didn’t use dynamic content in the flow, you could just leave the formula as:
CustomerArrivalNotification.Run()
To finish it off, I’ve added a second part to the OnSelect formula, which simply clears the text in TextInput2 if someone clicks on the Submit button. If you are doing something similar, make sure the formula for running the flow occurs first, otherwise the value will be blank.

Upon a customer entering their name and clicking Submit, the flow will run and post the message in a Teams channel to notify staff.