Triggering a flow from an agent’s topic is a reliable approach where you control exactly when the automation runs. The trade-off is that the run is hard wired to your conversation design. The alternative is to create an agent flow on its own and add it to your agent as a tool. This way, the agent can decide when to run it based on the user’s request, rather than you forcing it through a topic.
See here for more info on the topic-based approach: Run automations from an agent topic in Copilot Studio – Rishona Elijah
When you would choose the tool based approach?
A tool-based agent flow is ideal when you want:
- Fewer topics and less branching conversation logic
- A more natural, flexible chat experience where users can ask in different ways
- The agent to decide whether the automation is needed, based on context
- One flow that can be reused flexibly across multiple agents
What changes when you stop using topics?
With a topic, you are explicitly telling the agent: when the user says X, run flow Y. With a tool, you are giving the agent a capability and letting the orchestrator decide when to use it.
Step 1: Create the agent flow
Let’s assume that you have already built your agent flow in Copilot Studio. I’ll walkthrough by using this example: a flow that sends an approval request to the user’s manager. You can see how this flow has been created here: Copilot Studio: Build an agent flow that sends an approval request to the user’s manager – Rishona Elijah
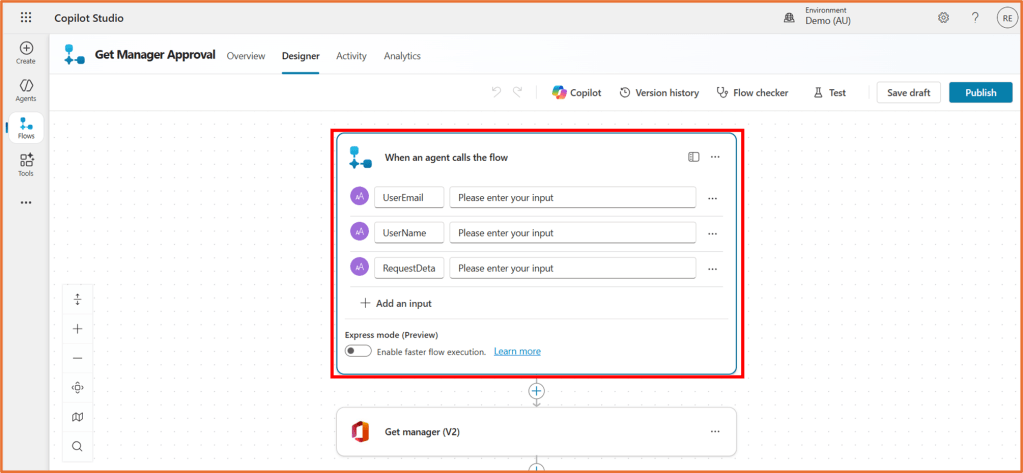
This flow requires three inputs, which are are specified in the trigger, When an agent calls a flow. The three inputs are UserEmail, UserName, RequestDetails. Note that when we configure the tool in the next few steps, we will tell the agent how and where it should retrieve that information.
Step 2: Add the tool
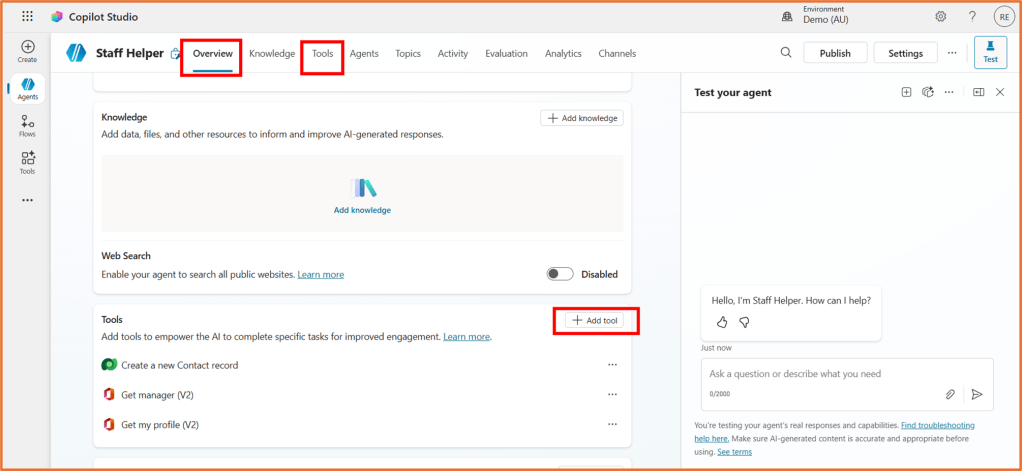
Open your agent in Copilot Studio and select +Add tool on the Overview or Tools area.
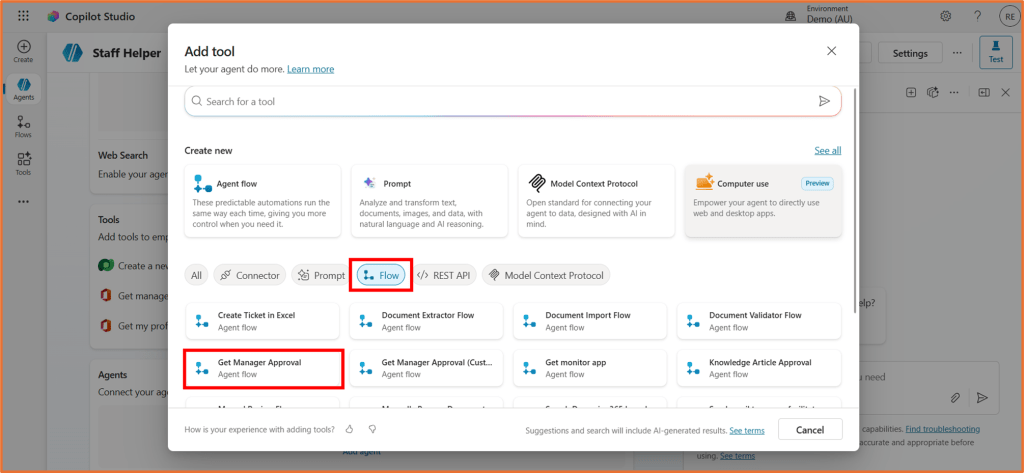
Select your flow from the Flow category, then Add and configure.
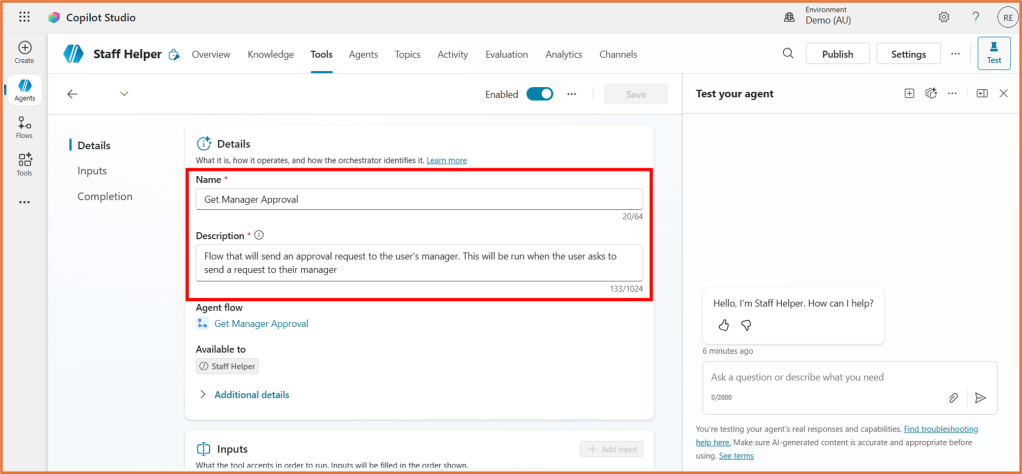
Step 3: Configure tool- Details
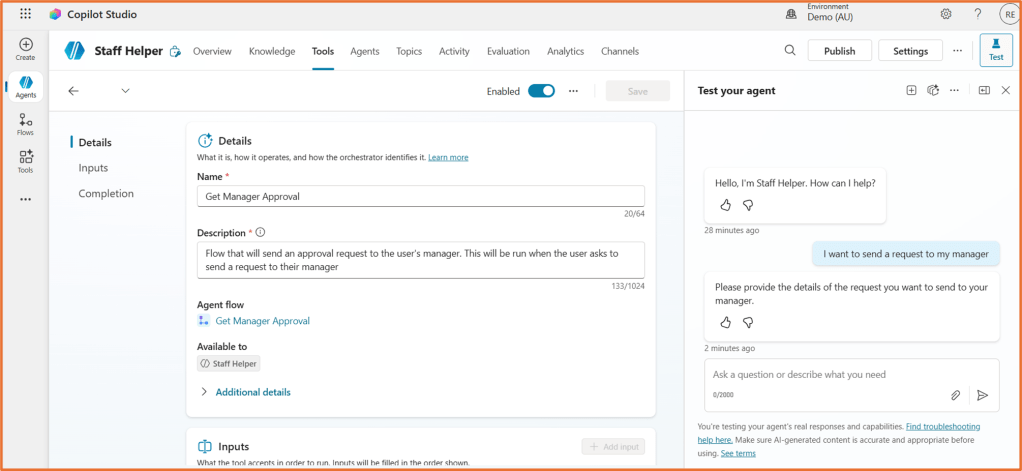
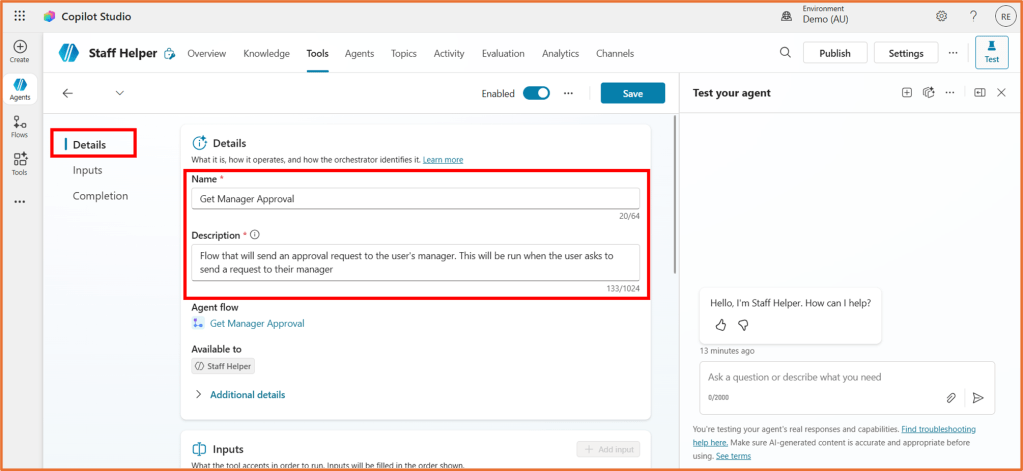
In the Details area of the tool, you can update the Name and Description.
Updating the Name and Description will help the agent to determine when to use the tool. For example your description may be, “Flow that will send an approval request to the user’s manager. This will be run when the user asks to send a request to their manager”.
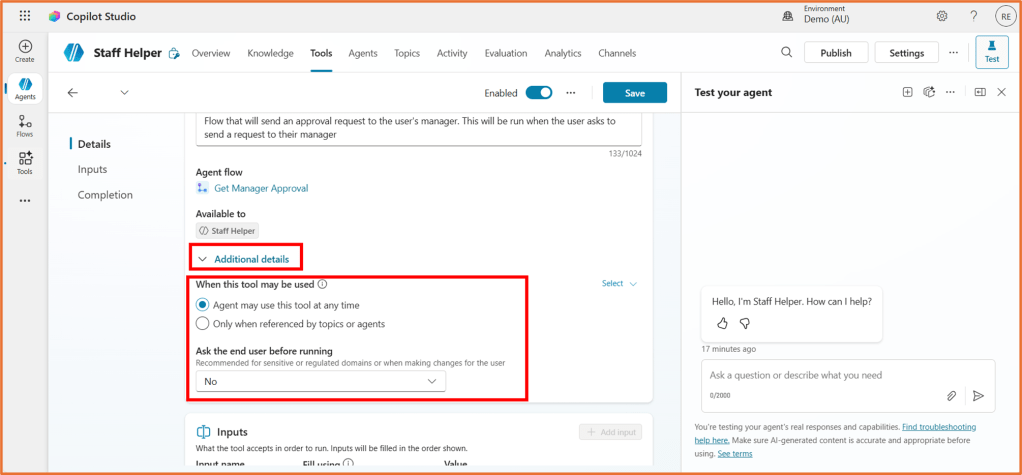
Under Additional Details, select Agent may use this tool at any time.
Ask the end user before running will first get the user to confirm via the agent if they wish to proceed with running the automation. This is recommended for flows that you don’t want triggered by accident. If you select Yes here, enter a message the user will see before proceeding.
Step 4: Configure tool- Inputs
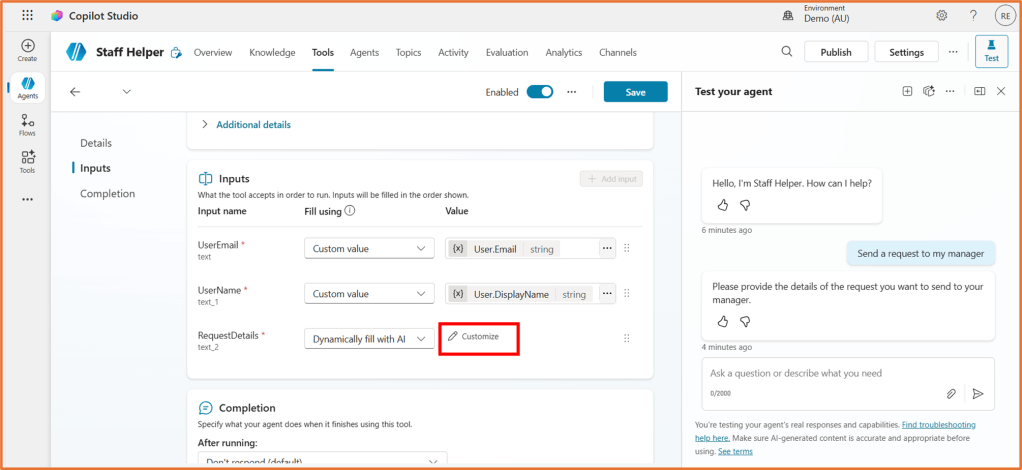
Listed in the Inputs section will be the inputs found in your flow’s When an agent calls a flow trigger. You can either Dynamically fill with AI or enter a custom value for more control. Let’s see how we might fill the the three inputs in this example, UserEmail, UserName, RequestDetails.
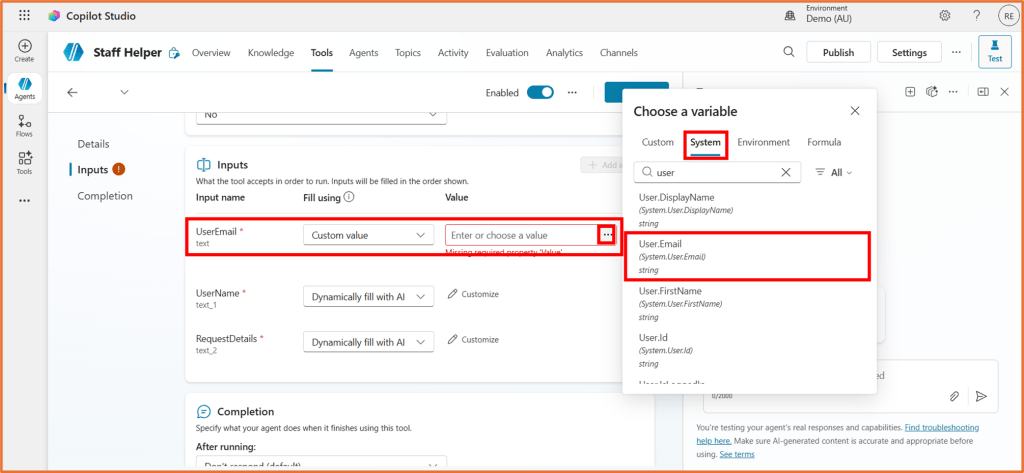
UserEmail
The email address of the user talking to the agent.
Fill using: Custom value
Value: Select the System variable User.Email
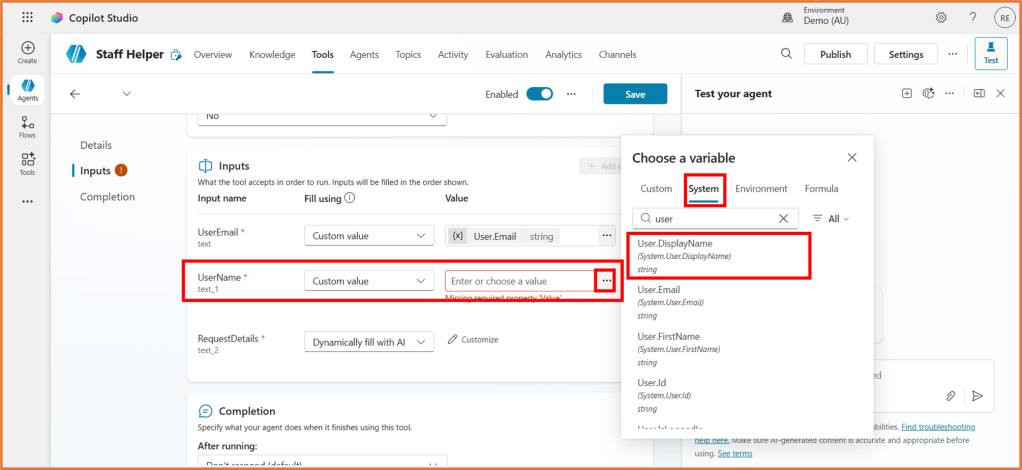
UserName
The display name of the user talking to the agent.
Fill using: Custom value
Value: Select the System variable User.DisplayName
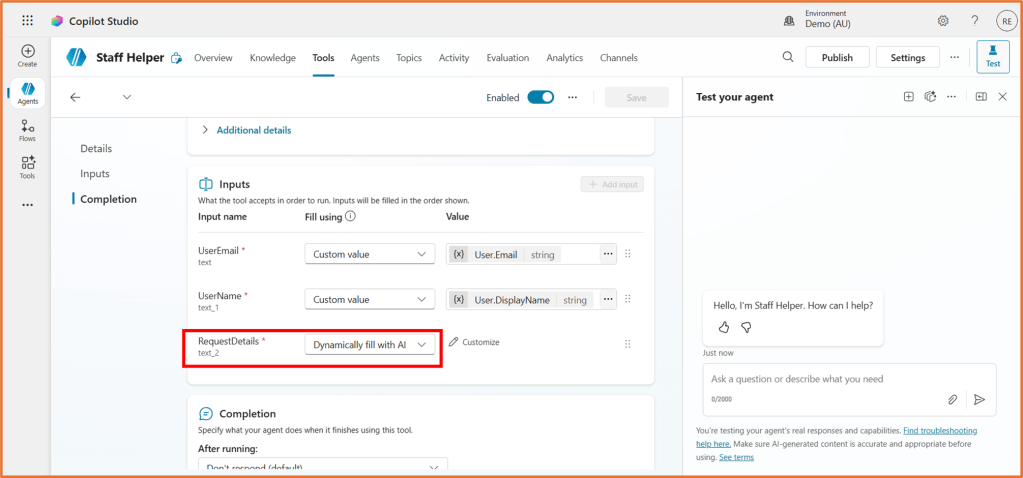
RequestDetails
The request/message the user wishes to send to their manager for approval.
Fill using: Dynamically fill with AI
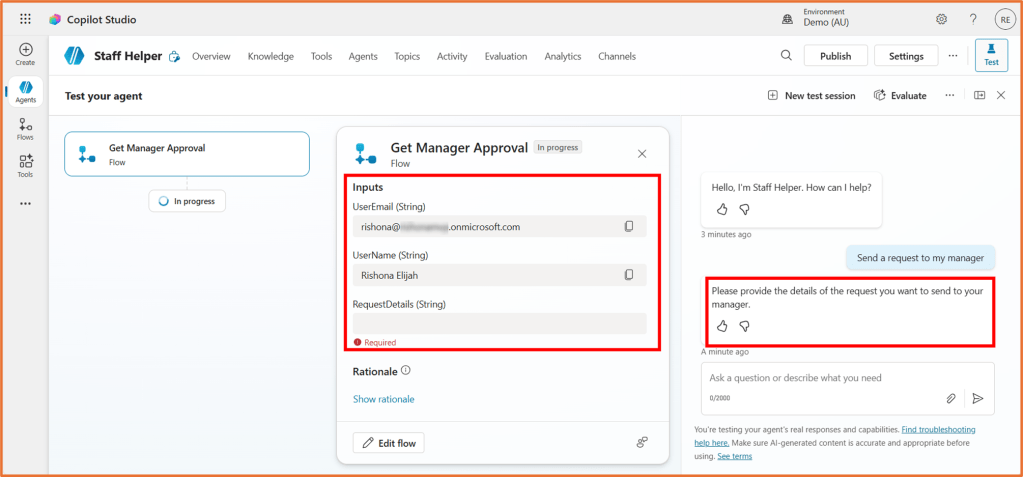
Let’s save the tool and give it a test to see how these inputs are collected. Click Save on the tool. In the Test pane, I will enter the phrase “Send a request to my manager”.
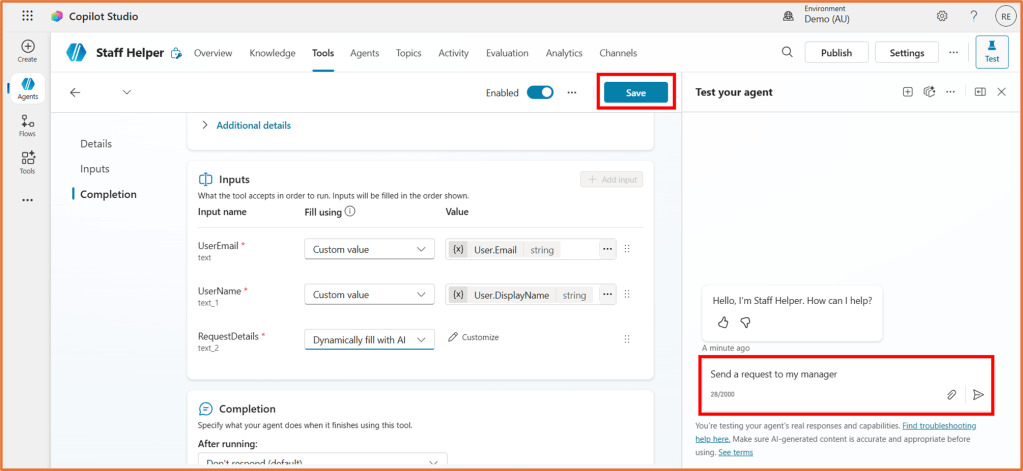
Because I pre-set a custom value for UserEmail and UserName, the agent does not need to request for this information. It did, however, ask me to provide details about the request as this is set to fill dynamically with AI.
When using Dynamically fill with AI, you can optionally add more control over how the input value is captured or how the agent asks the question to the user. Click Customize for the Value to configure these details.
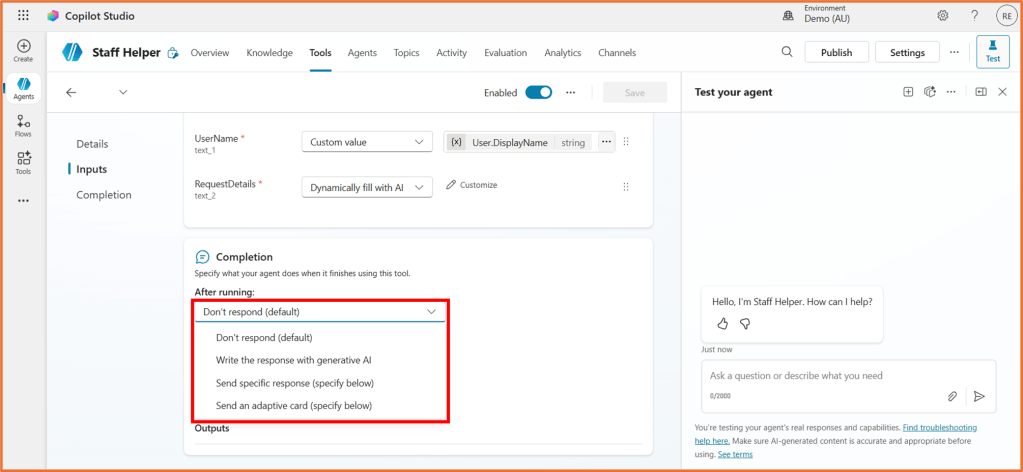
Step 5: Configure tool- Completion
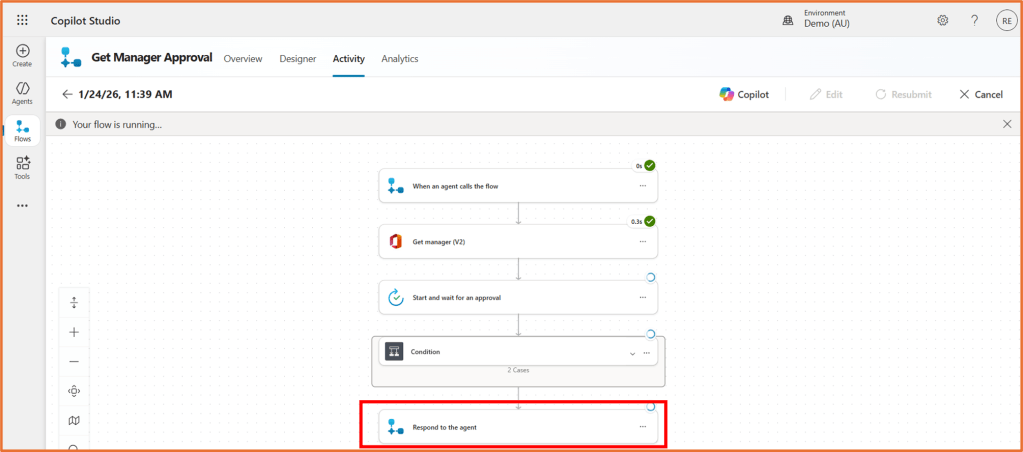
In the Completion stage, you can optionally specify a message the agent will display once the flow reaches the step Respond to the agent.
Note regarding Respond to the agent step
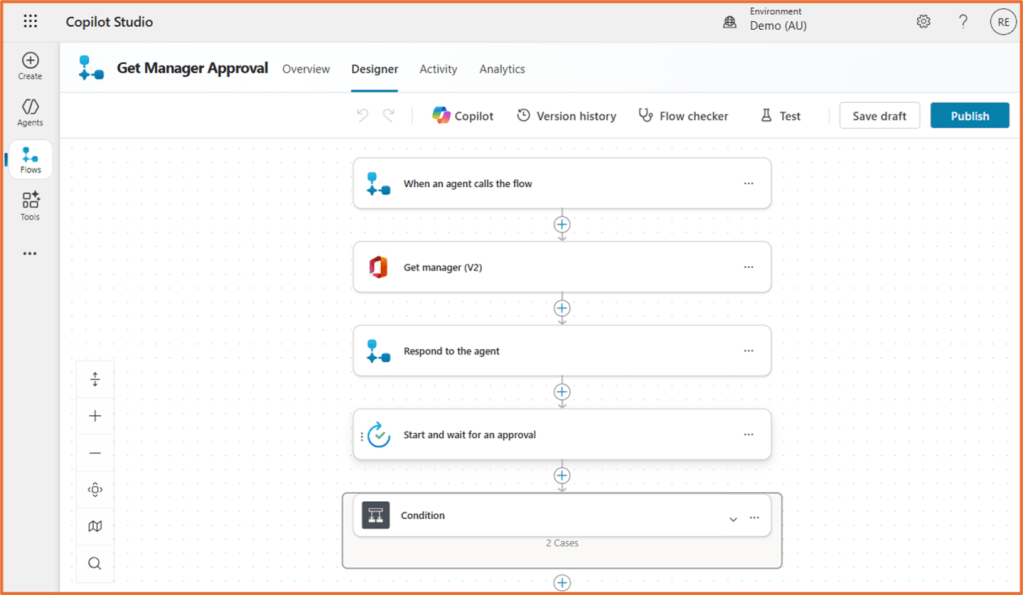
It is recommended to move the Respond to the agent step to a position as early as possible in the flow, considering the outputs you wish to send back. In the screenshot below, my Respond to the agent step needs the output of the manager’s name, so I have placed it after the Get Manager (V2) action, then the longer steps of waiting for the approval occur afterwards.
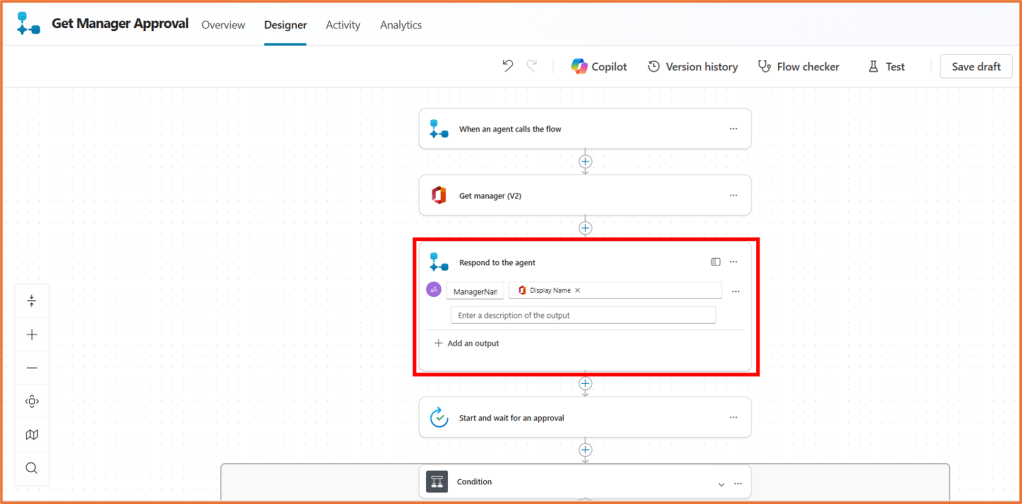
If you are following along with the the flow shown in Copilot Studio: Build an agent flow that sends an approval request to the user’s manager – Rishona Elijah, it does not contain an output. I have added the output to demonstrate it for this post.
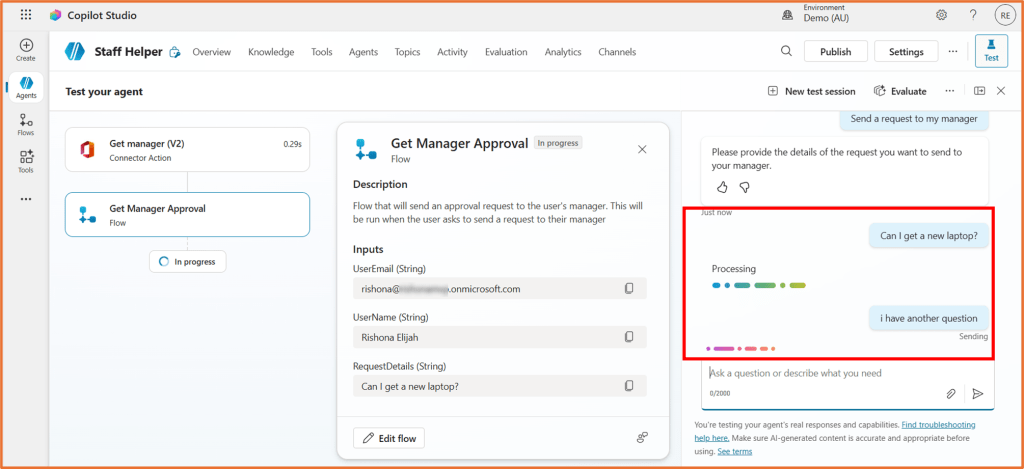
Why? When the flow is running before the Respond to the agent step, the user cannot talk to the agent. If Respond to the agent was at the end of a long flow, the user would be kept waiting in the conversation and it can timeout. See the screenshots below.
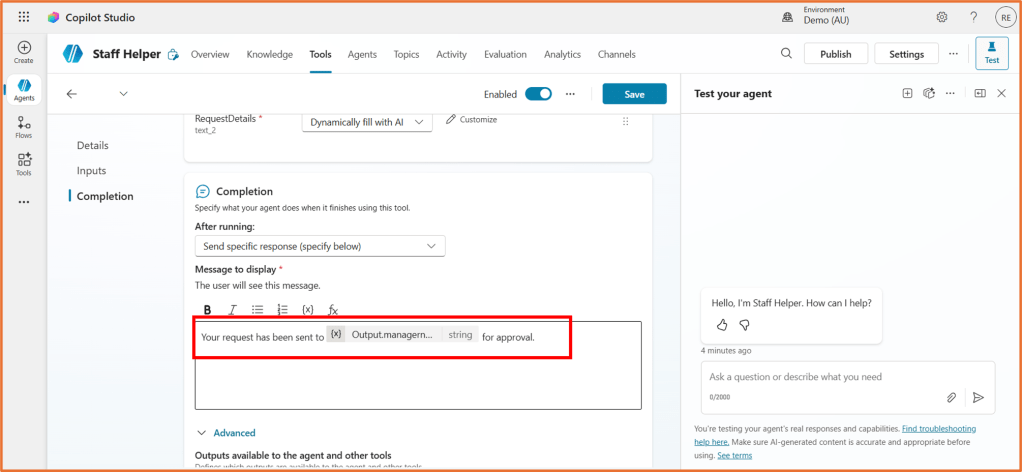
In the Completion configuration of the tool, let’s set After running to Send a specific response (specify below).
Enter the message as you would like it to appear to the user. If the Respond to the agent step of your flow includes any outputs, you can dynamically insert the values throughout your completion message.
To do so, click on the {x} button and select the output variable from the Custom section.

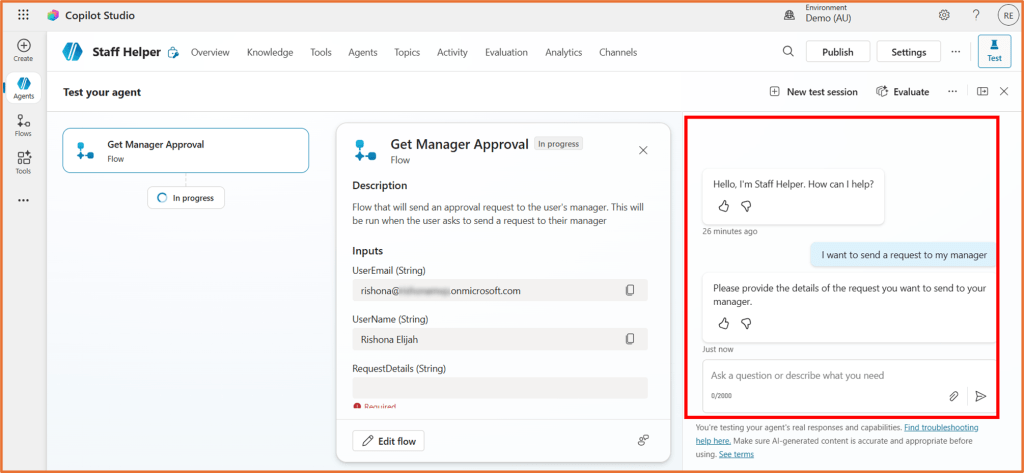
Step 6: Test your flow
Your flow is now configured to run! Test it out by entering a message (as a user may) in the test pane to initiate the flow.
If you find that the flow does not trigger as intended, try update the Description and Name to help the agent determine when the flow should run.
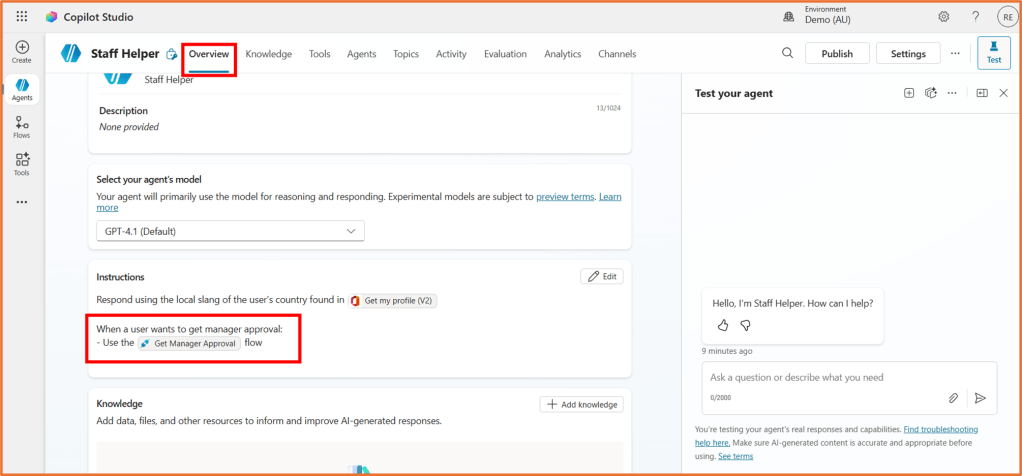
You can also add it to the Instructions of your agent. This is optional, but can help with telling the agent when the flow should be used.