If you’ve attended training such as App in a Day, and you don’t want to lose what you’ve built, here’s how you can save your work.
You can export your solution even if you haven’t finished building it yet. For example, if your trial account is about to expire and you want to keep working on your app, you could import it into your developer plan environment for ongoing access.
1. Export your solution
1. Log into Power Apps using the credentials you used to build the solution. Make sure you are in the right environment.
2. Click on Solutions from the left navigation. Click on the checkbox next to the solution you want to export. If this is for App in a Day, you will have your Contoso Coffee solution. Click Export.

3. Publish all changes then click Next.

4. Select Unmanaged then Export.
Unmanaged is selected as this will allow you to continue to make changes to your app/solution after it is imported. However, select Managed if you don’t intend to make any changes (such as if moving it to a production environment).

5. You should see a message that it is currently exporting. Leave it for a few minutes until the message turns green. Then click Download.


This will download your solution as a .zip file. Keep this handy, as it will be used for the import next. Do NOT extract/unzip the file, that is not necessary.
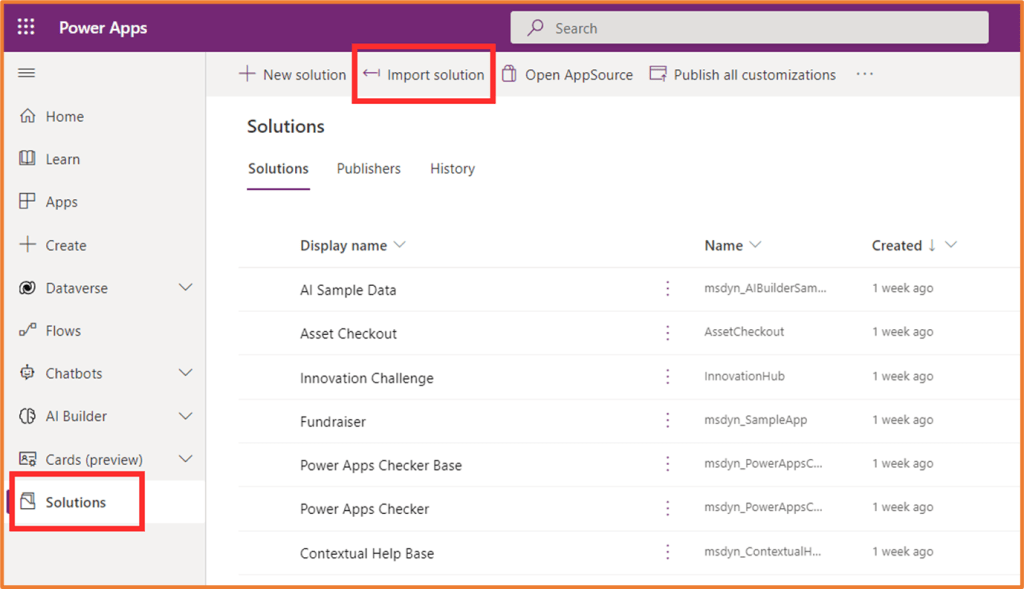
2. Import your solution
1. Log into Power Apps using the credentials you want to import your solution to. Go to the right environment, such as your developer plan.

2. Go to Solutions from the left navigation menu and click Import solution.
3. Click Browse and select the .zip file you downloaded from the Export step. Click Next, and Next again.

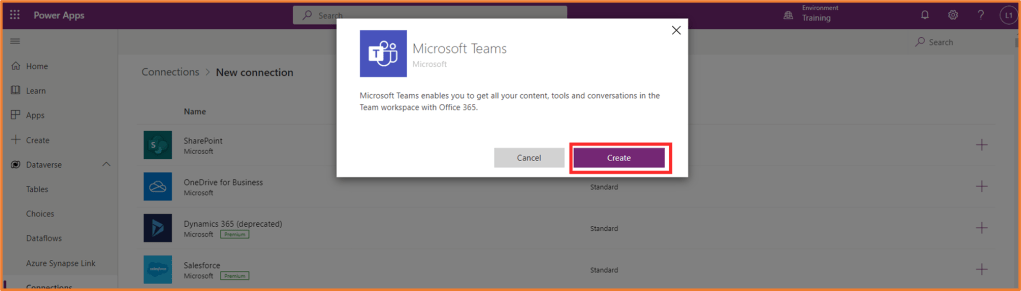
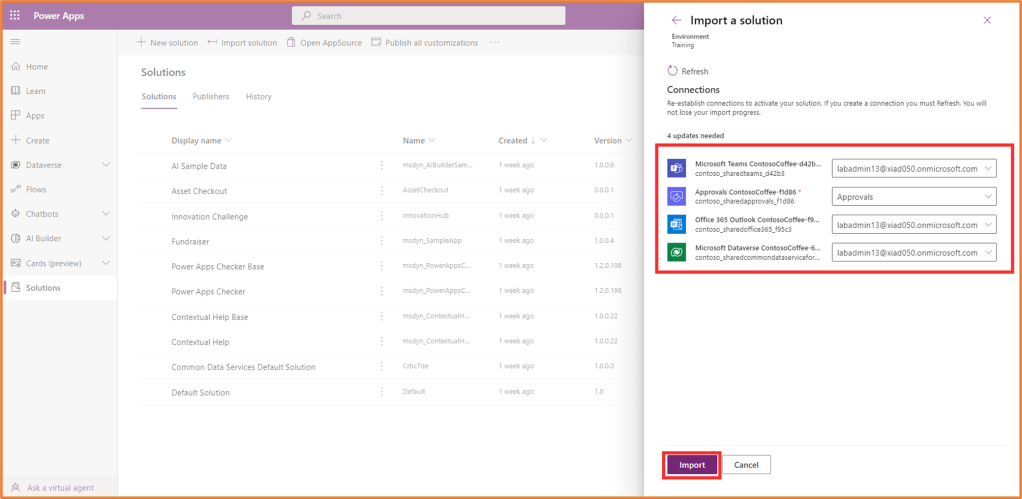
4. You may need to set up the connections. If that’s the case, for each connection listed, click +New connection.

5. This will launch a new tab. Click Create for the connection when prompted. You may be asked to sign in again.
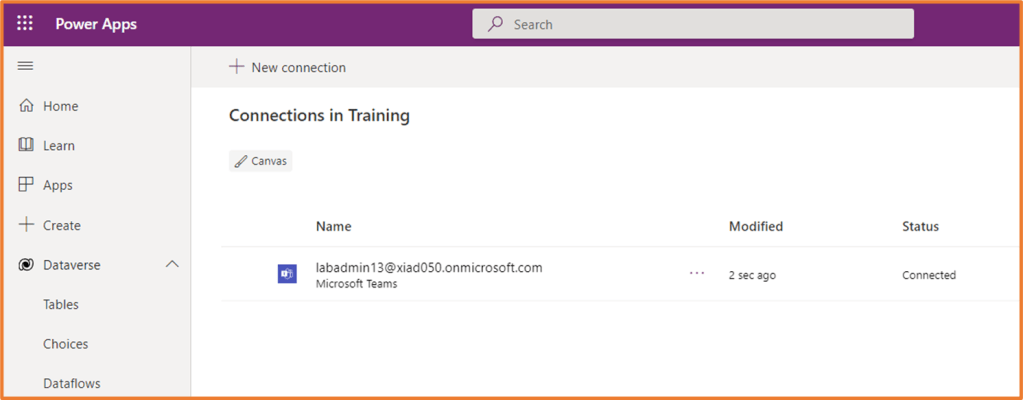
6. Once you can see the connection is added, close the tab and return to the previous one.
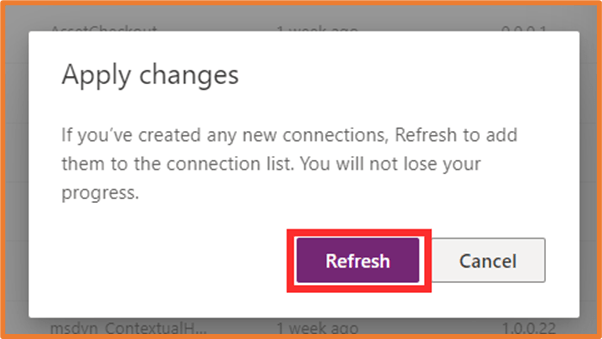
7. Click Refresh, and repeat for the other connections listed. Click Import once done.
8. You will see a message that the solution is importing. This will become green once the solution has finished importing, which may take a few minutes.

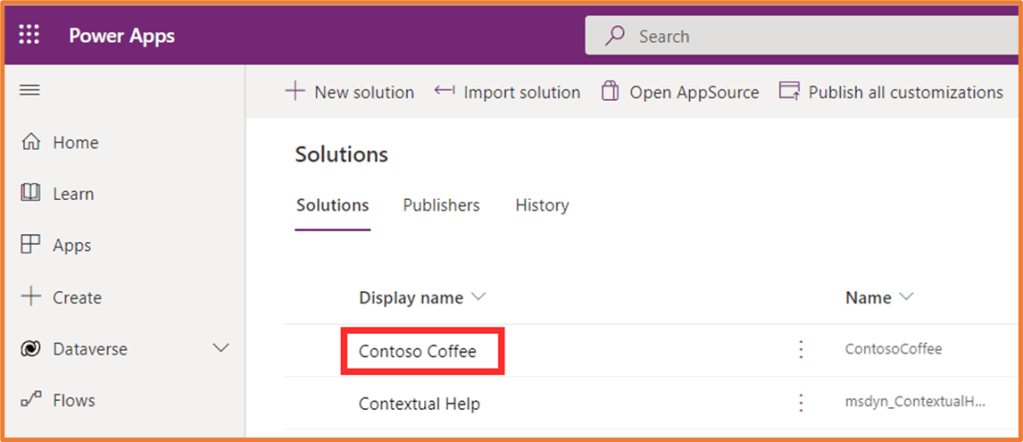
9. Once ready, click on the solution name to open it.
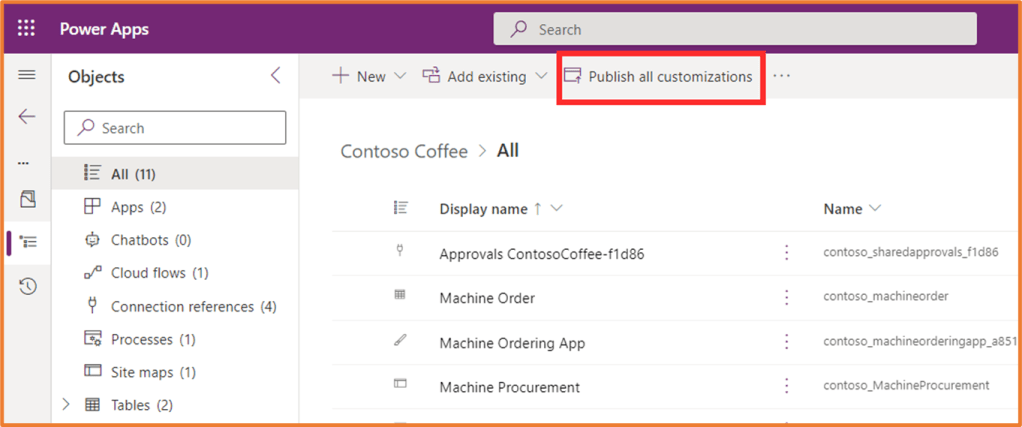
10. Click Publish all customizations.
You have now imported your solution! You can now either use your app or continue your building here.
